INSTALLING THE DRIVE SYSTEM
INSTALLING THE DRIVE SYSTEM
9
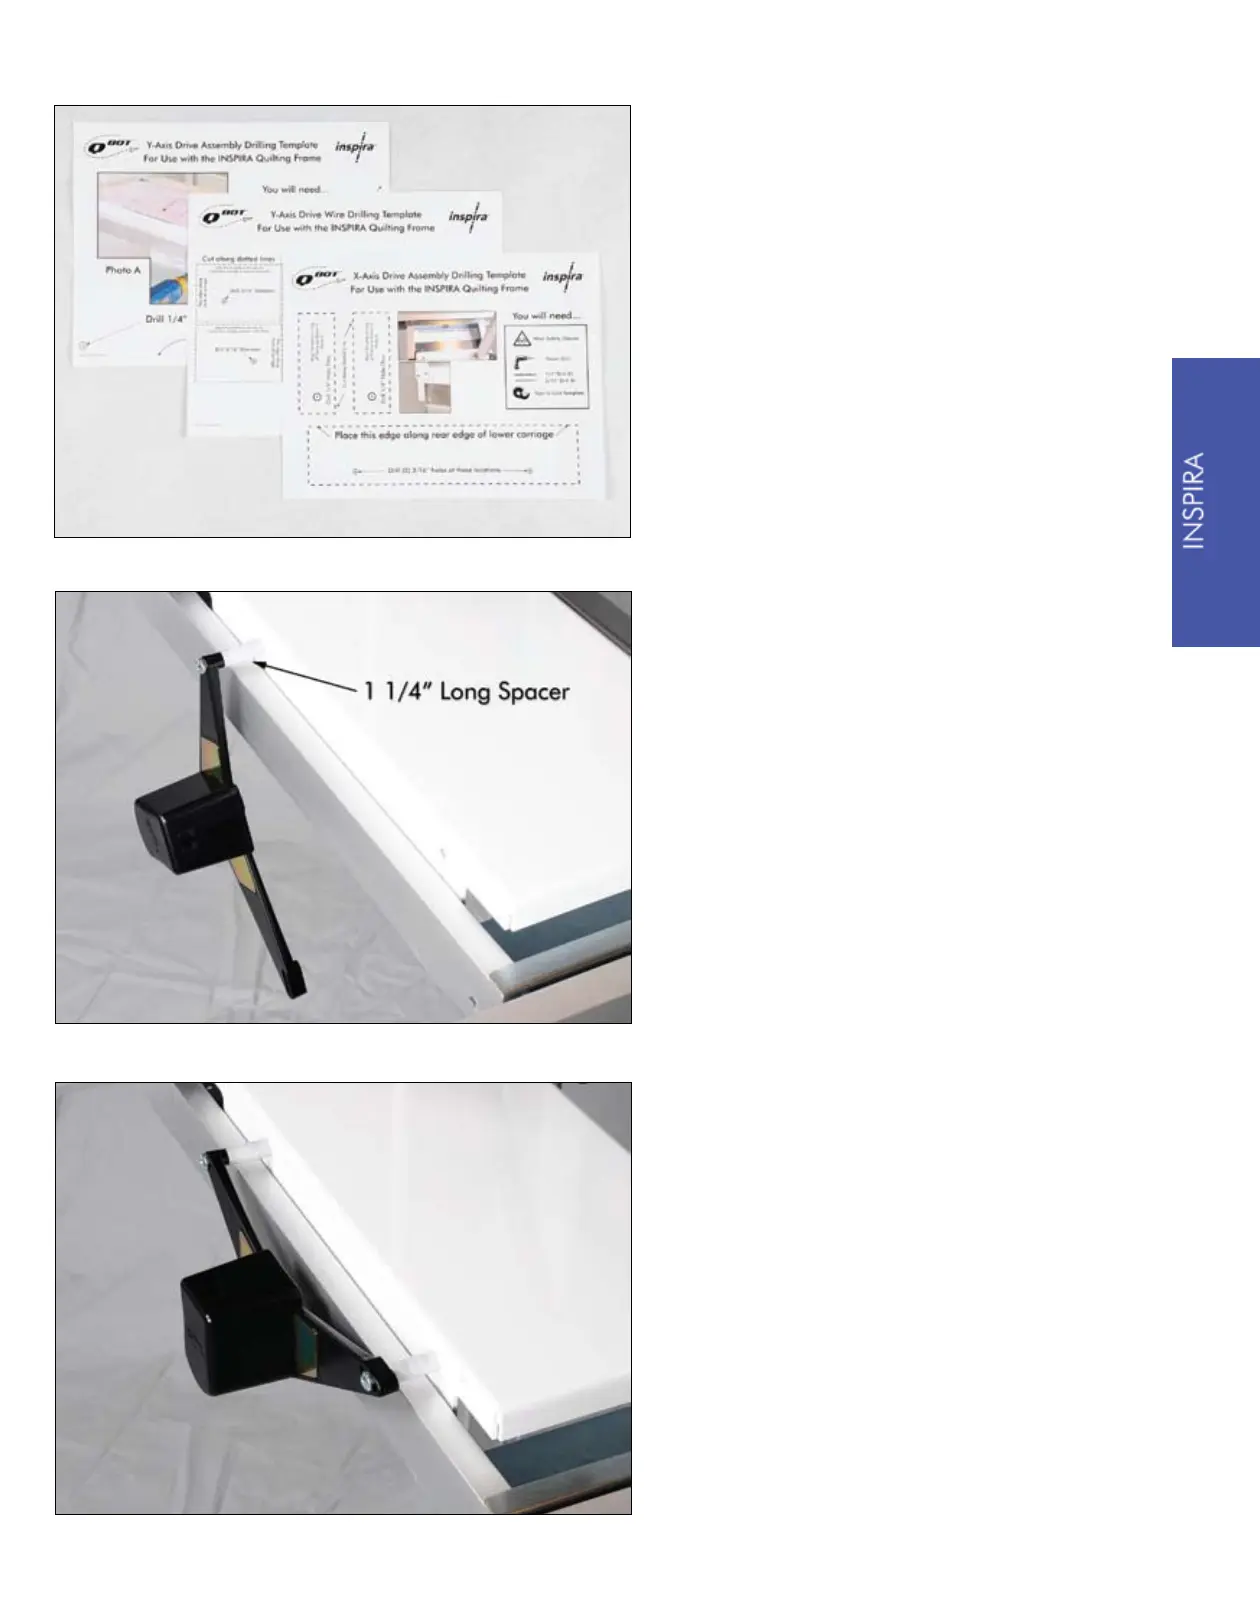
The first step to installing the QBOT
on the Inspira quilting frame is to drill
holes in the upper and lower carriages
and in the outer legs of the quilting
frame. Follow the instructions and use
the templates provided on pages 33
through 37 to drill these attachment
holes.
Once you have all the holes drilled,
you are ready to install the Y-Axis
drive assembly. Take one 2½” screw
from your hardware kit and place it
through the attachment hole in the
drive assembly. Next, slide on one
1¼” spacer. Place the screw through
the rear hole in the upper carriage.
Assemble one of the ¼” nuts to the
screw. Do not fully tighten yet.
Take the other 2½” screw from the
hardware kit and place it in the slot on
the drive assembly. Slide on the other
1¼” spacer. Place the screw through
the other hole in the upper carriage and
assemble a ¼” nut to the screw. Tighten
both screws snugly. Overtightening will
damage the drive assembly.