INSTALLING THE DRIVE SYSTEM
INSTALLING THE DRIVE SYSTEM
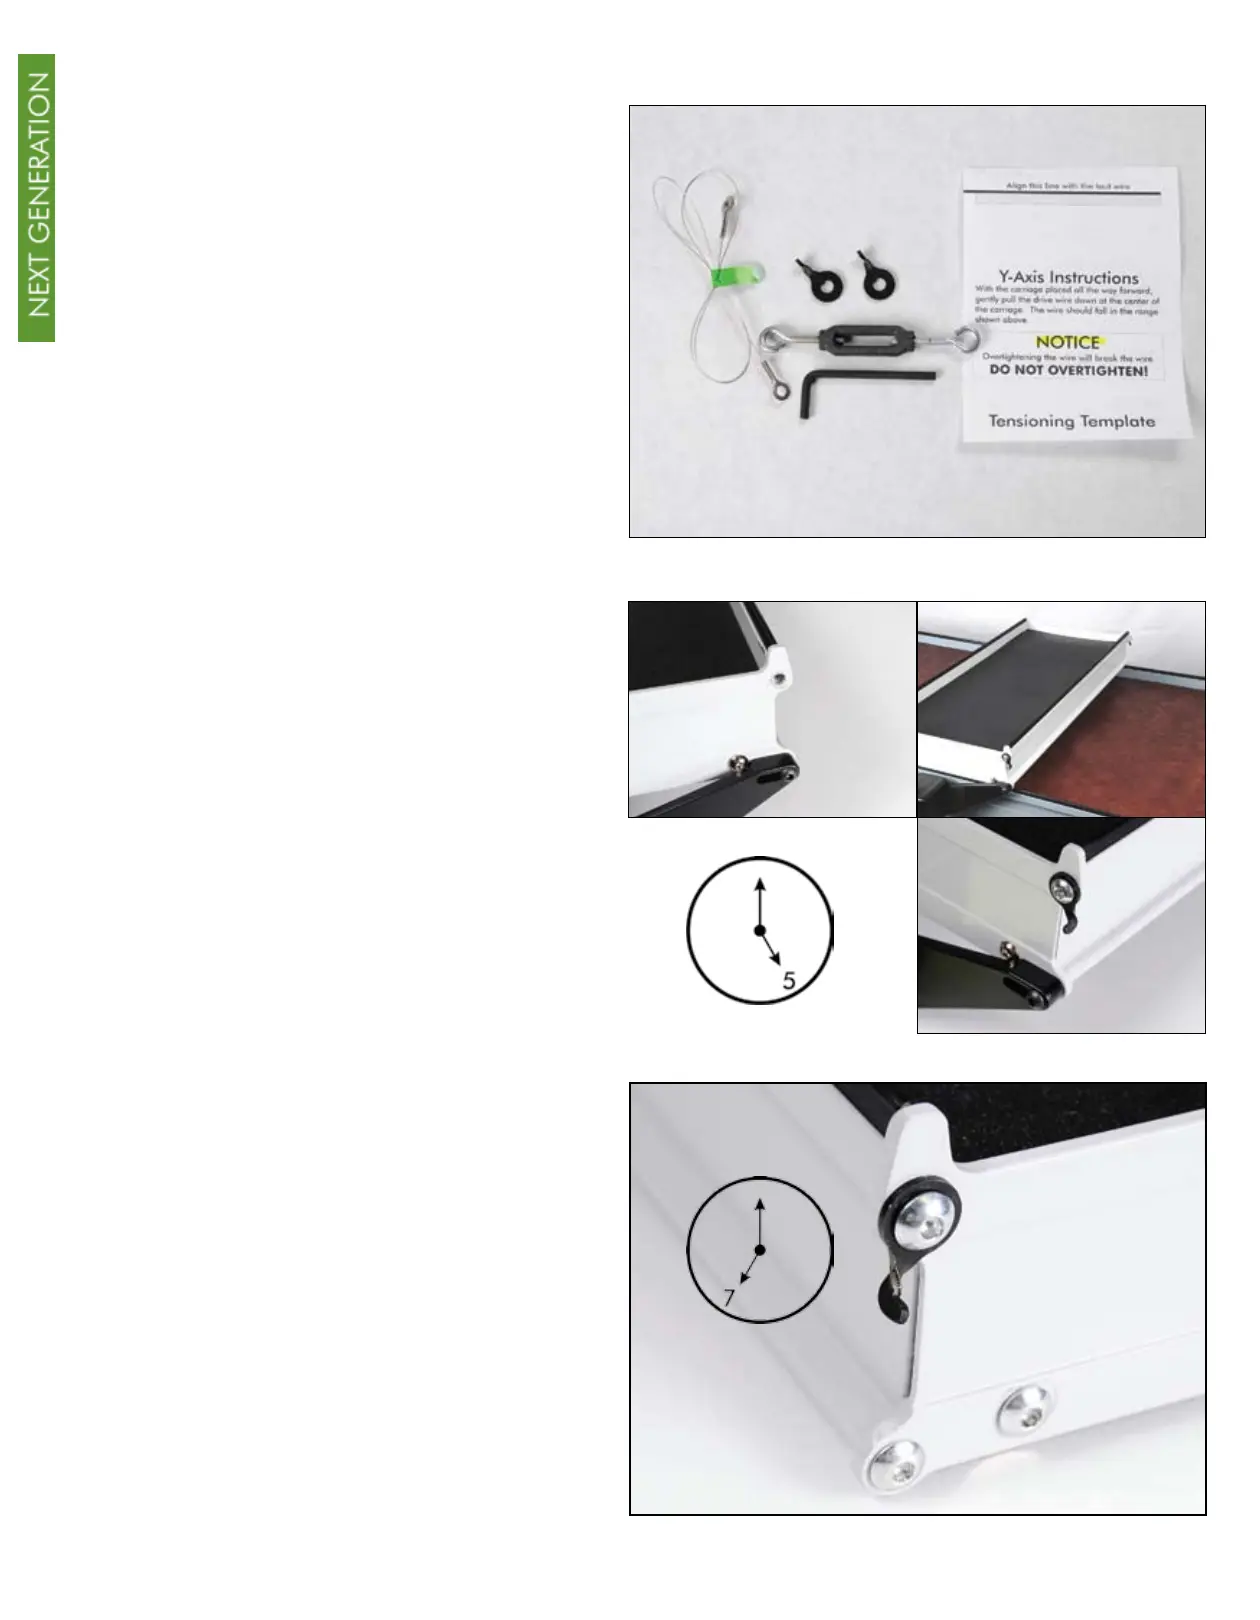
4
Install the 24” upper drive wire to
the lower carriage. You will need the
following within reach when you begin
this installation: 2 Y-axis wire holders, 24”
wire, 4 mm hex key, one tensioner and
tensioning template (found on last page
of this manual.)
Remove the upper right-hand screw
that is above the drive assembly. Keep
this screw handy. Attach one Y-axis wire
holder and replace the screw you just
removed. Tighten securely, making sure
that the hook on this wire holder is in the
5 o’clock position.
Remove the second screw that is at the
top of the opposite end of the lower
carriage on the same side. Attach the
second Y-axis wire holder and replace the
screw. Tighten securely ensuring that the
hook on this wire holder is in the 7 o’clock
position.
BACK
FRONT
FRONT
BACK