INSTALLING THE DRIVE SYSTEM
INSTALLING THE DRIVE SYSTEM
5
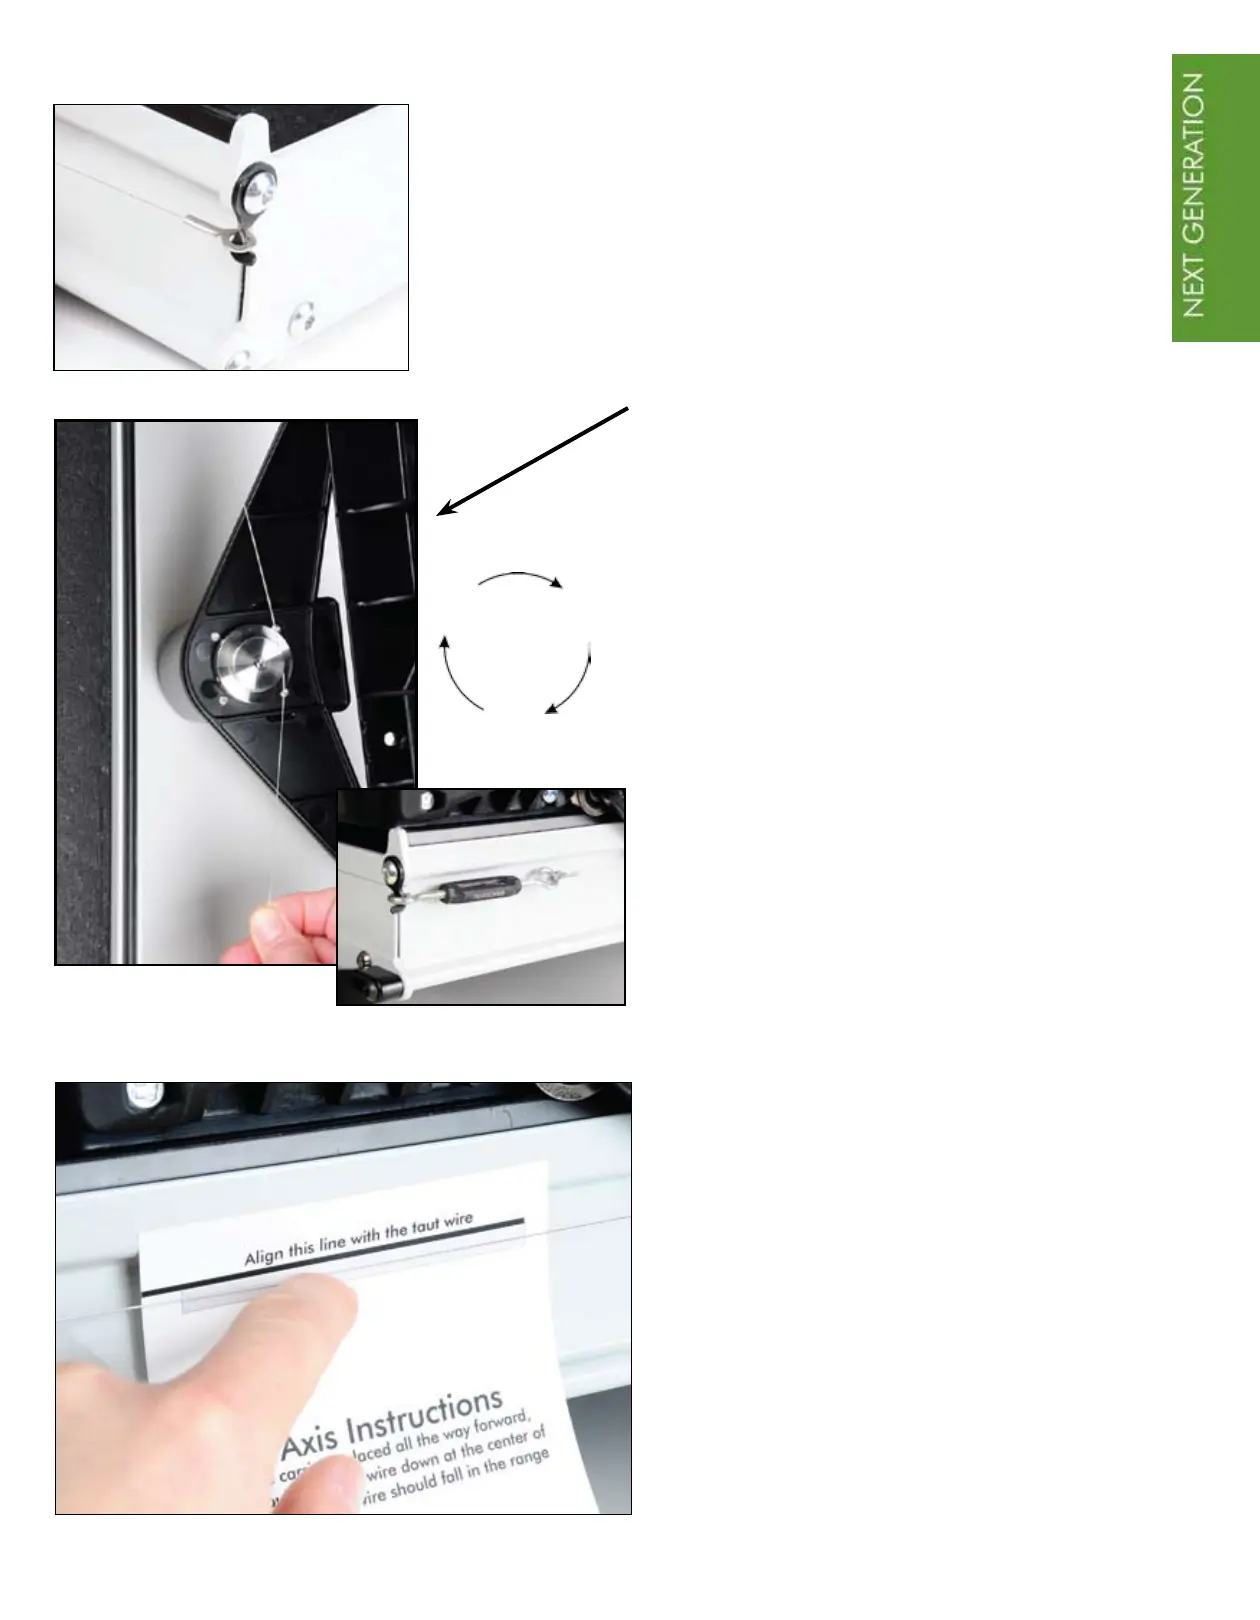
Take one end of the 24” wire and place
the eyelet around the hook of the Y-axis
wire holder on the front of the lower
carriage.
Rest the upper carriage onto the drive
assembly near the lower carriage. Place
the drive wire over the top of the drive
pulley wrapping twice around the drive
wheel in a clockwise direction.
Holding the wire taut with your hand,
return the carriage to its upright position
on top of the lower carriage.
Attach the eyelet of the wire to the
tensioner. Attach the other end of the
tensioner to the hook of the Y-axis wire
holder.
Move the upper carriage all the way to
the front of the lower carriage. Tighten
the wire with the center of the tensioner
until it is stretched like a guitar string.
Use the tensioning template as your
guide for tightness. The wire should
move approximately 1/8 to 1/4 inch as
you push on it.
The upper drive wire is now installed!
TIP - Please watch the DVD for
more information about the drive
assembly installation.
2X