You are ready to install the lower assembly.
You will need the following within reach
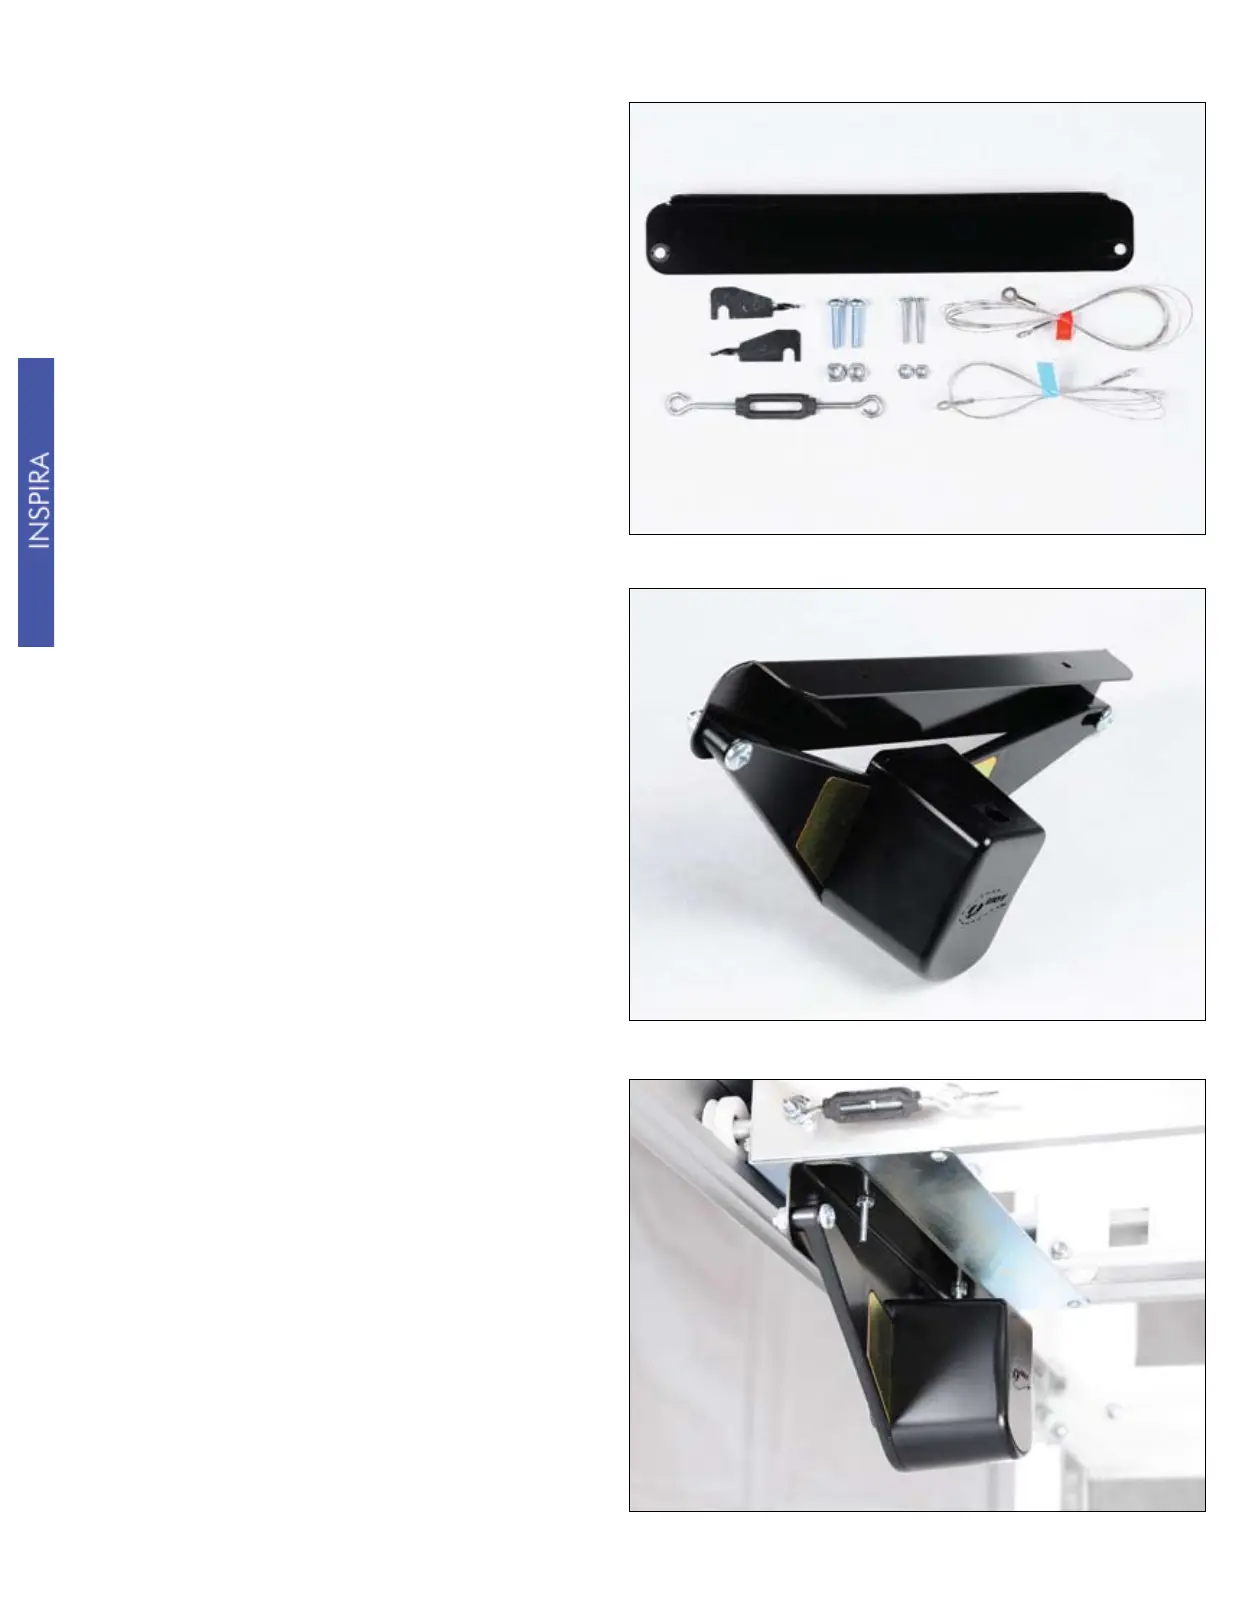
when you begin this installation:
(2) X-Axis wire holders, (1) 60” drive wire
or (1) 120” drive wire depending on your
frame length, (2) ¼” X 1” screws, (2) ¼”
nuts, (2) #8 X 1” screws, (2) #8 nuts, (1)
tensioner, (1) tensioning template, and (1)
X-Axis bracket adapter from the Inspira
bracket kit.
INSTALLING THE DRIVE SYSTEM
INSTALLING THE DRIVE SYSTEM
Install the X-Axis bracket adapter on the
underside of the lower carriage of the
Inspira frame. Use (2) #8 X 1” screws as
shown in the picture to the right. Note
the orientation of the bracket. For proper
carriage movement after assembly, it is
important to have the bracket attached as
shown. Place the screws into the holes in
the lower carriage. Place the bracket with
the drive assembly installed in the previous
step onto the screws. Attach the #8 nuts to
the screws. Tighten.
Using two ¼” X 1” screws and two ¼” nuts,
attach the drive assembly to the X-axis
bracket adapter for the Inspira frame as
shown in the picture to the right. For proper
fit to the frame, the drive assembly must be
attached as shown.
12