INSTALLING THE DRIVE SYSTEM
INSTALLING THE DRIVE SYSTEM
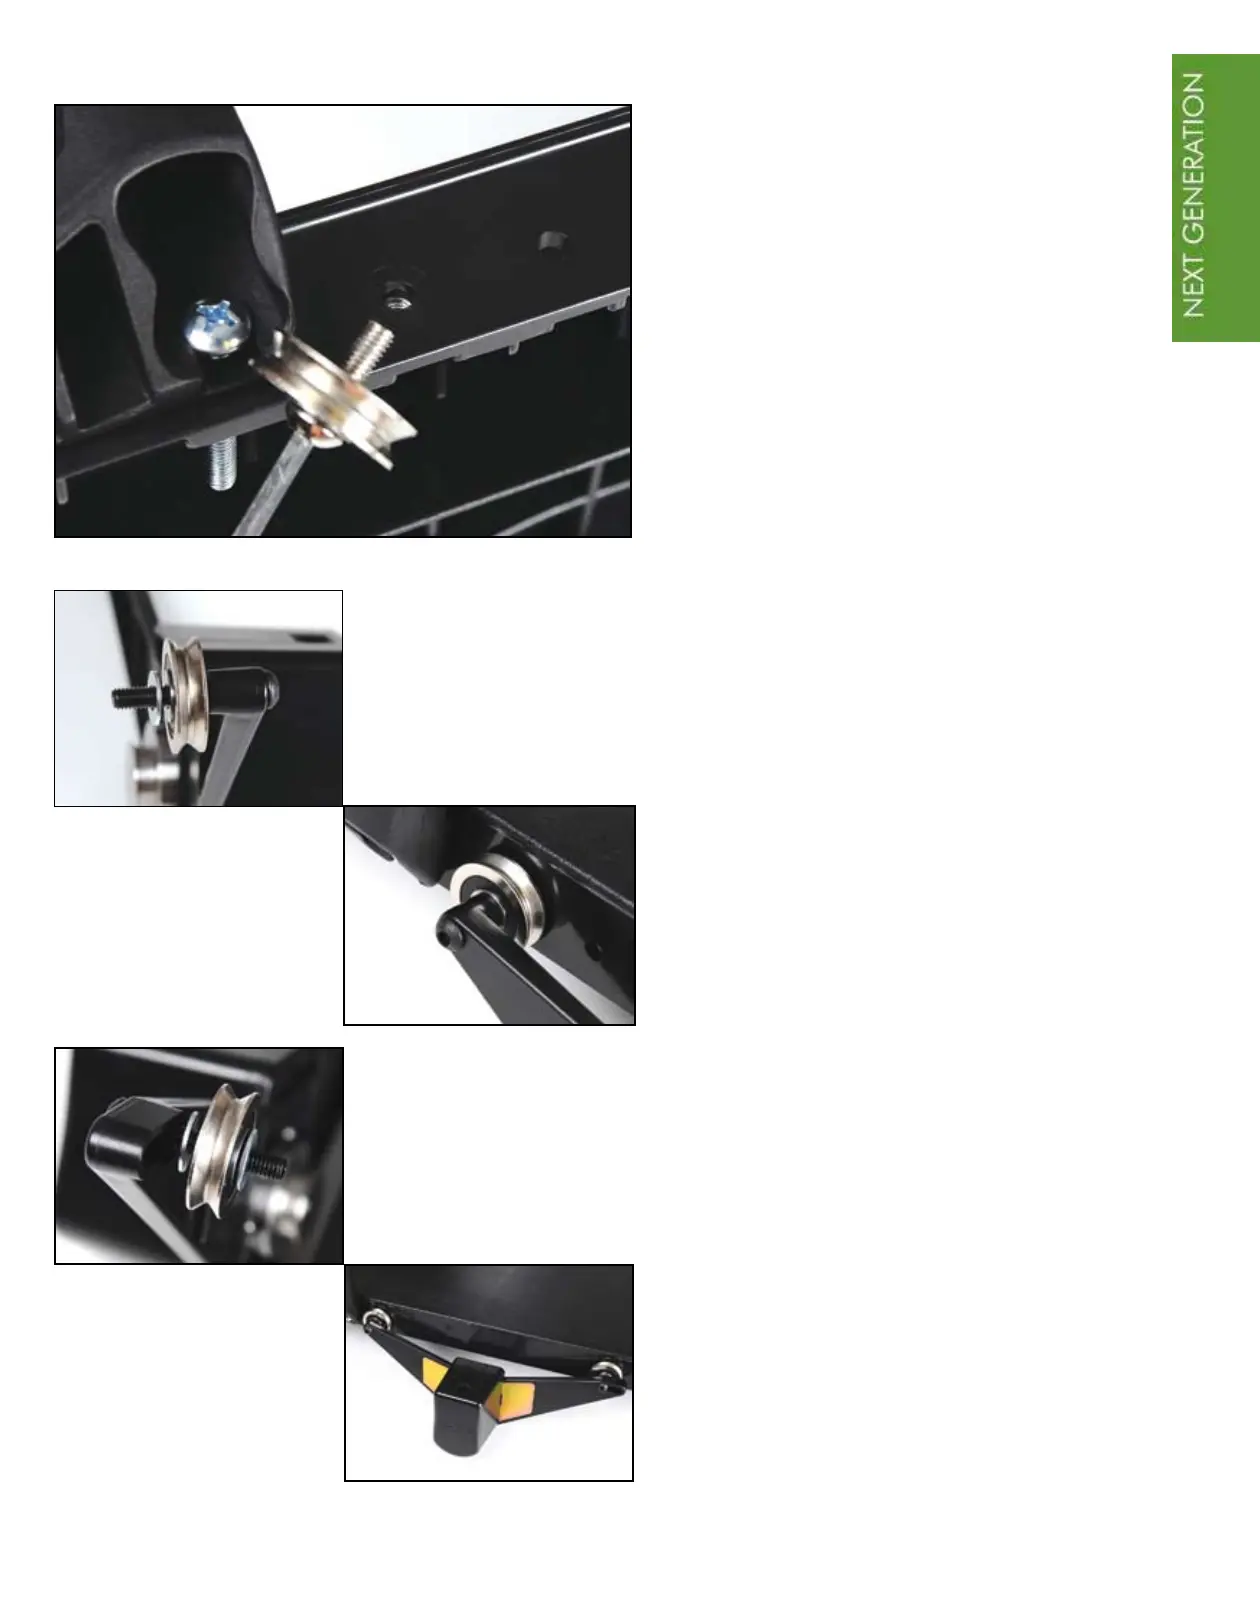
3
Attach the second drive assembly to the
right hand side of the upper carriage as
viewed when you are standing at the
back of the frame. Set the upper carriage
on its side with the handle holder of
the carriage on the left. Remove both
bolts and metal wheels from the right
side. Set aside the wheels to be used
later. The bolts and washers that were
removed will not be reused.
Place one 1½” button head screw
through the hole of the drive assembly,
replace one metal wheel, then slide on
a washer from the QBOT installation
hardware pack. Insert into the rear hole
in the upper carriage and screw gently
into the original nut that is in the upper
carriage. Do not tighten at this point.
Next, place the second 1½” button head
screw into the slot in the assembly. Slide
on a washer from the QBOT installation
hardware pack, metal wheel, and 3
rd
washer. Insert into the upper carriage and
screw gently into the original nut. Securely
tighten both screws after the assembly is
in place on the carriage.