INSTALLING THE DRIVE SYSTEM
INSTALLING THE DRIVE SYSTEM
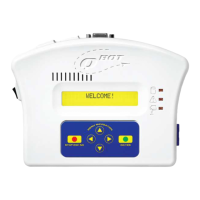
Next, install the X-Axis wire holders to
the rear outer frame legs as shown in
the pictures to the left. Remember, these
holes were drilled into the frame using
the drilling templates from the Inspira
hardware pack. One wire holder is
marked ‘L’ and one is marked ‘R’. If you
are standing at the front of the quilting
frame, the one marked ‘L’ will be on the
rear left-hand leg and the one marked
‘R’ will be on the rear right-hand leg.
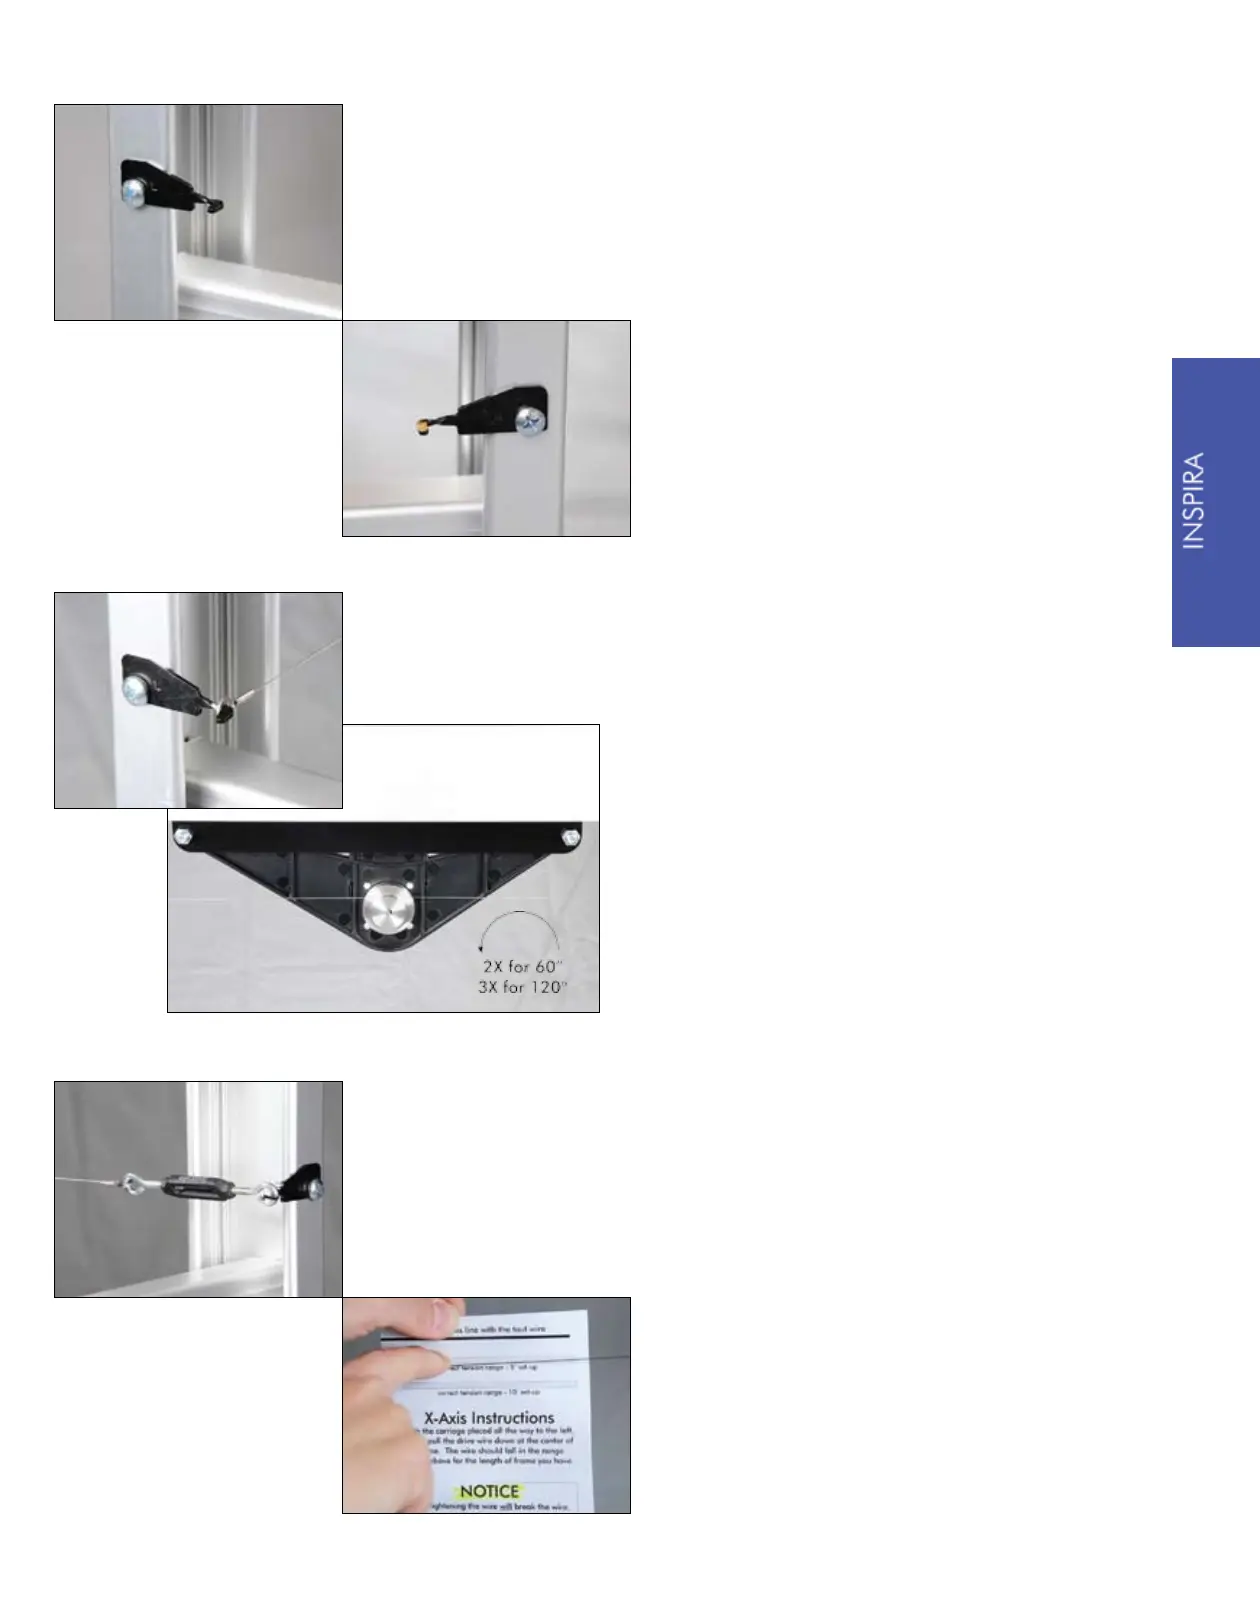
While holding tension on the wire, attach
the free eyelet to the right hand side of
the tensioner. Slip the other end of the
tensioner onto the X-axis wire holder
attached to the left hand frame leg.
Turn the center portion of the tensioner to
make the drive wire taut. Use the enclosed
tensioning template as a guide to set the
proper tension. Do not overtighten the
tensioner.
The lower drive assembly is now
installed!
Standing behind the frame, attach one
end of the drive wire to the drive wire
holder marked with an ‘L’. The bracket
with the ‘L’ will be on your right. While
keeping tension on the wire, wrap the
wire around the drive assembly spool
counter-clockwise:
2 times if you are setting up at 5’ length
or
3 times if you are setting up at 10’
length
13