MAKING THE CONNECTIONS
MAKING THE CONNECTIONS
15
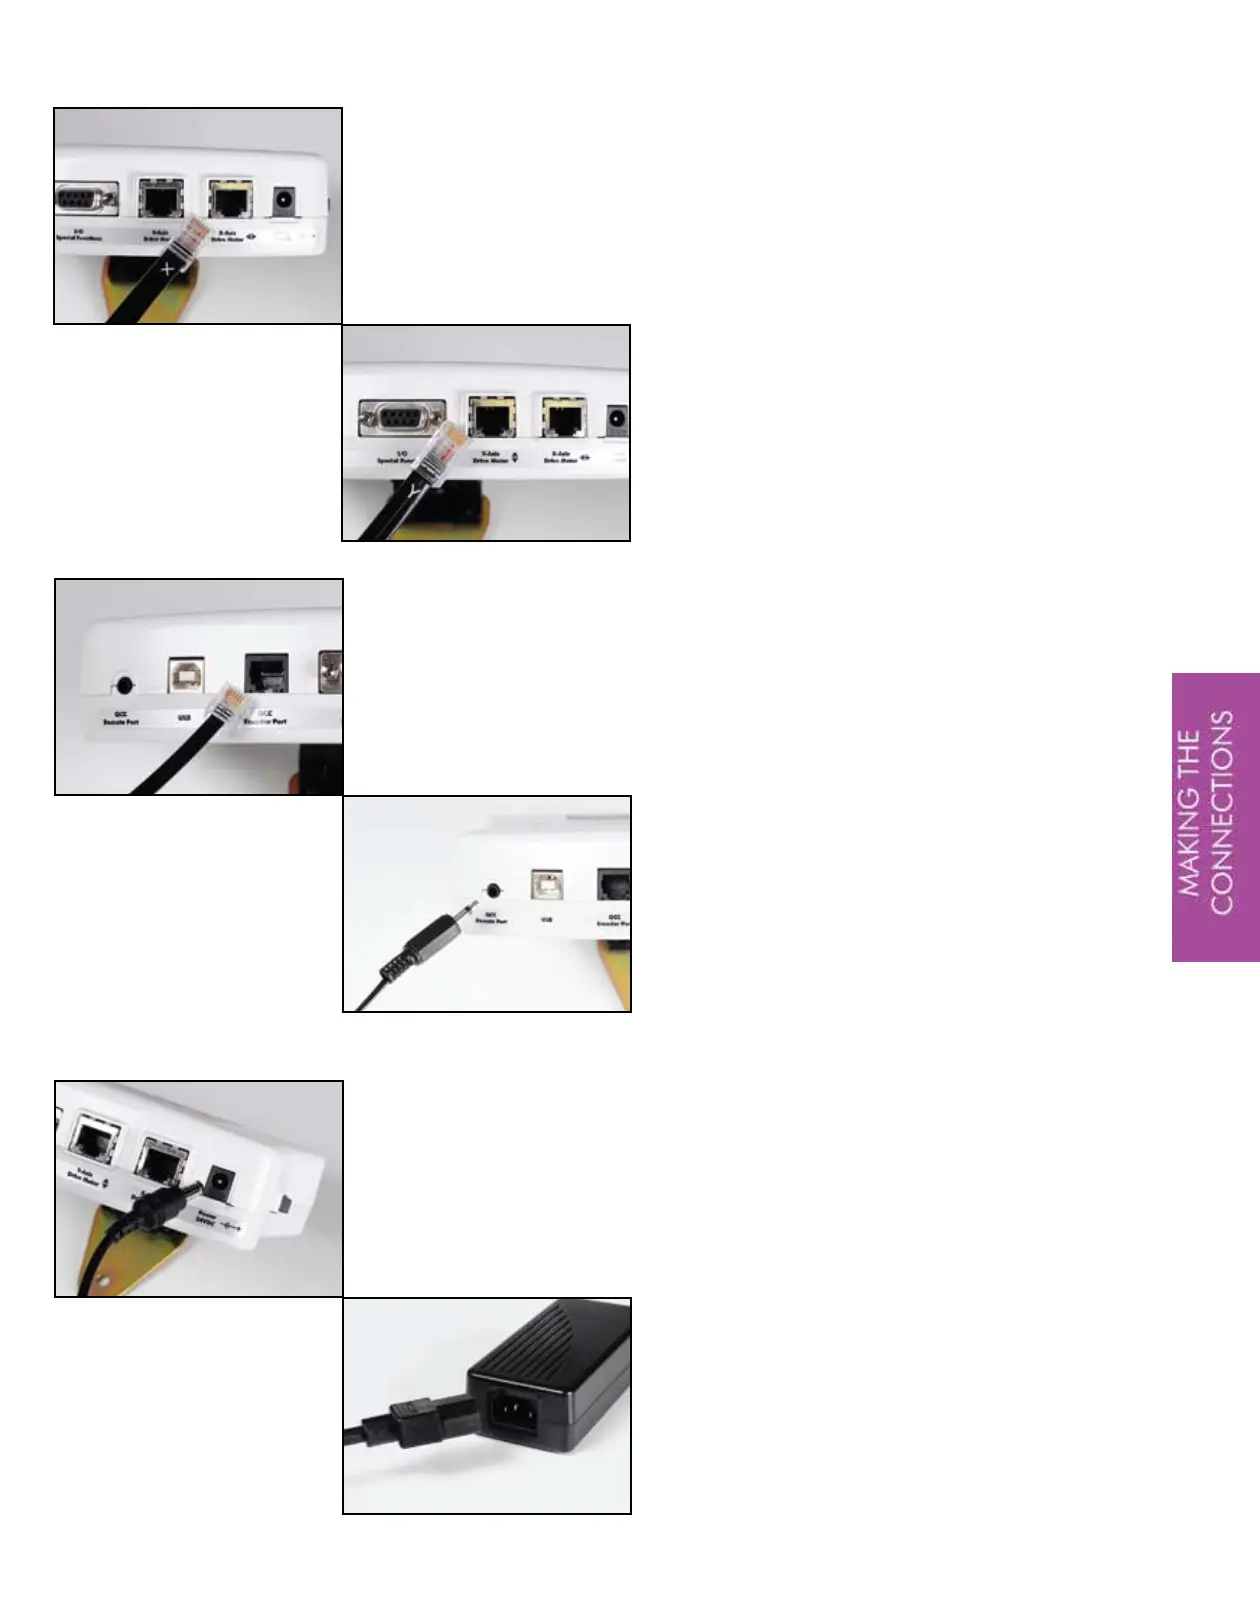
There are two ends to your wiring
harness. One end of the wiring harness
has long wires. The other end has
shorter wires. We are now going to
plug in the shorter wires to the QBOT.
Plug the cable marked with an ‘X’ into
the corresponding port on the QBOT.
Plug the cable marked with a ‘Y’ into
its corresponding port.
TIP-Push these connectors in until you
hear a click.
The smaller flat cable, which looks
similar to a phone cable, is the
connection between your QBOT and
your Quilter’s Cruise Control.
Plug this cable into the connection
labeled ‘QCC Encoder Port’ on the
QBOT.
The final wire of the harness is the wire
that plugs into the port labeled ‘QCC
Remote Port’ on the QBOT.
Now you are ready to connect the
power supply to the QBOT. Remove
the power supply from its box and
plug the connector into the QBOT as
shown. Next, ensure that the QBOT
power switch is in the ‘OFF’ position,
designated by ‘0’ on the label under
the switch. Finally, plug the power
cord into the QBOT transformer.
You’re almost done. You’ll be QBOT
quilting shortly.