Installation
15
Tools required:
Drill
Phillips and flat-head screwdrivers
To install the hard ceiling mount:
1. If you have not already done so, remove the dome cover.
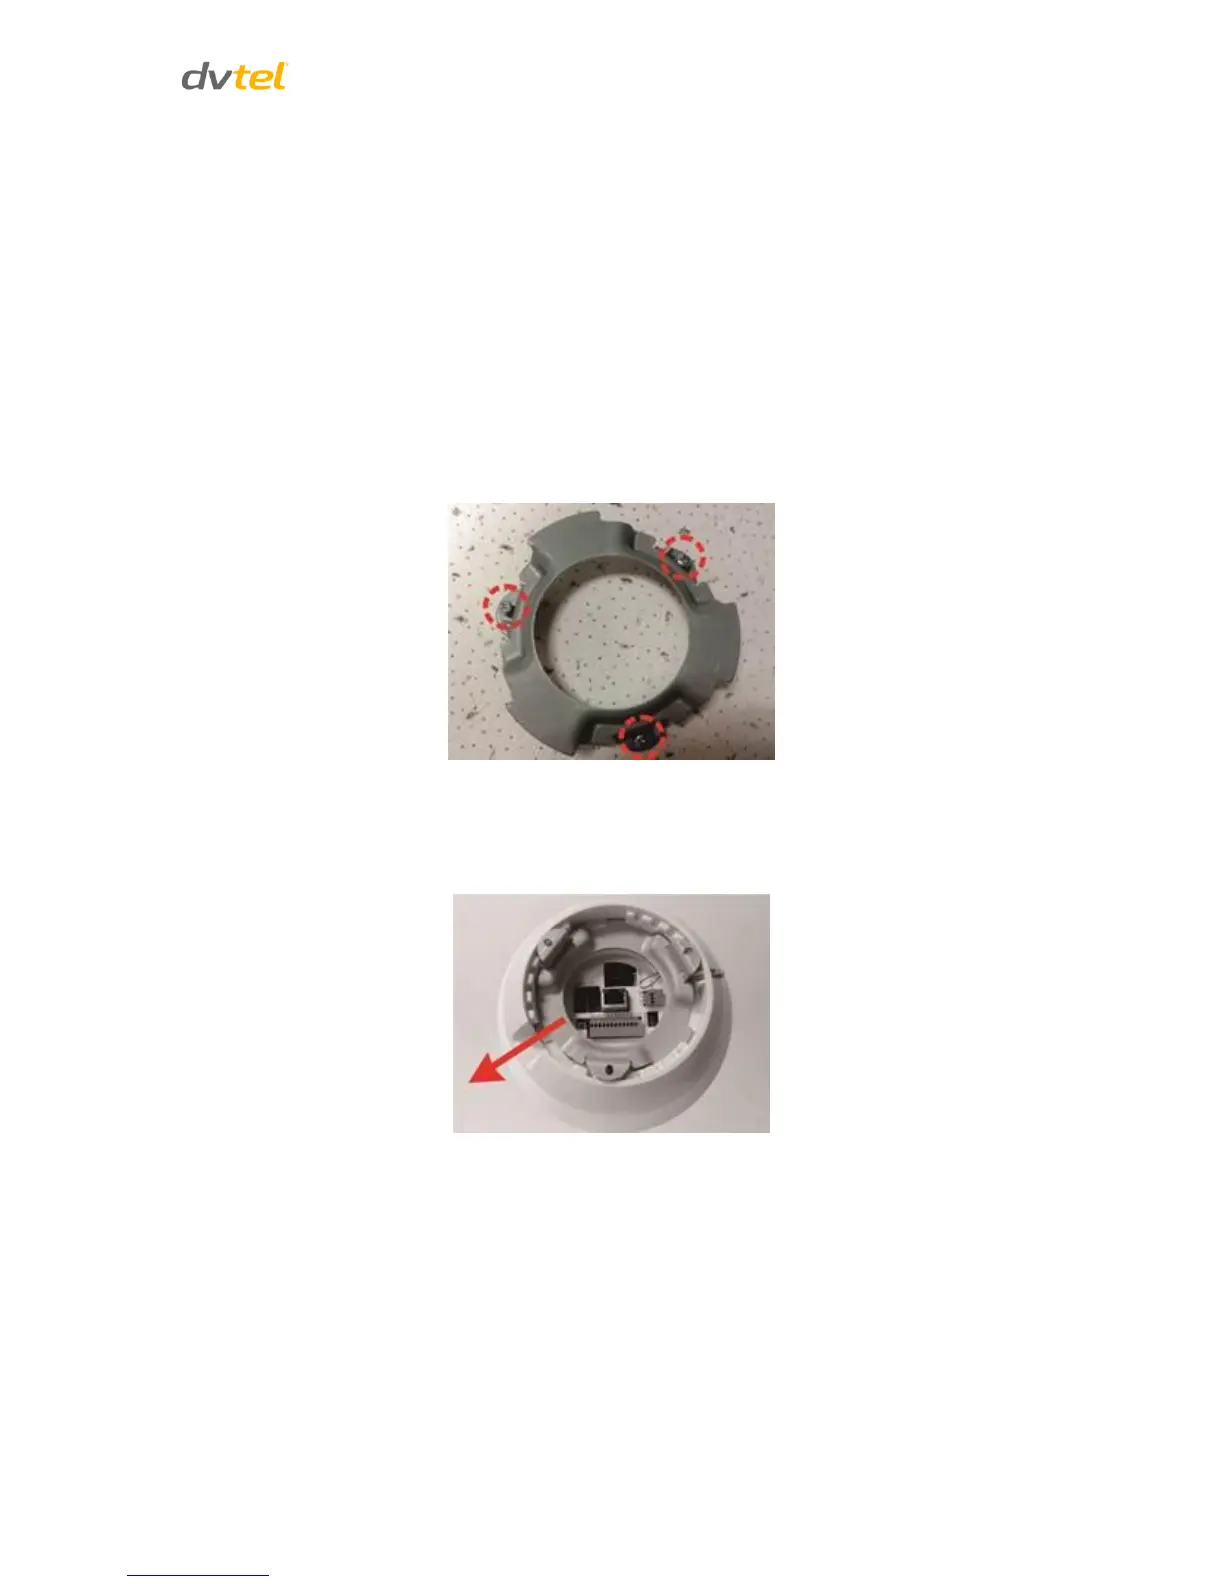
2. Use the hard ceiling mount as a template to mark the mounting surface where the three screw
holes will need to be drilled.
3. In the marked locations, drill each hole using a drill-bit of a slightly smaller diameter than the
supplied screw anchors and fully insert the anchors into drilled holes. You may need to tap
them flush with the wall using a finishing hammer.
4. Attach the Hard Ceiling Mount using three supplied self-tapping screws.
5. Thread cables through the center hole of the mount and connect them to the camera
back plate.
6. Hide the cables inside the ceiling. Alternatively, thread the cables through the gap at the side
of the fixing plate as shown in the figure below.
7. Attach the camera to the hard ceiling mount by turning the camera counter-clockwise.
 Loading...