19
Revised 4-21-10
UNBAL WORLD
GND
SHLD
SHLD
GND
SLV
L-
R-
STUDIOHUB+
JU6
JU4
JU5
JU3
JU1 JU2
J4J3
J6
J5
J2
J1
Part # SH-1/4UNBAL StudioHub+ 1/4” & Mini TRS Panel (Unbalanced)
(856) 467-8000
•
Fax (856) 467-3044
•
www.studiohub.com
JU1 and JU2*
Install to tie StudioHub+ RJ45 right - connection to StudioHub+ shield.
Install to tie StudioHub+ RJ45 right - connection to StudioHub+ power ground.
JU3 and JU4*
Install to tie StudioHub+ RJ45 left - connection to StudioHub+ shield.
Install to tie StudioHub+ RJ45 left - connection to StudioHub+ power ground.
JU5 and JU6*
Install to tie 1/4” and mini TRS sleeve to StudioHub+ RJ45 shield.
Install to tie 1/4” and mini TRS sleeve to StudioHub+ RJ45 power ground.
*Improper use of JU1, JU2, JU3, JU4 may result in no output, excessive noise,
crosstalk, oscillation, or circuit failure.
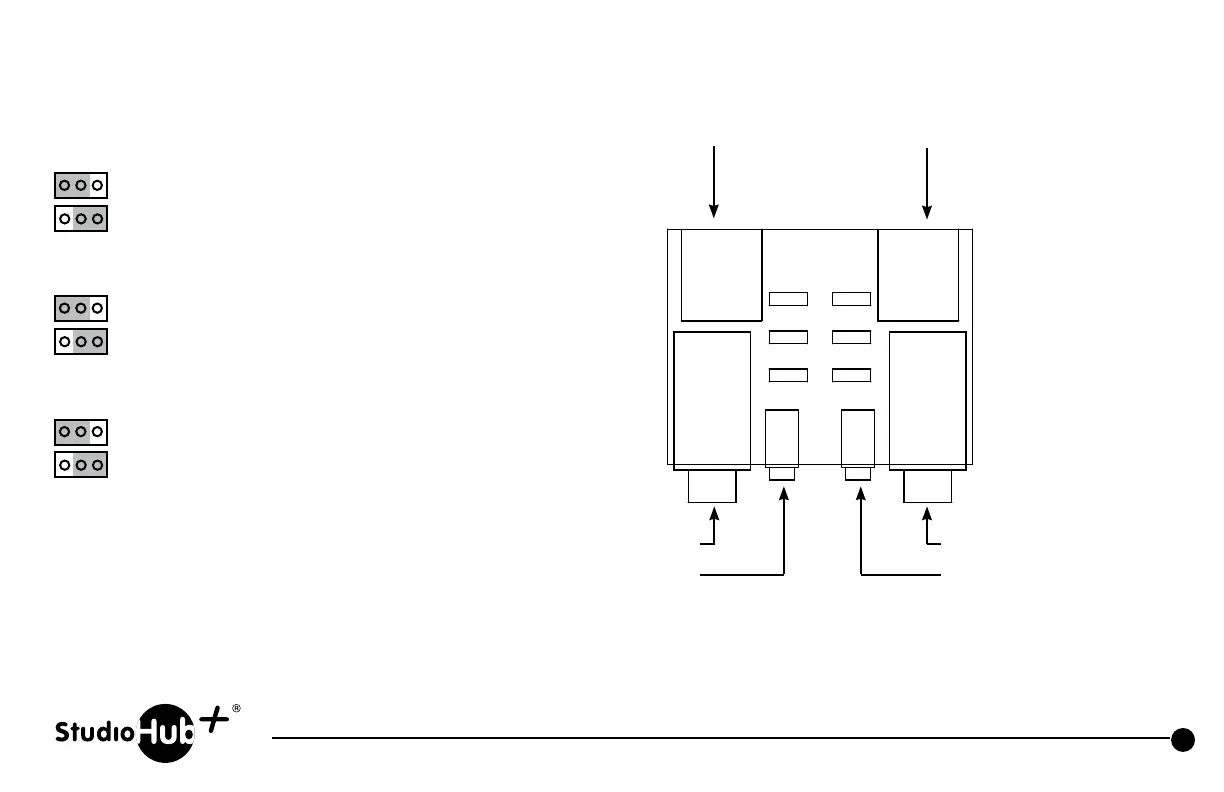
Stereo unbalanced StudioHub+
RJ45. Signal to/from J4 and J6
Stereo unbalanced StudioHub+
RJ45. Signal to/from J3 and J5
1/4” and mini TRS J3 and J5 are in
parallel. Use only one at a time.
Stereo unbalanced 1/4”
Stereo unbalanced mini TRS
Stereo unbalanced 1/4”
Stereo unbalanced mini TRS
1/4” and mini TRS wiring
Tip = Left + StudioHub+ RJ45 connection
Ring = Right StudioHub+ RJ45 connection
Sleeve = See JU5 and JU6
1/4” and mini TRS J4 and J6 are in
parallel. Use only one at a time.