12
IQ Network Communication Cartridge
Install the Cartridge
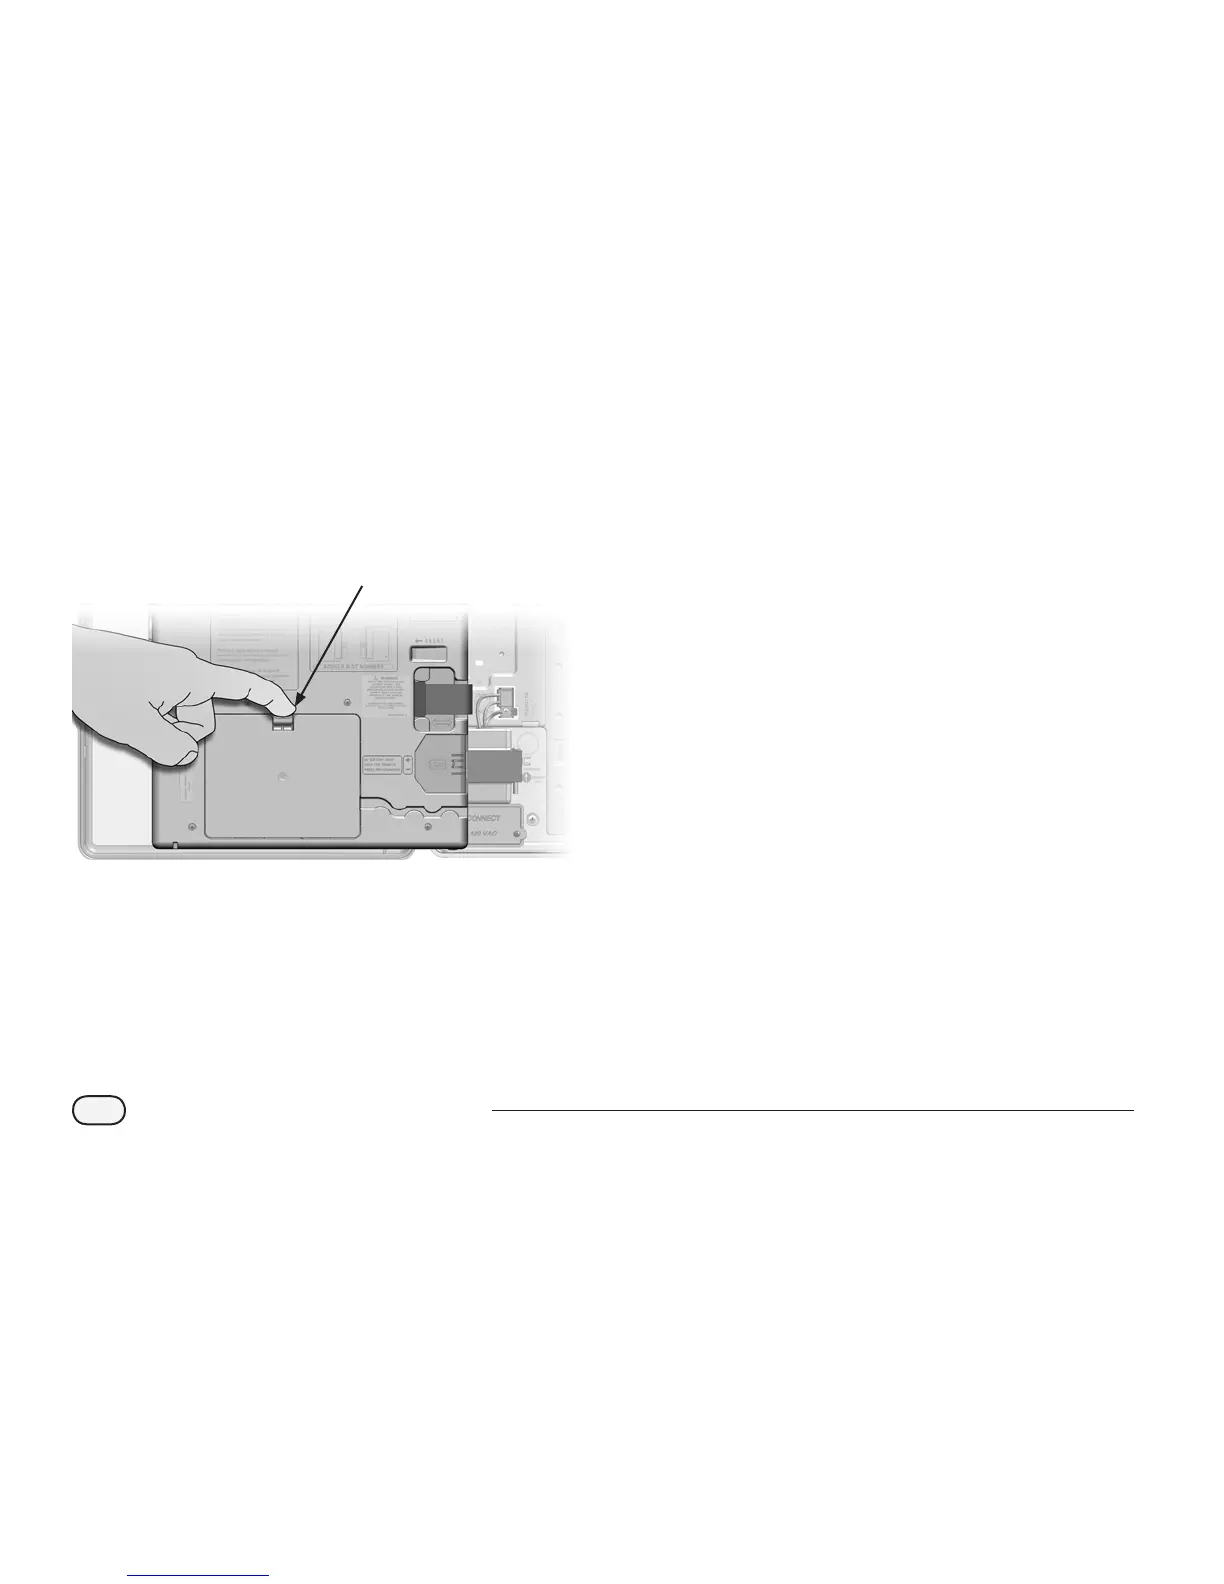
A
Press down on the top-latch of the cartridge bay cover
and remove it from the back of the front panel.
1
B
Connect the IQ Port cable or antenna to the cartridge
(see Fig. 4). This cable or antenna provides the
communication to the IQ computer.
b
NOTE: The cable for the NCC-RS cartridge has a DB9
connector that will not t through the knockout. Route
the small end of the cable through the bottom of the
knockout rst, then connect to the IQ Port.
C
Connect the CM Port cable to the cartridge that applies
to the intended conguration (see Fig. 4). Two CM Port
cables are included in the box with each cartridge,
one straight cable and one Y-cable. The cable that is
required depends on the controller conguration:
l
If the satellite is a Server or Client that will use a radio
modem for wireless communications with other satellites
on the IQNet, then install the Y-cable. The Y-cable plugs
directly into the radio modem (see user manual that comes
with radio modem for installation and configuration
instructions).
l
If the satellite is a Server or Client that will use a wired
connection (IQNet PE Communication Cable) to
communicate with other satellites, install the straight
cable.
l
If the satellite is a Server or Client that will use a radio
module for wireless communications AND a wired
connection (IQNet PE Communication Cable) to
communicate with other satellites, install the Y-cable.
l
If the satellite is Direct (with no wireless or wired
connection to another satellite) no CM Port cable is
necessary.
 Loading...