Installation into a 19" Rack R&S XU 4200
2.3 6166.5368.02.01
2.3 Installation into a 19" Rack
2.3.1 Installation of Two Radios
Installation of two Radios\Installation of two radios "Radio".doc
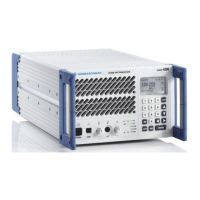
Fig. 2.1 Installation of two radios.
Installation
instruction
1. Prepare the rack by installing the guide rails.
2. Screw-connect the included L-mounting brackets on one side of the
transceiver.
3. Slide the transceiver into the rack so that one side lies on the guide
rails.
4. Fasten it to the rack with screws. Do not tighten the screws to the end.
5. Install the second radio.
6. Using the supplied screws, fasten the front handles of the two adjacent
transceivers together, creating a rigid unit.
7. Tighten the four rack screws.
Note: To remove one of the radios, follow the reverse procedure. Radios
can be replaced separately.
.
2.
4.
1.
.
7.
5.
 Loading...