Chapter 5
58 Miller Nitro 2000 Series AutoBoom™ Installation Manual
Install Fittings on the AutoBoom Valve
Before mounting the AutoBoom valve (P/N 063-0131-124) on the machine, install the proper fittings on the
valve. This prepares the valve for installation and simplifies the hose connection process later in the procedure.
Refer to the following table to install the fittings in the appropriate ports of the AutoBoom valve.
Mount the AutoBoom Valve
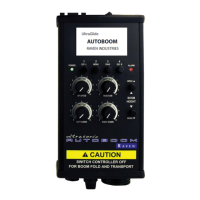
FIGURE 2. AutoBoom Valve Mounted on the Mounting Plate
1. Secure the AutoBoom valve (P/N 063-0131-124) to the mounting bracket (P/N 107-0171-676) using four
5/16”-18 x 7/8” hex bolts (P/N 311-0052-104) and four 5/16” zinc plated lock washers (P/N 313-1000-019).
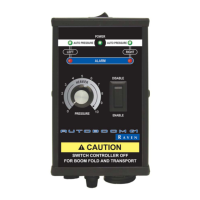
FIGURE 3. AutoBoom Valve Mounted on the Machine
2. Secure the mounting bracket to the machine’s center rack using the machine’s bolts and four 5/16”-18 zinc
flanged lock nuts (P/N 312-1001-169).
Fitting Part Number Port
Fitting - 11/16” ORFS (M) to 9/16” SAE O-Ring (M) Straight Adapter 333-0012-084 LC, RC
Fitting - 13/16” ORFS (M) to 3/4” SAE O-Ring (M) Straight Adapter 333-0012-168 P, T
Fitting - 11/16” Hex 9/16” SAE O-Ring Plug 333-0012-194 LV, RV
 Loading...