Service Manual Rayjet
Laser beam alignment
Beam alignment
07/09/2010 Trotec Produktions- und Vertriebs GmbH_Linzer Strasse 156, A-4600 Wels, Austria, Technical Support 15 / 53
tel_+43 (0)7242 239-7000, fax_+43 (0)7242 239-7380, mailto: rayjet@troteclaser.com www.rayjetlaser.com
8. Bridge the interlock system by putting magnets on the interlocks.
9. Move the x-axis to the 0/0 position.
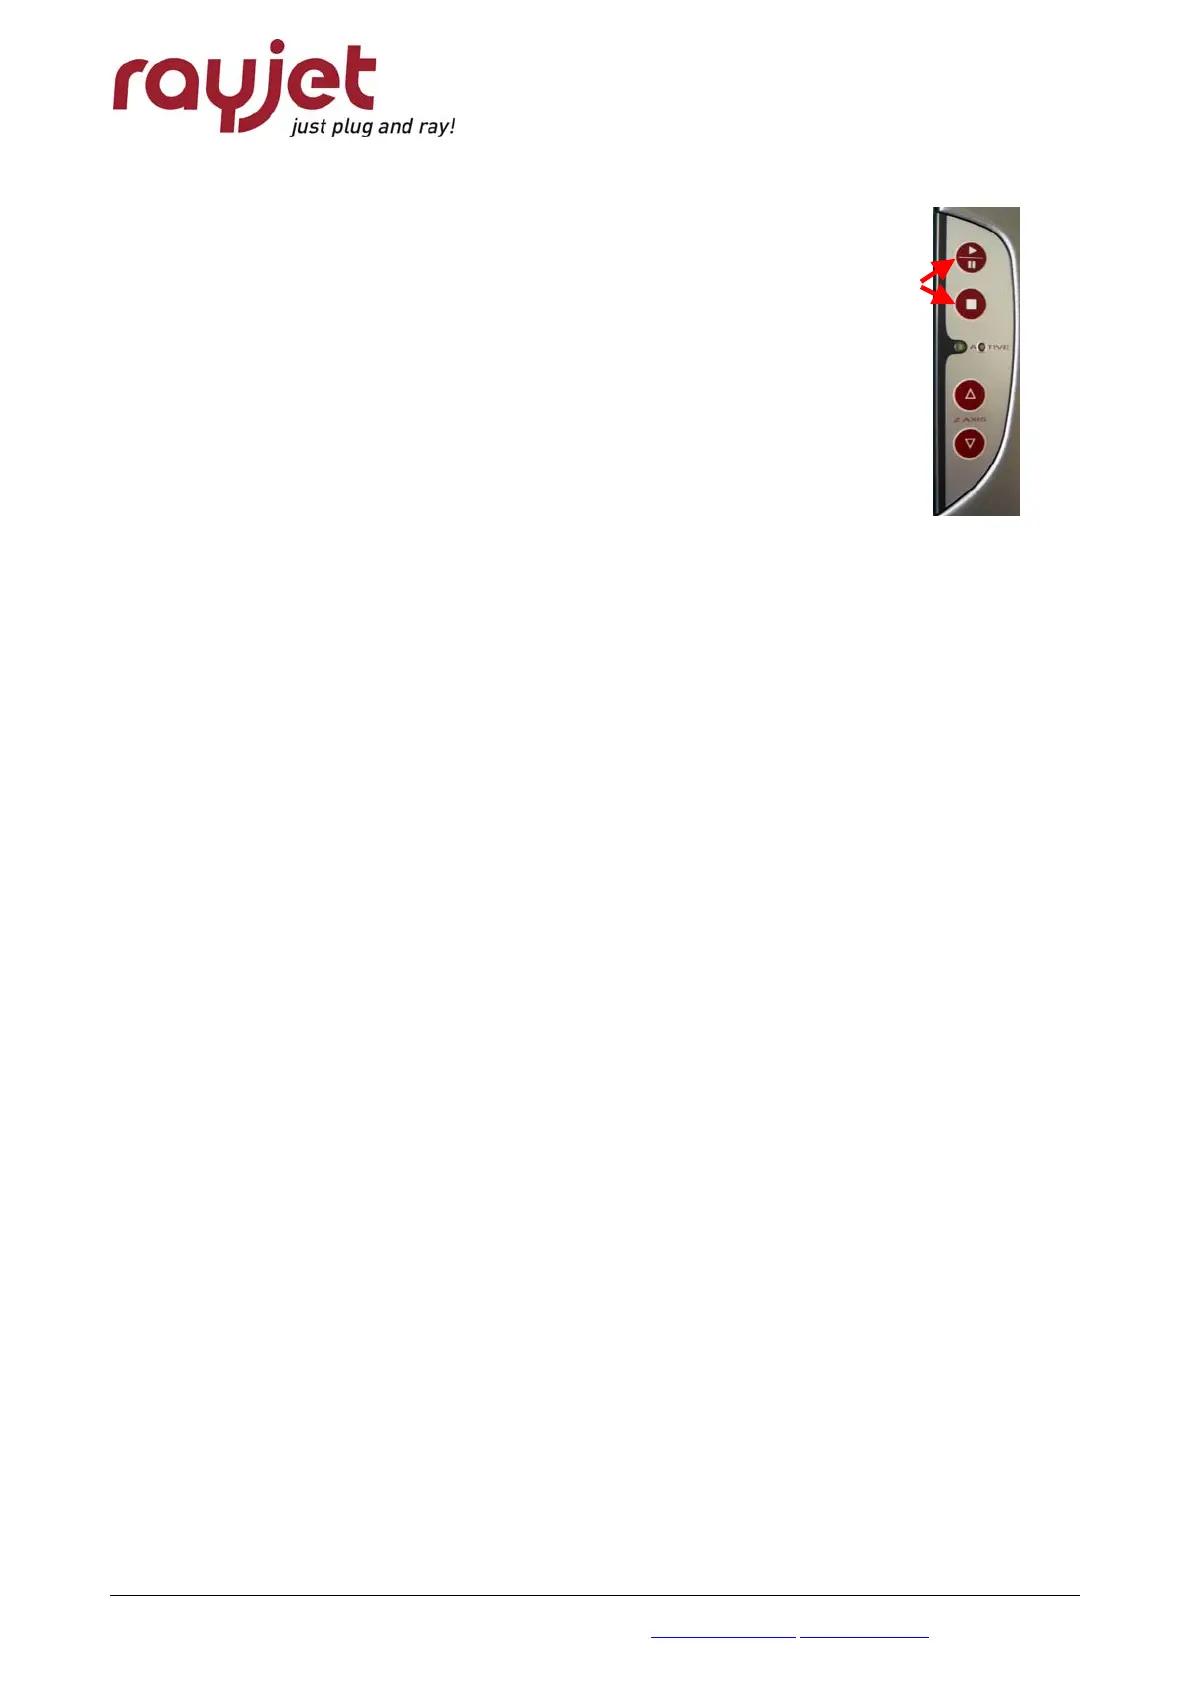
10. Press the “Start/Pause” and “Stop” buttons (see picture besides) simultan-
eously until you see a little mark on the BAT which is firstly getting grey
(burned) and then lightening up. This is only possible if all interlocks are
closed.
If you cannot see the mark at all, align mirror #1 until you can see it.
11. Move the x-axis with mirror #2 to the front side of the machine (400/0).
12. Again press the “Start/Pause” and “Stop” buttons simultaneously until you see
a little mark.
Adjust mirror #1 until this second mark is at the same position as the first mark (generated in
step 10).
13. Repeat the steps 9 to 12 until the marks are in the same position. As soon as they are in the
same position, follow up with the next steps.
14. Put mirror #2 back on.
15. Put the BAT for mirror #3 on the beam entrance of mirror unit #3.
16. Move the engraving head to the 0/300 position.
17. Press the “Start/Pause” and “Stop” buttons simultaneously until you see a little mark on the
BAT again.
18. Move the engraving head to the 0/0 position, do a testpulse again and adjust mirror #2 until you
hit the mark created in step 17.
19. Repeat steps 16 to 18 until the marks are in the same position.
20. If the mark is not centered bring it to the center by adjusting one of the screws for the laser
tube fixing plate. In this way you can bring the laser beam up or down.
21. Check the alignment at all four corners of the working table again.
22. When the position of the mark is in the centre with maximum displacement (distance from
burned dot to the centre) which is one sixth of the diameter of the mirror or hole where you do
the adjustment, you may remove the BAT from mirror #3.
23. Seal the adjustment screws by putting some varnish to them.
24. Put the cover for mirror #1 back on.
25. Now your engraver is aligned properly.
26. Put the maintenance panel back to the Rayjet and close it.