Chapter 3: Installation 25
Extension cable
If an extension power cable is required, please note the following:
• The wire gauge used may be affected by the scanner type.
• To minimize voltage drops, use large gauge cable.
• Use the supplied power cable to connect to the display unit. Then use a suitable
connector block to connect the free end to the extension cable, taking particular
care to ensure the correct polarity. The supplied power cable has a cross section of
10 mm.
Fuse ratings
• Without a scanner - use a 6.3 amp anti-surge fuse.
• With a scanner - refer to the fuse notification in the scanner handbook.
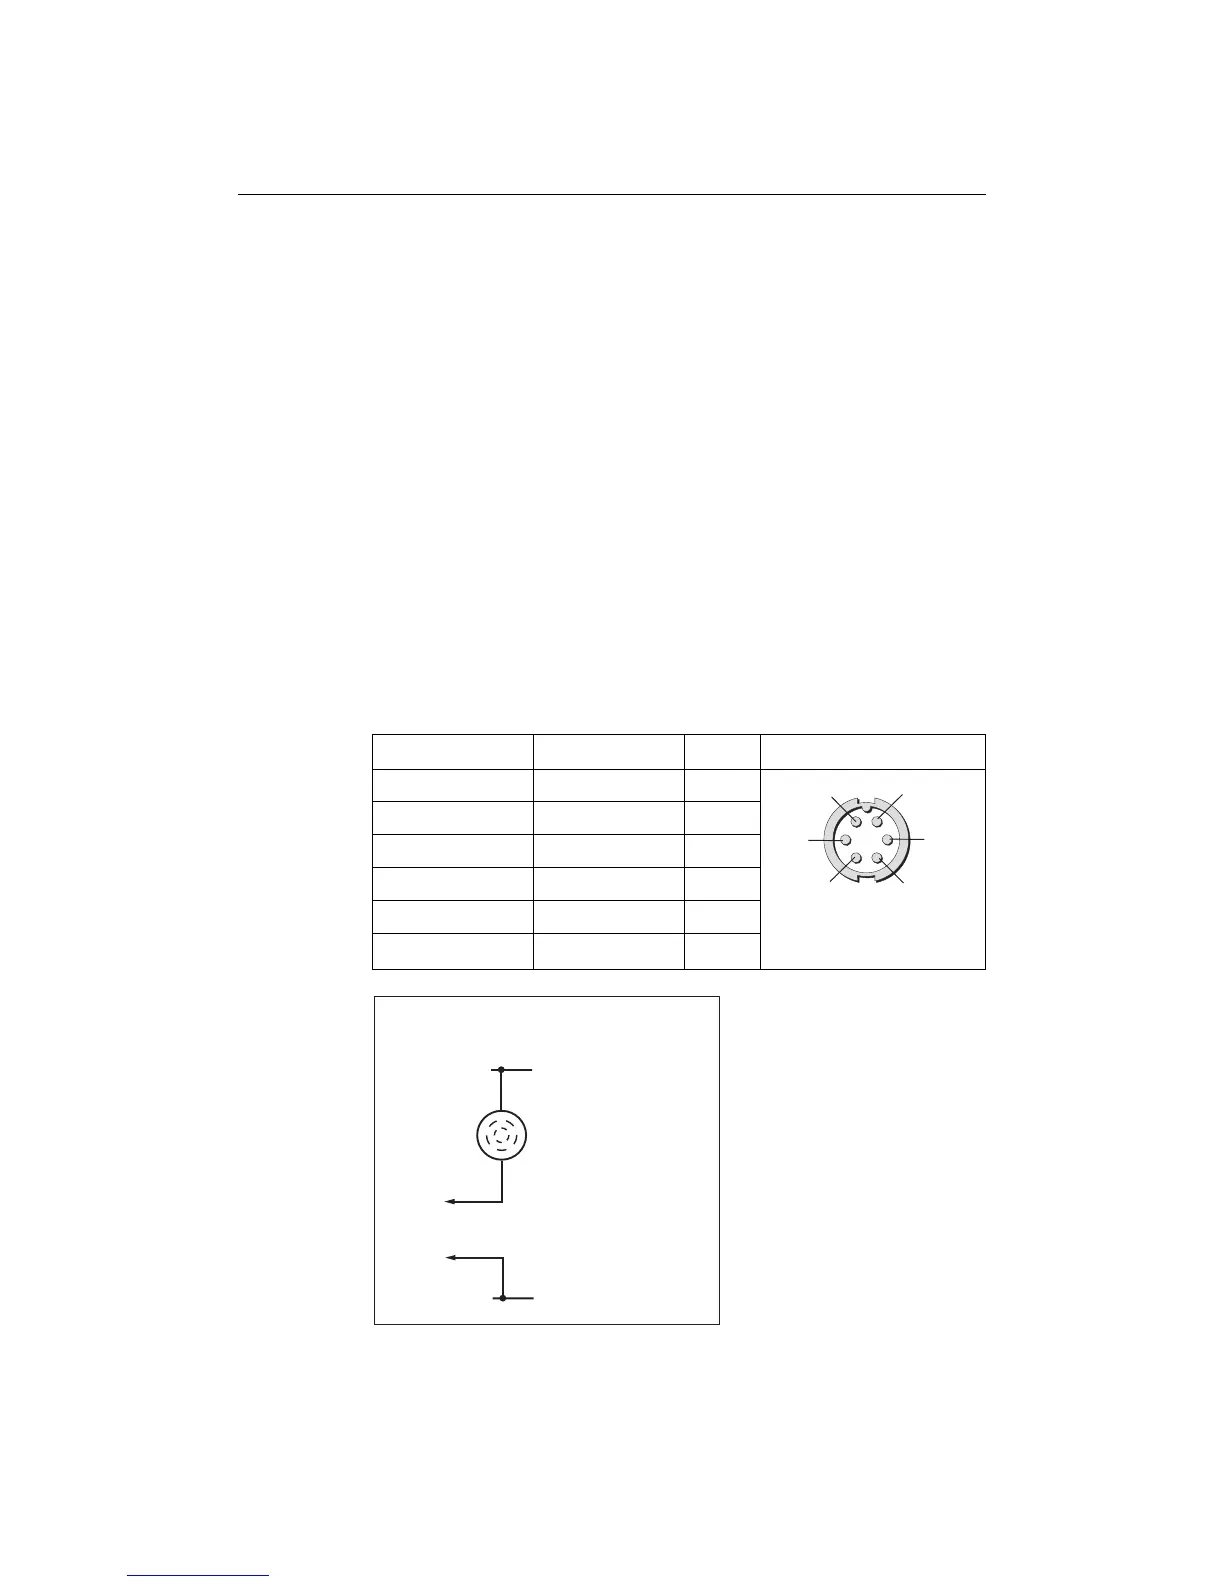
SeaTalk/Alarm out cable
The SeaTalk cable is supplied with insulated tails. These should be connected to your
existing equipment using either the cable splicers supplied or by using a standard
screw terminal block.
Function Color Pin no. Rear unit view
SeaTalk power Red 1
SeaTalk return Black 2
SeaTalk data Yellow 3
Alarm out (open collector) White 4
Alarm return Brown 5
Screen (RFground/earth) Unsheathed/Drain wire
6
D7528-1
1
2
3
4
5
6
D7482-1
Alarm
(100mA max)
Alarm
out
Alarm
return
Battery -
Battery
+
Connections for external alarm
 Loading...