Chapter 4: Commissioning the system 33
4.4 Initial power on procedure
Once you have conducted the pre-start checks you are ready to start the display:
1. Press the POWER button until the introductory logo is displayed:
• The keys light up and after a few seconds a navigation warning is displayed.
• If you have networked two or more E-Series displays, you will also hear an
alarm and be asked to select the repeater displays. Press SET AS REPEATER on
the appropriate Display(s).
• At this time the radar scanner (if fitted and powered) is checked for compatibil-
ity with the display. An error message is displayed if the scanner is incompati-
ble.
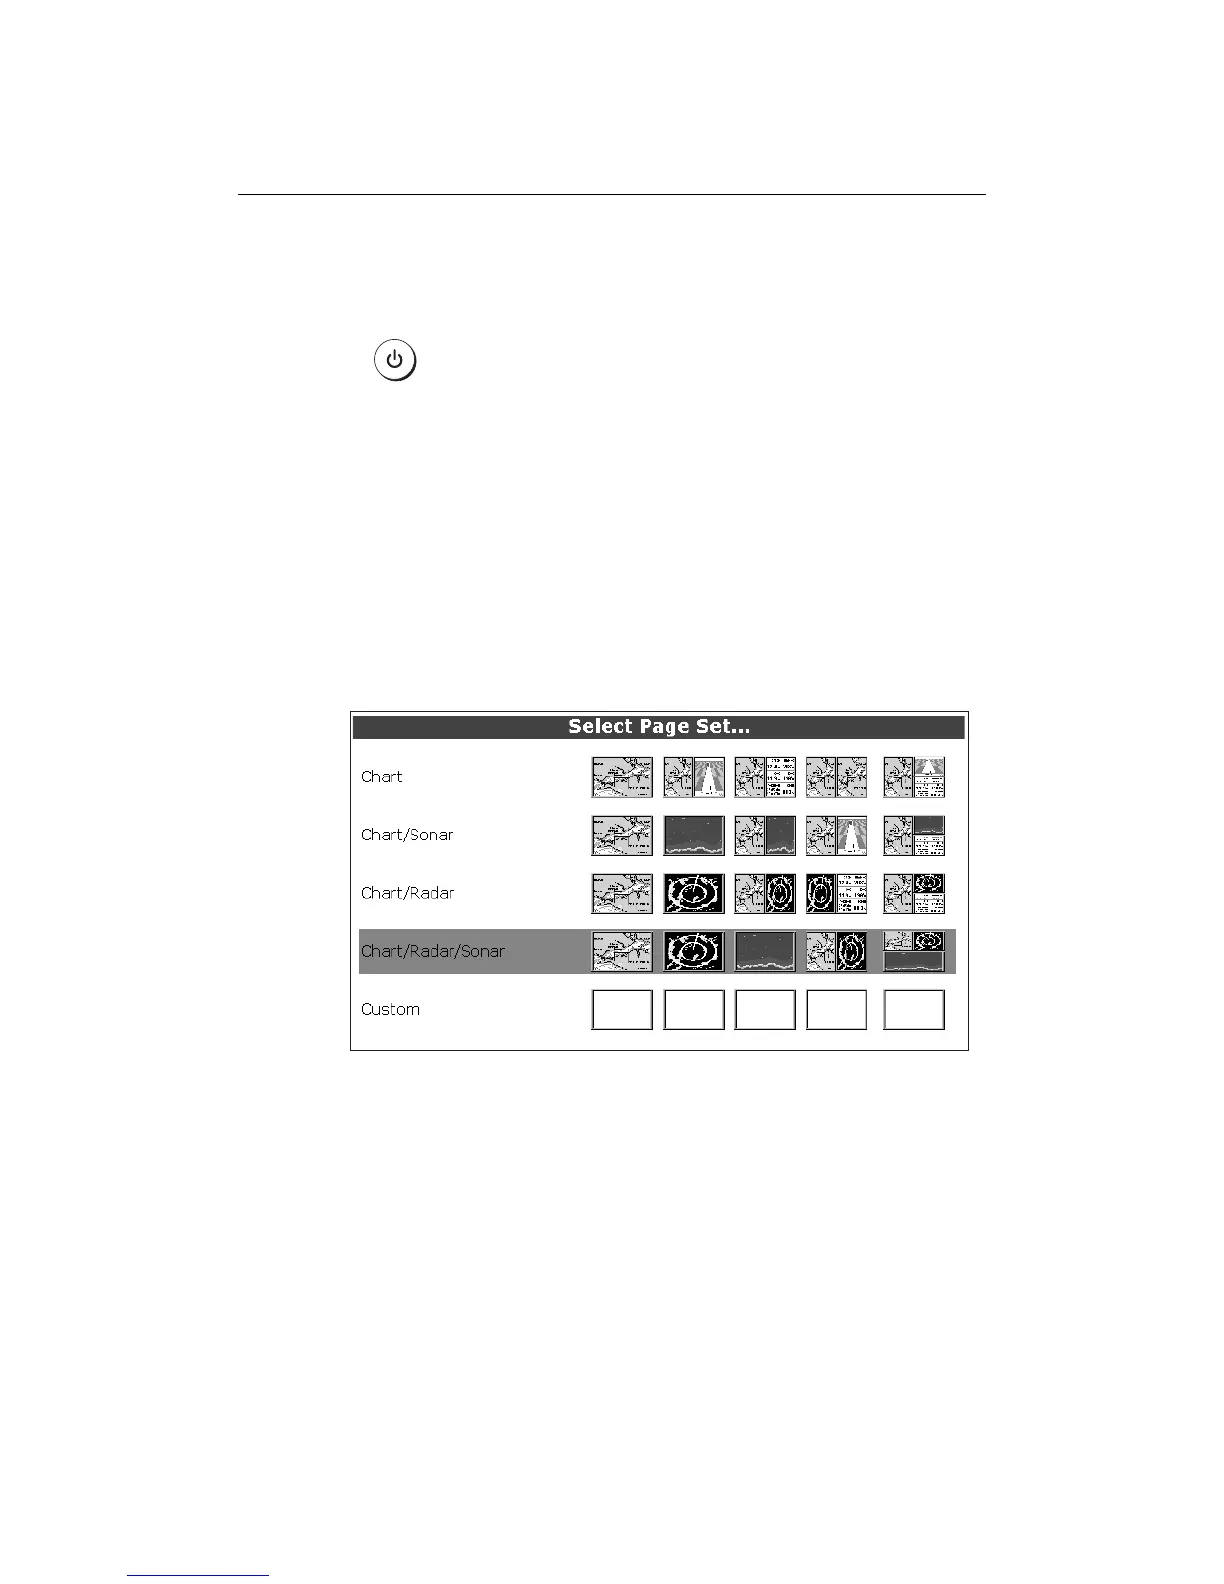
2. Read the warning and then press OK to remove it. The Select Page Set screen is dis-
played:
3. Use the trackpad to select the required page set and then press OK.
You are now ready to test that your system is receiving the necessary data to run all the
required applications.
4.5 How do I test and align the radar?
Your E-Series display is part of an integrated system. Raymarine strongly advise that
you test and align the radar before connecting to other systems.
To test and align the radar you must first select a radar application. With the Select
Page Set screen displayed (see previous section):
D6577-1
D6655-3
 Loading...