Keep dust and grit from entering the
cassette door. They are abrasive and
cause excessive wear both to the
camcorder's recording/playback heads
and cassettes.
Always replace the lens cap on the lens
when the camcorder is not in use.
When the camcorder is not in use.
always remove the cassette and AC
adapter/charger or battery.
The camcorder can be damaged by
improper storage or handling. Do not
subject the camcorder to swinging.
shaking, or dropping.
Do not touch the lens with your fingers.
The oil from your skin can damage the
lens. Use lens-cleaning tissue and
commercially prepared cleaning solu-
tion designed for use on camera lens.
Improper cleaning may scratch the lens.
• Before handling your camcorder, make
sure your hands and lace are free from
any chemical products such as suntan
lotion, as it may damage the finish.
• Do not operate the camcorder tbr
extended periods in temperatures below
40°F (4°C) or above 95°F (35°C). Do
not store the camcorder in temperatures
below -22°F (-30°C) or above 149°F
(65°C).
• Do not operate the camcorder in
extremely humid environments.
• Do not aim your camcorder at the sun
or other bright objects.
• Do not leave your camcorder in direct
sunlight• Doing so could permanently
damage the camcorder's internal parts.
58
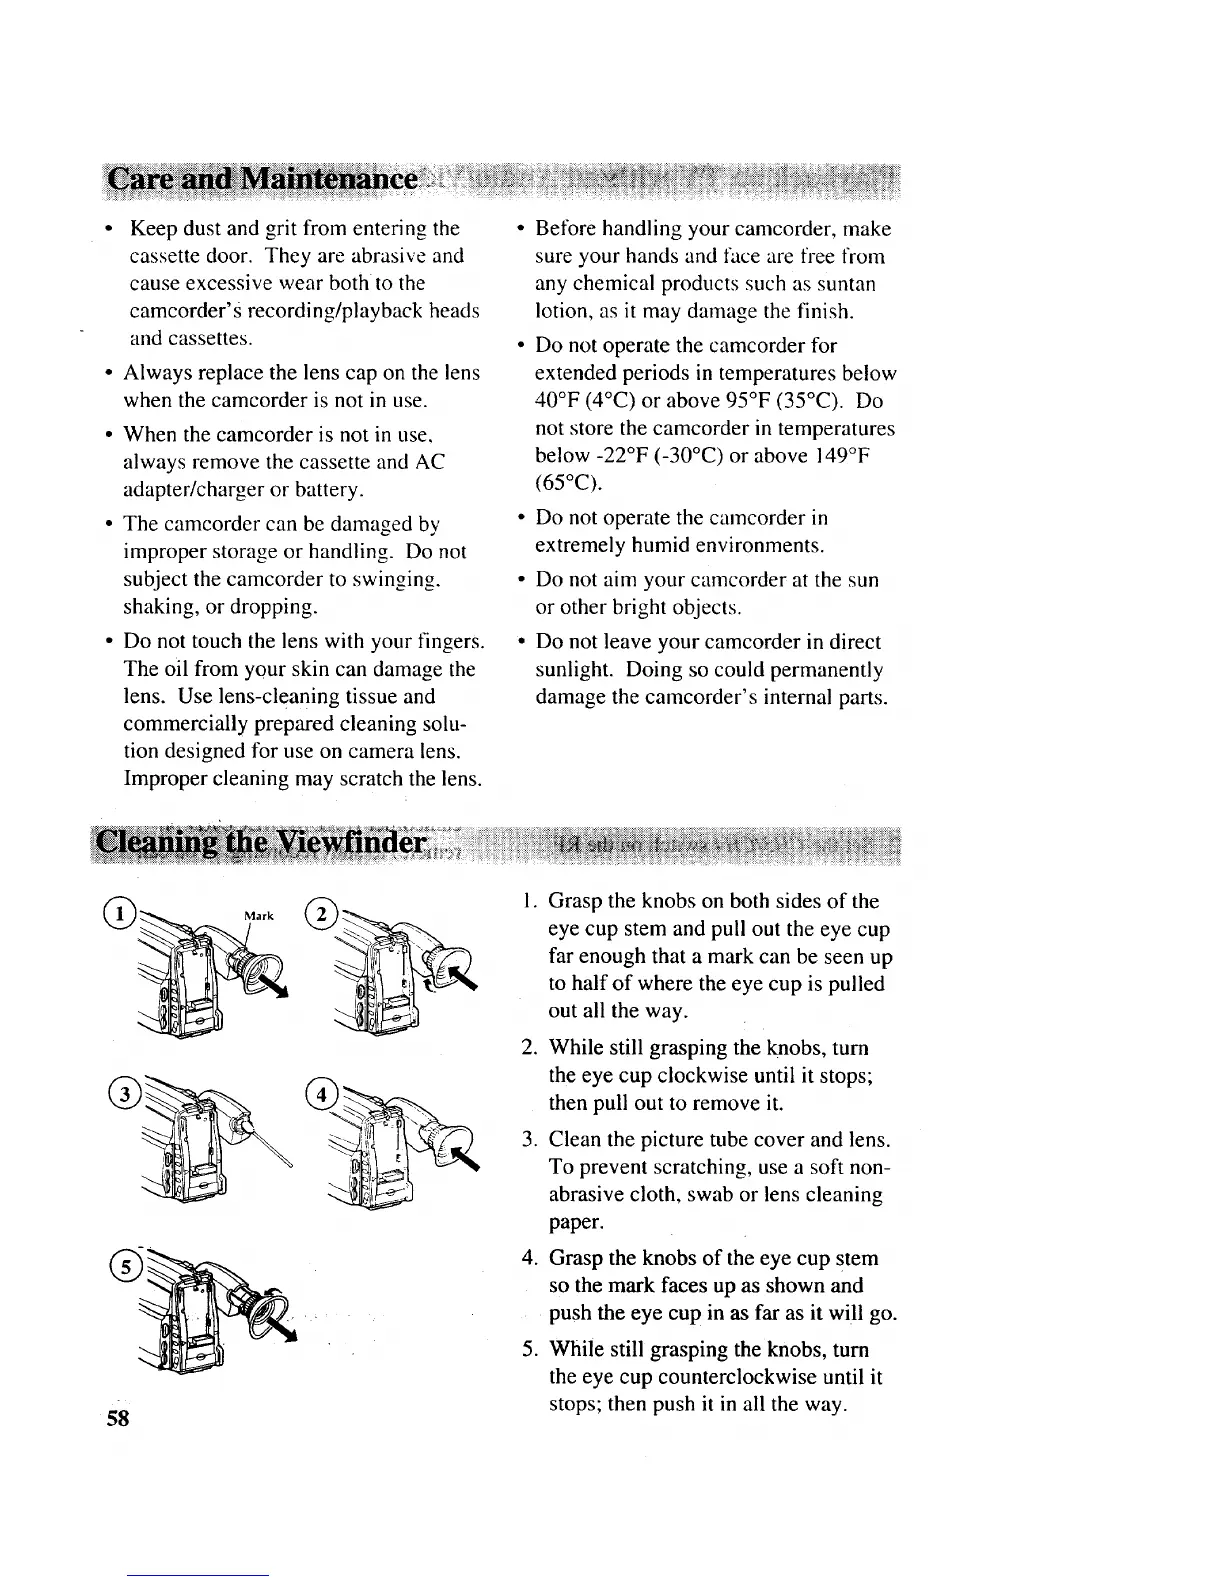
• Grasp the knobs on both sides of the
eye cup stem and pull out the eye cup
far enough that a mark can be seen up
to half of where the eye cup is pulled
out all the way.
o
While still grasping the knobs, turn
the eye cup clockwise until it stops;
then pull out to remove it.
.
Clean the picture tube cover and lens.
To prevent scratching, use a soft non-
abrasive cloth, swab or lens cleaning
paper.
4. Grasp the knobs of the eye cup stem
so the mark faces up as shown and
push the eye cup in as far as it will go.
5. while still grasping the knobs, turn
the eye cup counterclockwise until it
stops; then push it in all the way.