57
Stop button, joystick and Equator Button Interface
Depending on its specification, an Equator can be equipped with either a stop button, joystick or Equator Button
Interface. The joystick contains an integrated stop button and therefore a separate stop button is not required.
CAUTION: If both a joystick and stop button are available to a system, only one can be connected to
the system at a time unless you have a stop expander setup using the EQ-CM1.
Before connecting or disconnecting a stop button, joystick or Equator Button Interface, the system
must be powered down correctly, otherwise damage to the circuitry is highly likely.
If manual mode is not selected, the operator should always engage the stop button before entering
the Equator's working volume. This is especially important when the system can be operated
remotely.
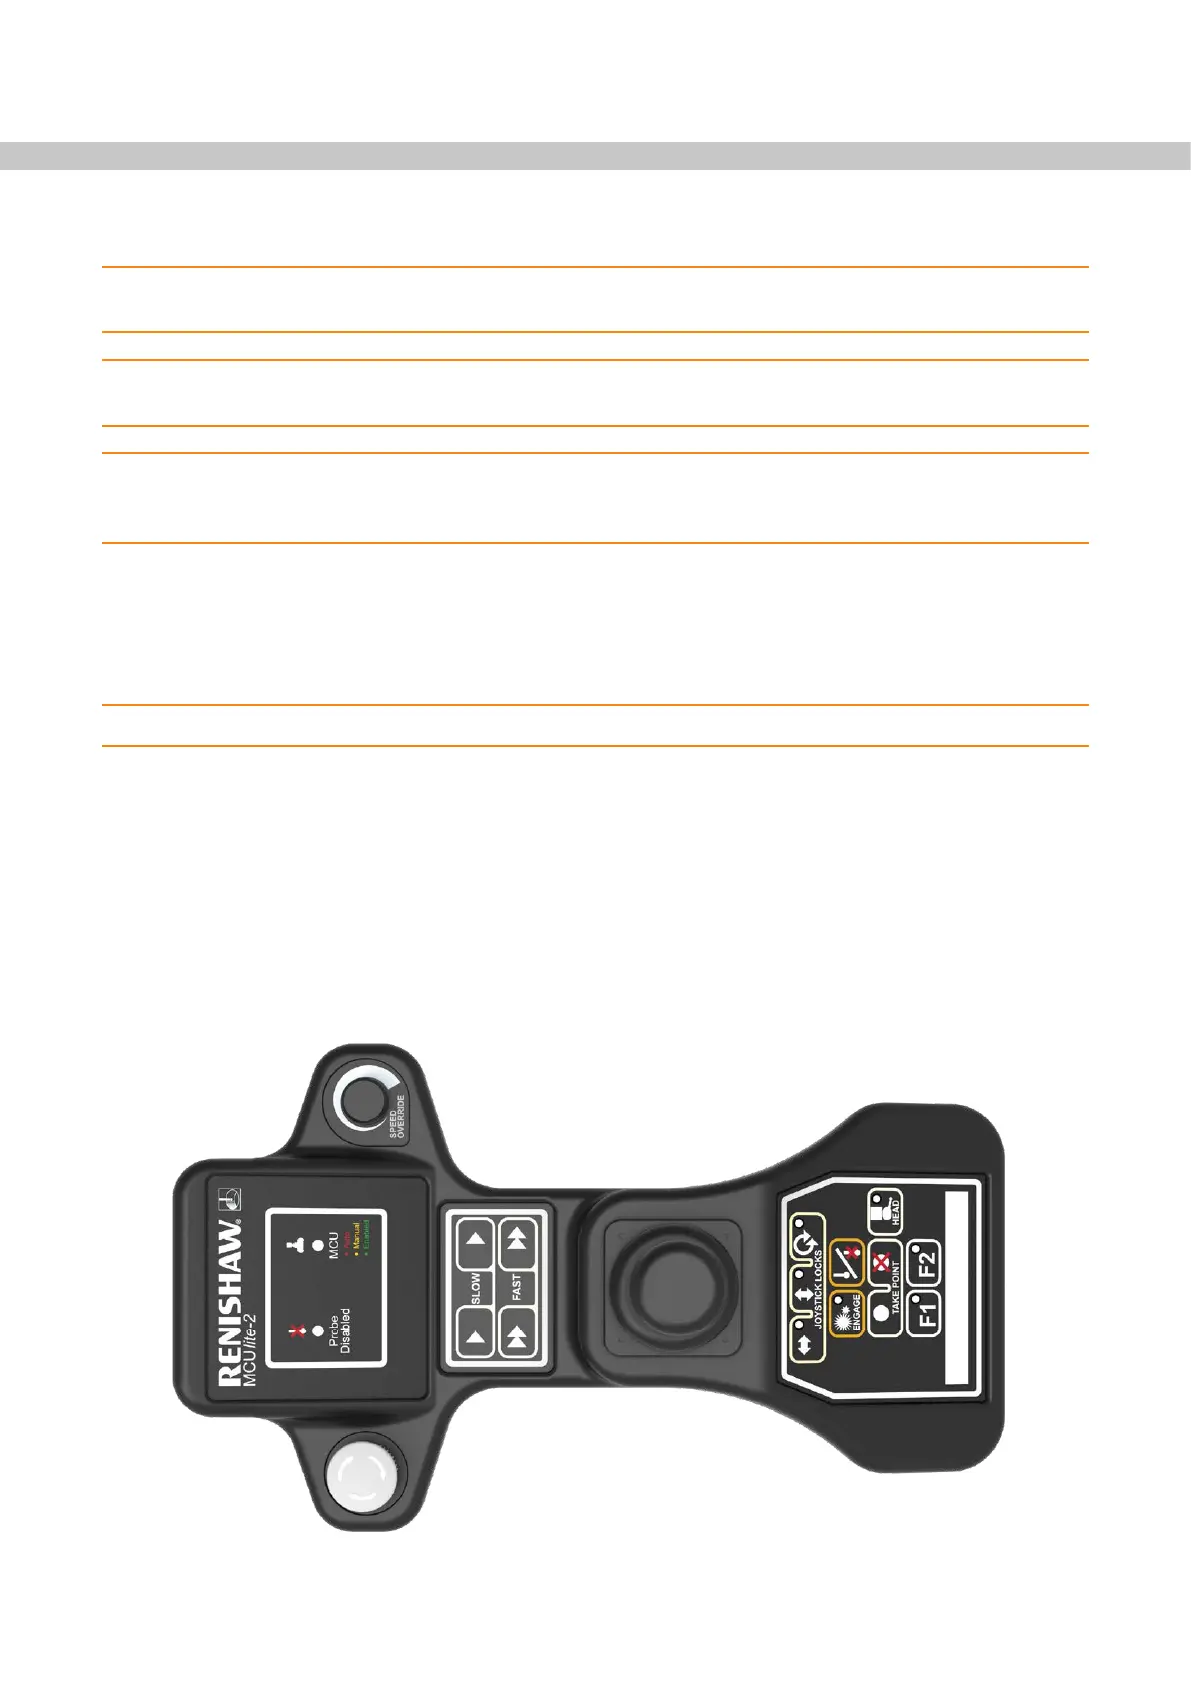
Joystick - MCUlite-2
The joystick is used to move the probe within the working volume and is especially useful for programmers.
Common tasks include moving the probe to the desired locations whilst programming, and manually measuring
a component’s initial alignment features before activating auto-alignment.
NOTE: To ensure good data quality, touch points should only be taken using the slow speed setting.
To move the probe in X (left to right) or Y (front to back) move the joystick in the desired direction while holding
down either the Fast button or the Slow button to control the speed. To move in Z, twist the joystick clockwise
to move the probe downwards, and anti-clockwise to move it upwards. Using these controls, the probe can be
moved in any combination of axes at once, meaning that 3D vector movements are possible.
If you drive the stylus into an artefact when using the joystick, this will result in a probe overdeflection error. You
will need to reset the probe in EquatorServer. To do this, access EquatorServer by pressing Alt and Tab, then
right click on the required probe and select “Set”.