– Pay attention to the anti-rotation device when using 250 and 500 ml grinding
jars. The hole drilled in the bottom of the grinding jar to support the anti-
rotation pin (VS) is situated on the side of the lettering areas (DE).
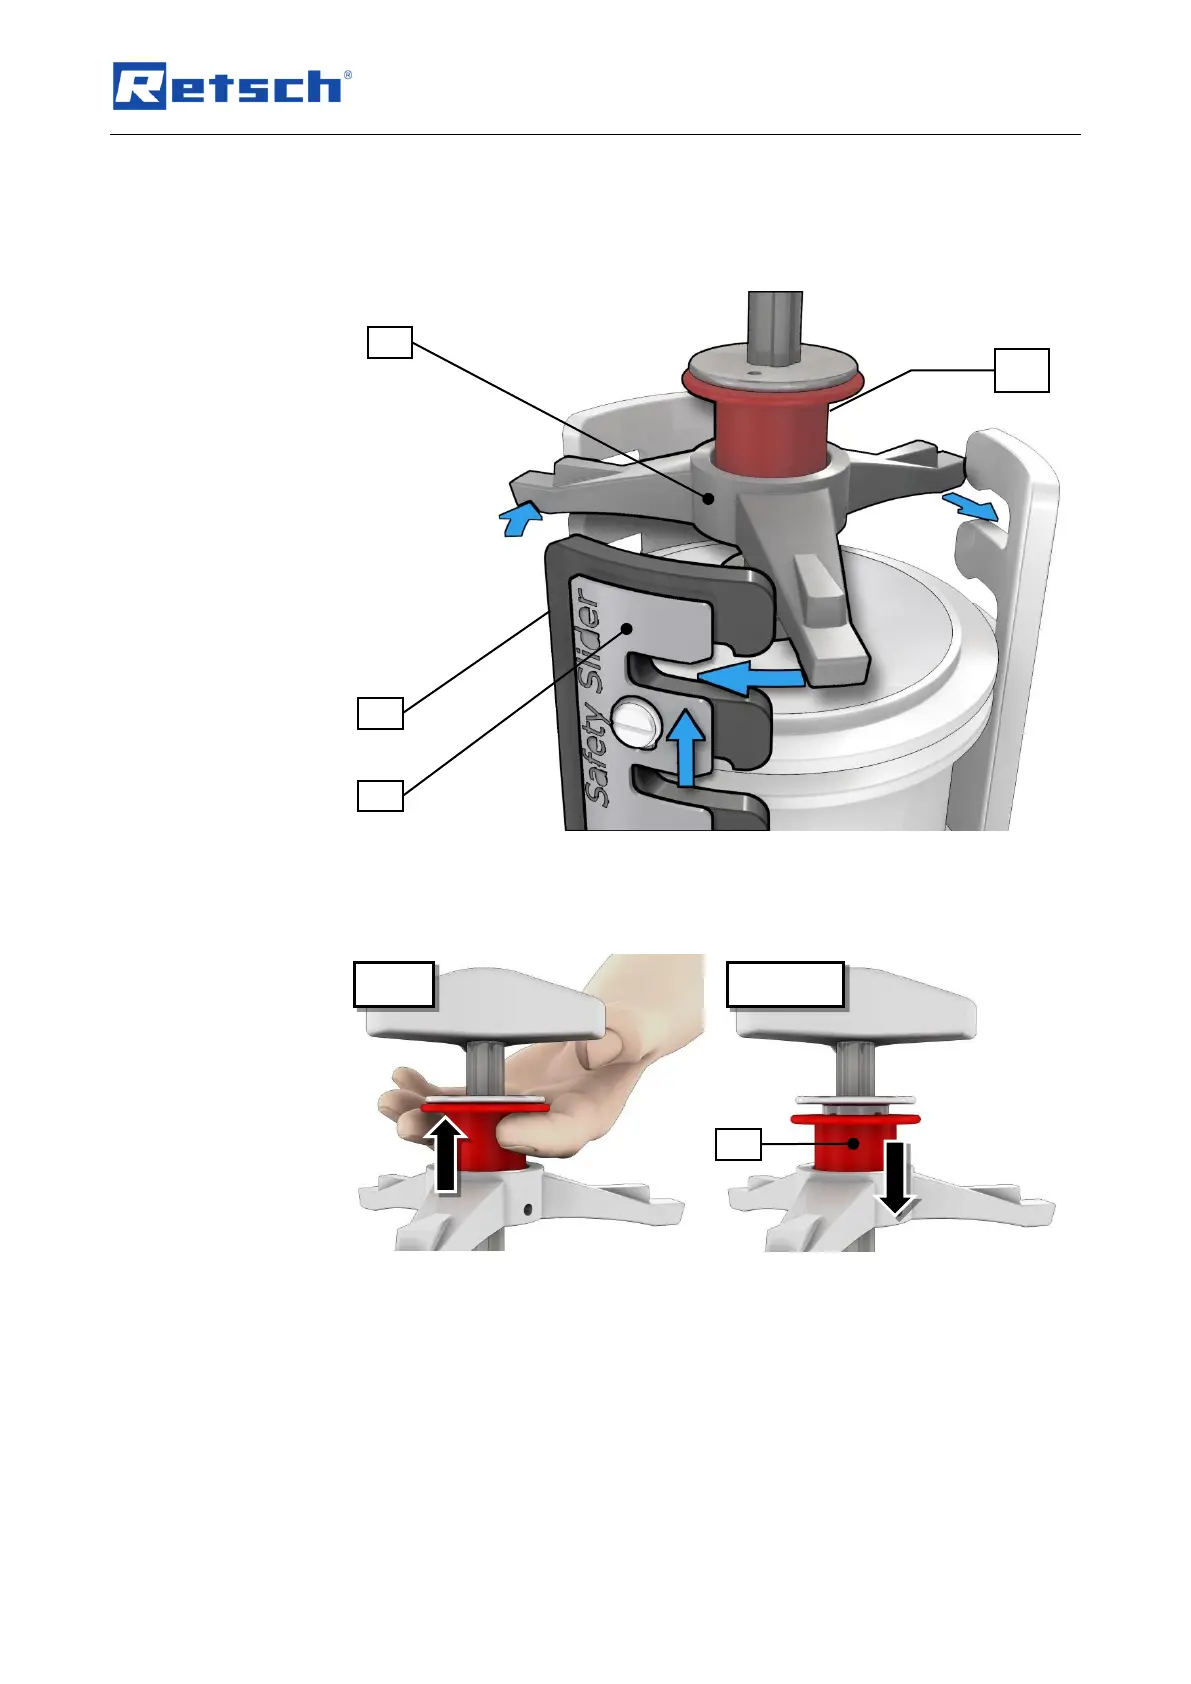
5.8.2 Inserting the clamping unit
Fig. 16: Inserting the clamping unit
• Insert the clamping unit (C) in the three latching brackets (Q).
5.8.3 Function of the locking sleeve
Fig. 17: Function of the locking sleeve
• Pull the red sleeve (CA) upwards and clamp the grinding jar by twisting the
three-star grip (CG) to the right.
• Allow the red sleeve (CA) to audibly click down into place, if necessary
tightening slightly using the three-star grip.
• It should no longer be possible to turn the three-star grip.
– The red locking sleeve now in the blocked position stops the threaded
spindle from coming loose automatically.