REYMSA COOLING TOWERS, INC.
www.reymsa.com
44
Follow appropriate electrical codes/methods when making electrical connections. Make sure that the
electrical cable run is secured to the fan motor and is well insulated from electrical shorting. Use of conduit
is recommended.
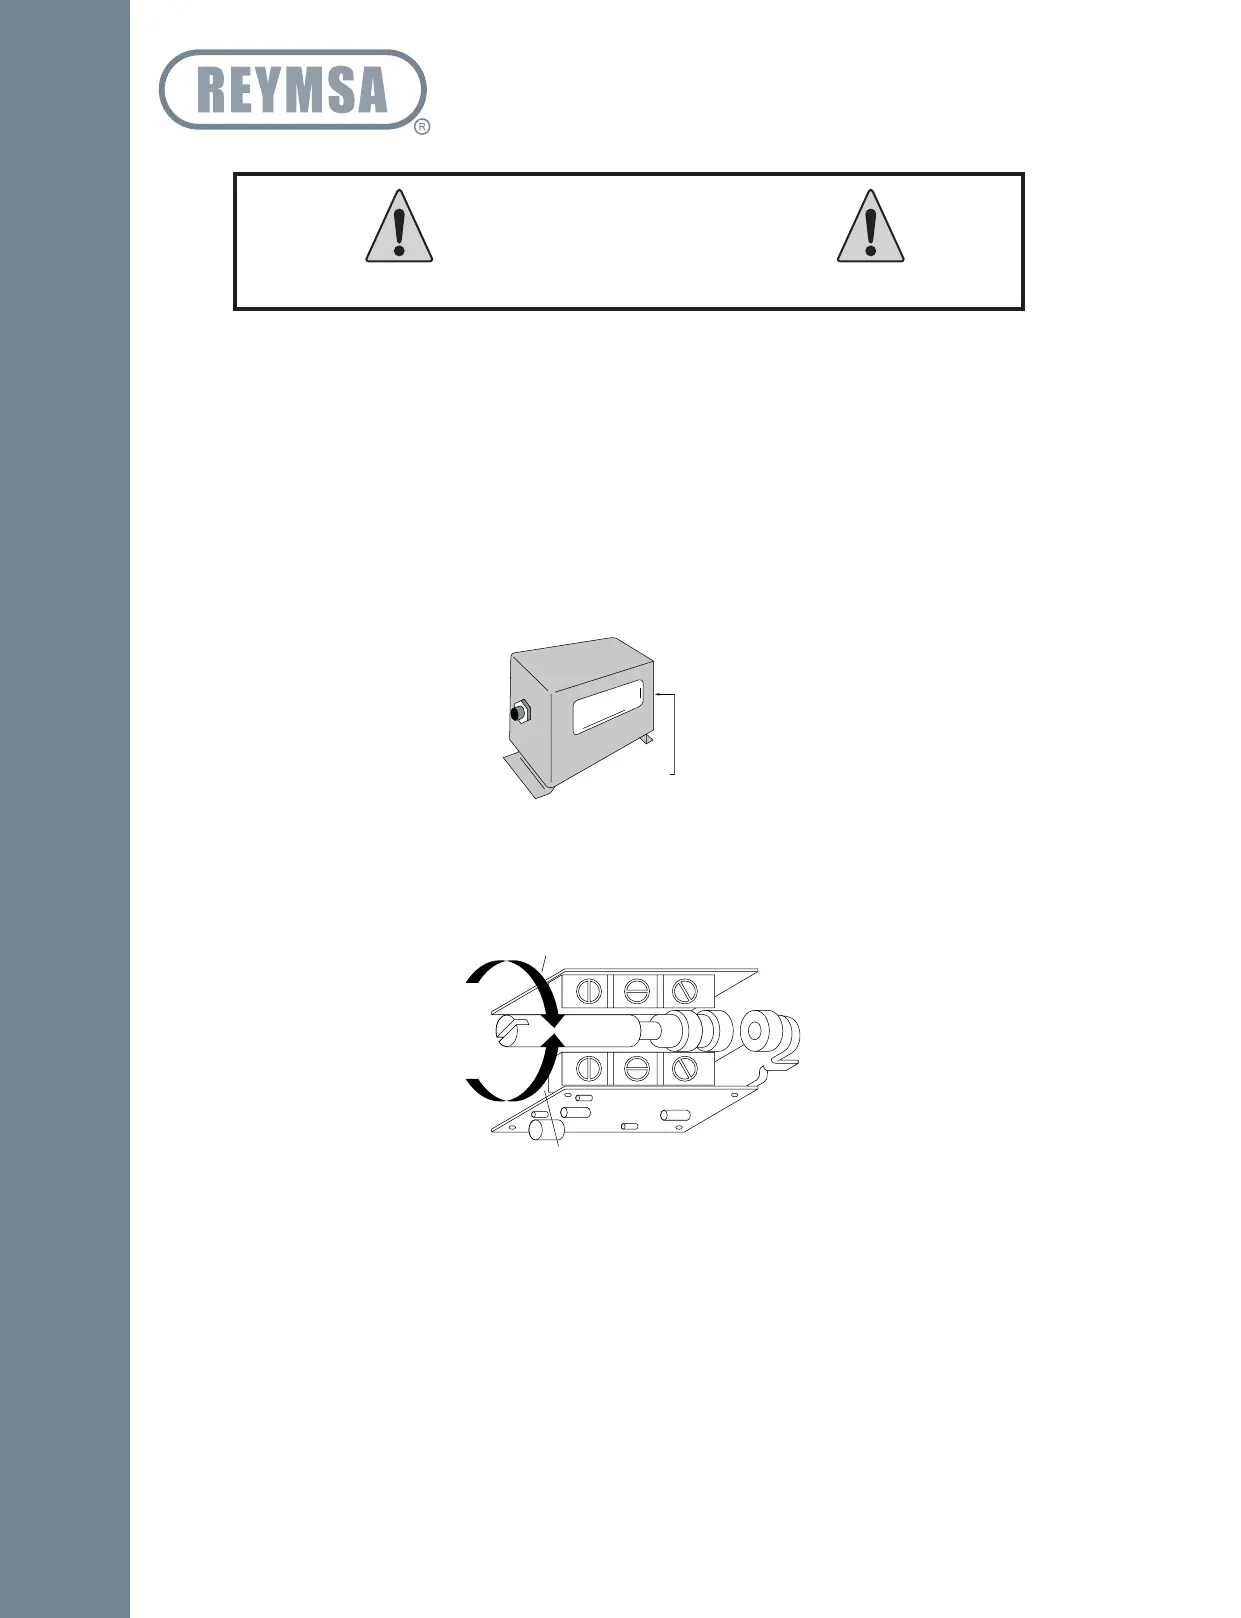
Sensitivity Adjustment
Each vibration switch is adjusted to the specific piece of machinery on which it is installed. After the switch
has been installed, the sensitivity adjustment will be increased or decreased so that the switch does not trip
during start-up or under normal operating conditions. This is typically done as follows:
▪ Remove all covers, lids, and electrical enclosures.
▪ Press the reset push button to engage the magnetic latch. To be sure the magnetic latch has engaged,
observe latch through the window on the vibration switch (see Figure A-107).
▪ Start the fan motor. If the vibration switch trips on start-up, allow the fan motor to stop. Turn the
sensitivity adjustment 1/4 turn clockwise (see Figure A-108): Depress the reset button and restart the
fan motor. Repeat this process until the vibration switch does not trip on start-up.
If the vibration switch does NOT trip on start-up, stop the fan motor. Turn the sensitivity adjustment 1/4
turn counter-clockwise. Repeat the start-up/stop process until the vibration switch trips on start-up. Turn the
sensitivity adjustment 1/4 turn clockwise (less sensitive). Restart the motor to verify that the vibration switch
will not trip on start-up.
▪ At this setting, you should expect the vibration switch will trip when abnormal shock or vibration exist.
▪ Verify the vibration switch sensibility annually to prevent any malfunction.
Do not exceed voltage or current ratings of the contacts.
WARNING
Sensitivity Adjustment
Figure A-107: Vibration Switch detail
Less Sensitive
More Sensitive
Figure A-108: Sensitivity adjustment
Installation