2
Playback Functions
92
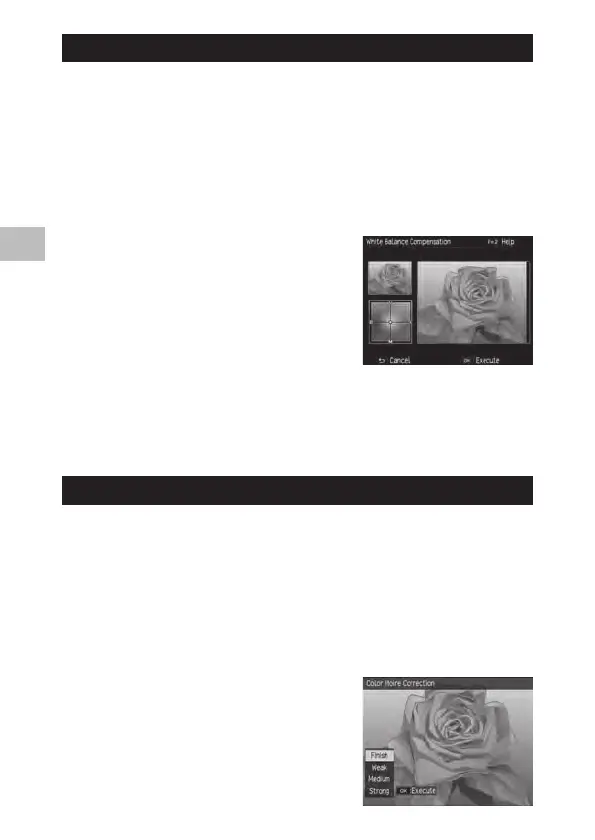
Correcting the White Balance
:PVDBODPSSFDUUIFDPMPSUPOFTPGTUJMMJNBHFT
1 Display the image to correct in playback mode and then press
the MENU/OK button.
The [Playback] menu appears.
2 Select [White Balance Compensation] and then press the $ button.
The [White Balance Compensation] screen appears.
3 Use the !"#$ buttons to adjust the
positions of the points.
To reset the white balance, press the r but-
ton. Pressing the r button again cancels
correction.
If you press the Fn2 button while this screen is
displayed, the operating procedure appears.
Pressing the Fn2 button again redisplays the
original screen.
4 Press the MENU/OK button.
A message appears to indicate processing is being performed, and then the
corrected image is saved as a new image.
Correcting Color Moire
:PVDBOSFEVDFDPMPS JOUFSGFSFODFDBVTFECZSFHVMBSPWFSMBQQJOHQBUUFSOT
in still images.
1 Display the image to correct in playback mode and then press
the MENU/OK button.
The [Playback] menu appears.
2 Select [Color Moire Correction] and then press the $ button.
3 Use the !" buttons to select [Weak],
[Medium], or [Strong] and then press
the MENU/OK button.
A message appears to indicate processing is
being performed, and then the corrected im-
age is saved as a new image.