Operating Progeny Analyzers 26
1006232_RevD
3. Choose an item from the RAD-supplied samples to display a confirmation screen.
4. Select the OK/ARM LASER soft key to display the Performance Verification scan screen
5. Select the Scan soft key to start the sample-analysis cycle.
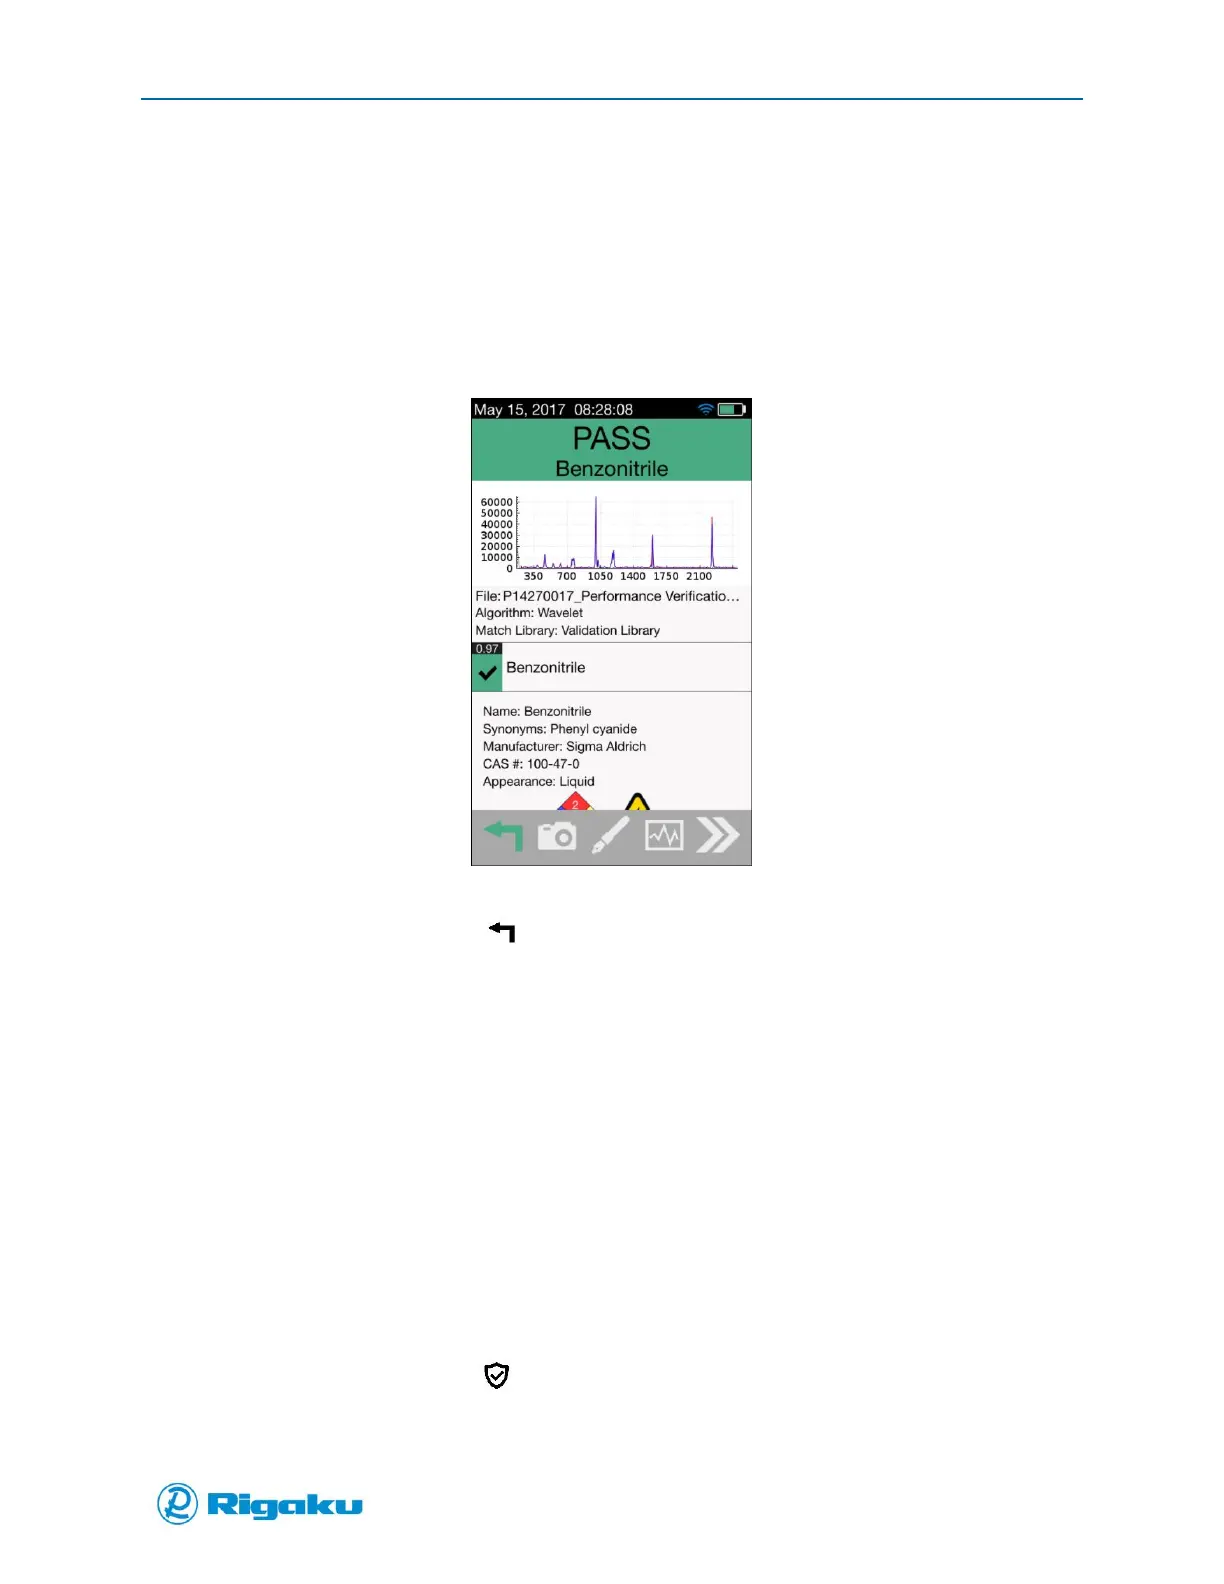
The sample-analysis cycle runs through four phases, (scanning, background, search, results) then
shows the Performance Verification on-screen results for the RAD-supplied sample profile
(Figure 12b).
Figure 12b Performance Verification Result Screen
If the result is Pass, select (Cancel/Back) to return to the Main screen.
Or:
If the result is Fail, calibrate your instrument (see “Instrument Calibration”).
Instrument Calibration
It is not necessary to do an Instrument Calibration unless you run Performance Verification and get a
failing result, or the instrument was recently serviced and/or spectral performance has changed or if
there is a RED checkmark in the shield indicating a Fail for Verification or Calibration. The Instrument
Calibration is usually done as part of the PQ/OQ procedures. The Instrument Calibration is run using a
calibration sample (Benzonitrile) provided by RAD to ensure that your instrument accurately collects and
processes spectral data and resets its Certification Status.
To re-calibrate your instrument for current operating conditions and reset the Certification Status:
1. If your Progeny Analyzer is off, power on (see “Powering On”) and log in (see “Using Instrument
with Login”) to a user account.
2. From the Main screen, select (Calibration) from the left corner of the action bar (Figure 10).
The Select Method screen shows the calibration options (Figure 11).
 Loading...