MONTAGGIO
SALVA
AGO
E
SPINGI
AGO
SU
TESTE
SERiE
264
AD
1
AGO
Montare il salva ago A sul basamento avvitando senza stringere, le due viti B (fig.
36).
Con barra ago
tutta
in basso, controllare
che
la cruna dell'ago si trovi nella
posizione
indicate
in fig.
37.
Verificare inoltre
che
quando
la
punta
del
crochet
entra
neH'incavo deH'ago, questo
sfiori
con
la
punta
la parte piana del salva ago (fig. 38).
Serrare
quindi le viti B:
Montare sul salva ago lo spingi asola C (fig. 36) mediante la vite B senza stringere a
fondo.
Portare I'ago infilato al
punto
morto
inferiore e, accostandolo allo spingi asola,
controllare
che
il
filo
scorra
liberamente.
Bloccare
lo spingi
asola
con
la
vite
D.
FITTING
OF
FRONT
AND
REAR
NEEDLE
GUARDS
ON
CLASS
264
1-NEEDLE
MACHINES
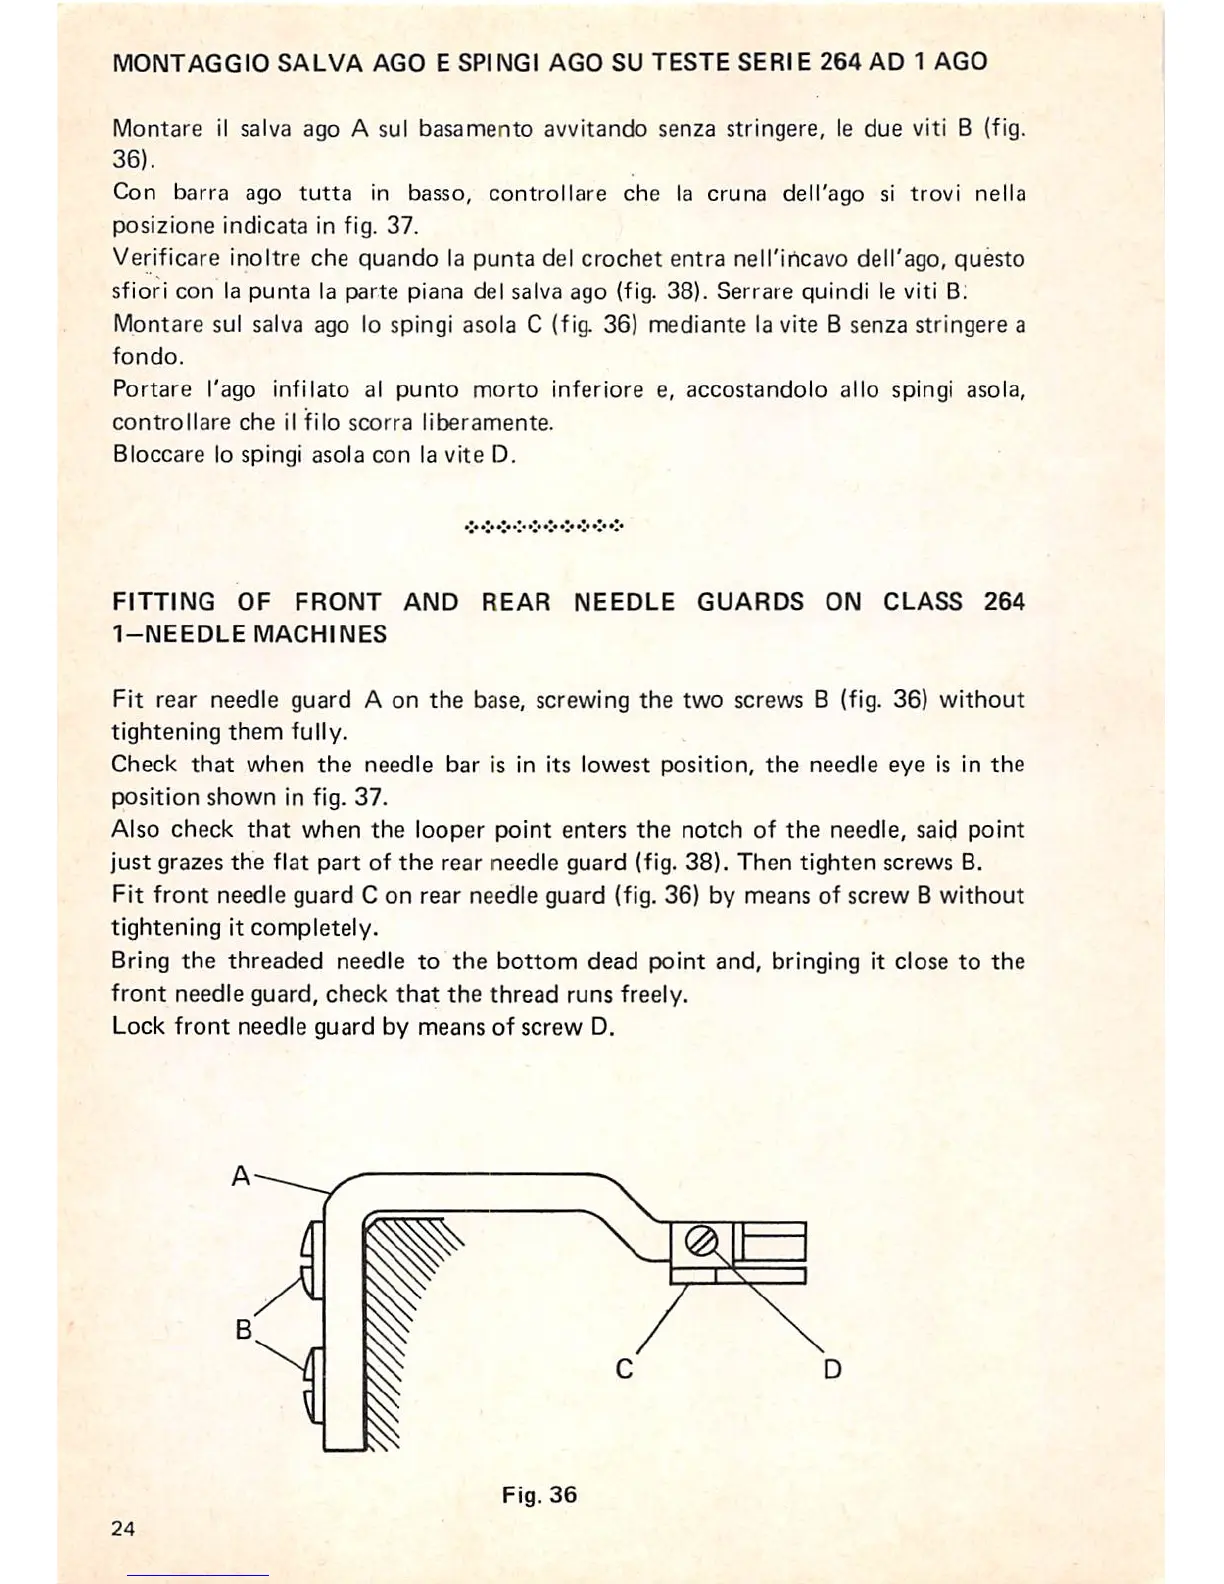
Fit rear needle guard A on
the
base, screwing
the
two screws B (fig. 36)
without
tightening
them
fully.
Check
that
when
the
needle
bar
is in its
lowest
position,
the
needle
eye
is in
the
position
shown
in fig.
37.
Also
check
that
when
the
looper
point
enters
the
notch
of
the
needle,
said
point
just
grazes
the
flat
part
of
the
rear needle guard (fig. 38).
Then
tighten
screws B.
Fit
front
needle guard C on rear needle guard (fig. 36) by means of screw B
without
tightening
it
completely.
Bring
the
threaded
needle
to
the
bottom
dead
point
and,
bringing it
close
to
the
front
needle
guard,
check
that
the
thread
runs
freely.
Lock
front
needle
guard
by
means
of
screw
D.
Fig.
36
24