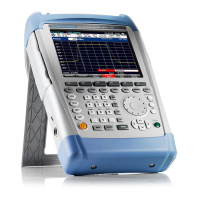
Connecting Printers R&S FSH3
Connecting Printers
The R&S FSH3 can output a screen shot to a printer equipped with an RS232 interface. Use the
Serial/Parallel Converter R&S FSH-Z22 for printers with a parallel interface.
A printer with an RS232 interface can be directly connected using the RS232 optical interface cable
supplied. If the R&S FSH-Z22 is used, its RS232 optical cable is connected to the R&S FSH3’s optical
interface, freeing up the Centronics parallel interface to connect a printer.
¾ Fold out the support at the rear of the
R&S FSH3.
¾ Connect the optical connector of the
RS-232 cable to the optical interface
on the right-hand side of the
R&S FSH3.
¾ Connect the 9-pin D-Sub connector of
the cable to the RS-232 input of the
printer.
Optical RS-232
interface
RS-232 cable
9-pin
connector
Connect printers with a parallel interface to the R&S FSH3 using the Serial/Parallel Converter
R&S FSH-Z22, freeing up the Centronics parallel interface to connect a printer. The R&S FSH-Z22 is
powered by a 9 V alkaline battery (NEDA, IEC6LR61).
¾ Fold out the support at the rear of the
R&S FSH3.
¾ Connect the optical connector of the
R&S FSH-Z22 to the optical interface
on the right-hand side of the
R&S FSH3.
¾ Connect the printer cable to the 25-
pin interface of the R&S FSH-Z22.
¾ Switch on the serial/parallel converter
using the slide switch on its top.
Slide switch positions:
OFF The R&S FSH-Z22 is off.
ON The R&S FSH-Z22 is on, and
the Battery OK LED flashes.
AUTO OFF The R&S FSH-Z22 is on, and
the Battery OK LED flashes. If
data transmission is interrup-
ted for more than 5 minutes,
the R&S FSH-Z22 is switched
off automatically.
Optical RS-232
interface
R&S
FSH-Z22
While data is transmitted to the printer, the "Busy" LED lights up.
1145.5973.12 1.16 E-6

 Loading...
