48
Convenient functions (Utility)
3.
Press the [f4]
(NEXT)
button.
4.
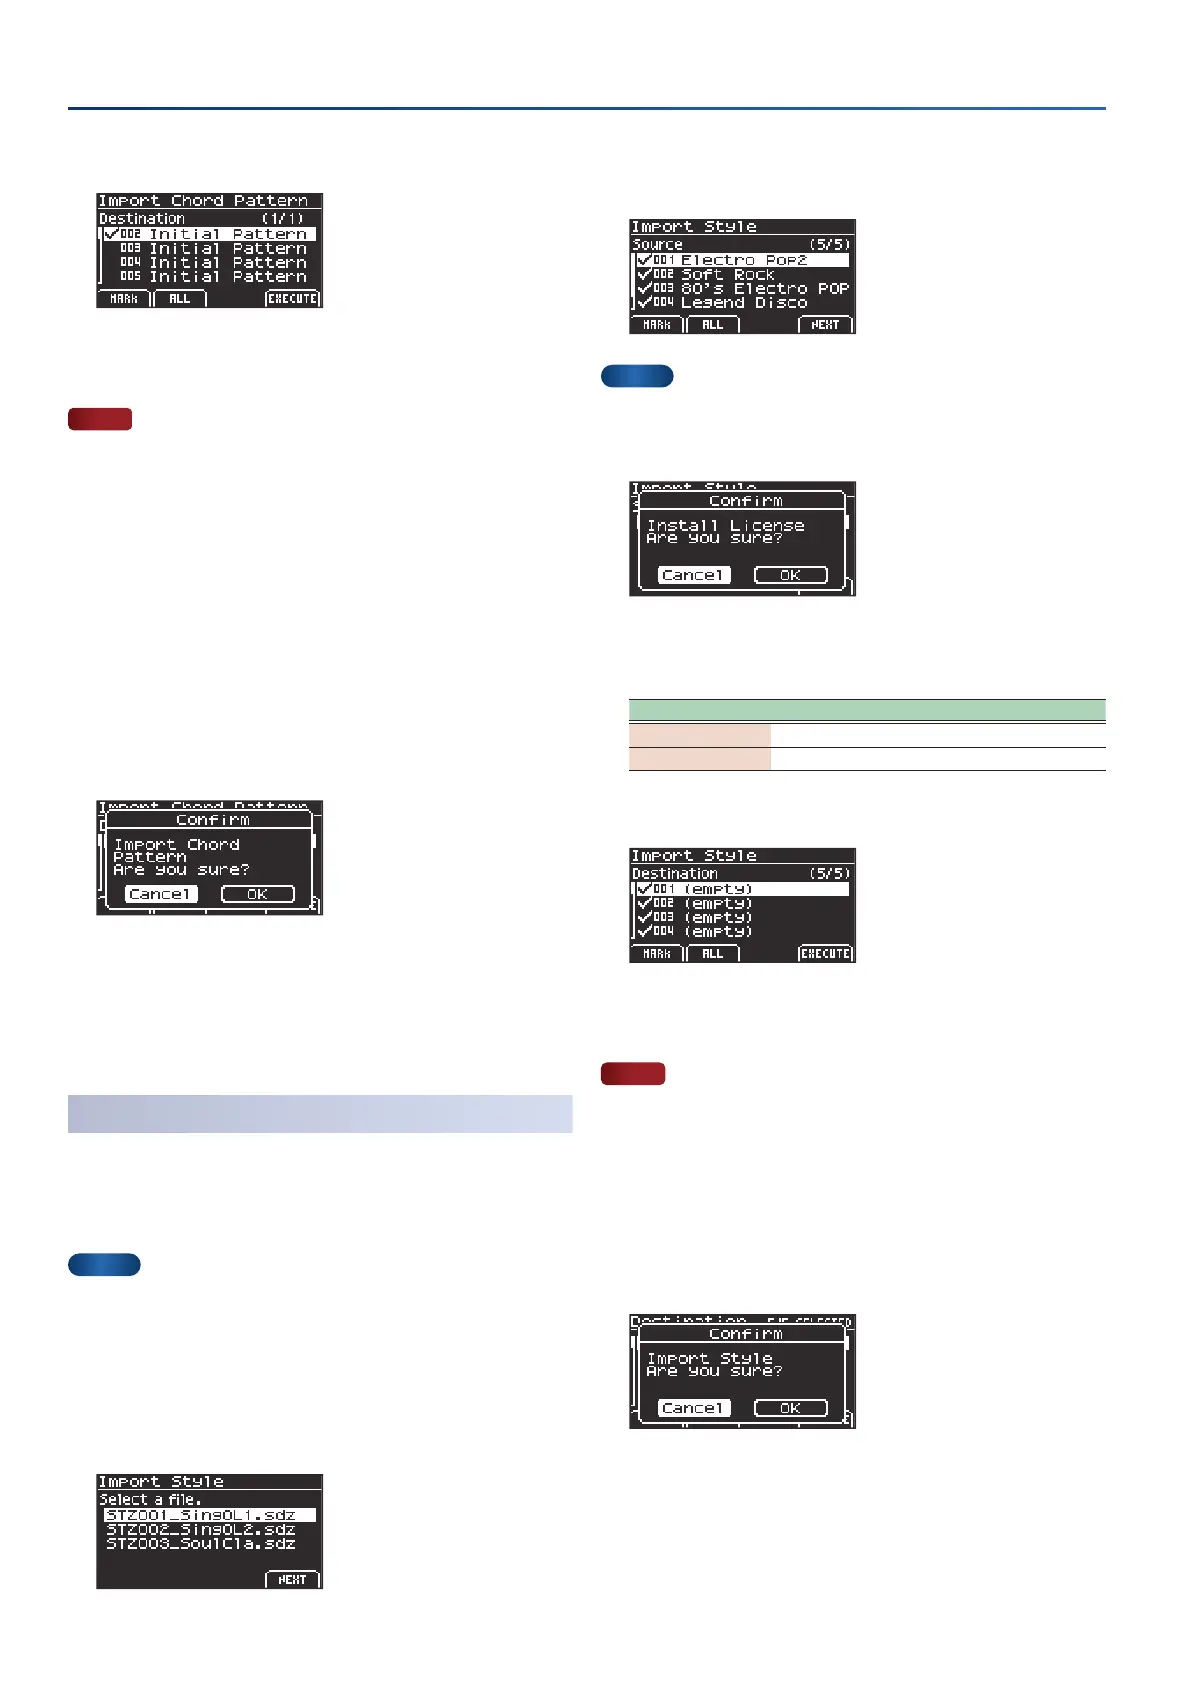
Add a check mark to the import destination using the
[f1] [f2] buttons.
NOTE
¹
Use caution, as this overwrites the chord patterns selected in the
import destination.
¹
The number of chord patterns is shown at the top right-hand part
of the screen.
¹
If a chord pattern named “Initial Pattern” already exists, this is
automatically selected as the import destination chord pattern with
a check mark.
¹
Even if a chord pattern named “Initial Pattern” already exists, it is
automatically selected as the import destination chord pattern,
even it was previously edited. If you don’t want to overwrite a chord
pattern, clear the check mark.
5.
Press the [f4]
(EXECUTE)
button.
A conrmation message appears.
6.
Use the cursor [ÌÌ] [ÊÊ] buttons to select “OK”, and press
the [enter] button.
If you decide to cancel, select “Cancel” and press the [enter] button.
Once the data is saved, the message “Completed” is shown and the
display returns to the Import Menu screen.
Importing a style (Import Style)
You can import the Style Packs that you’ve downloaded from
Roland Cloud into the User Bank for the styles.
*
See the Roland Cloud User’s Guide (Roland website) for details on
how to get the Style Packs.
MEMO
Save the style le you wish to import to the STYLE folder of your
USB ash drive, and connect the USB ash drive to the GO:KEYS.
Ø
“USB ash drive folder architecture” (p. 50)
1.
On the Import Menu screen, select “Style” and press the
[enter] button.
The Import Style screen appears.
2.
Use the dial to select the le, and press the [f4]
(NEXT)
button.
MEMO
If this is the rst time to import data, a screen appears that asks
you to install the license.
To install, select “OK” and press the [enter] button.
3.
Add a check mark using the [f1] [f2] buttons to the
styles you want to import.
Controller Explanation
[f1]
(MARK)
Marks the selected item and selects the next item.
[f2]
(ALL)
Marks all items.
4.
Press the [f4]
(NEXT)
button.
5.
Add a check mark to the import destination using the
[f1] [f2] buttons.
NOTE
¹
This overwrites the styles selected in the import destination.
¹
You can check the number of styles at the top right-hand part of
the screen.
¹
The styles shown as “(empty)” in the import destination are
automatically selected with a check mark.
6.
Press the [f4]
(EXECUTE)
button.
A conrmation message appears.
7.
Use the cursor [ÌÌ] [ÊÊ] buttons to select “OK”, and press
the [enter] button.
If you decide to cancel, select “Cancel” and press the [enter] button.
Once the data is saved, the message “Completed” is shown and the
display returns to the Import Menu screen.
 Loading...