Editing a Live Set
57
Introduction Playing Sounds Editing Sounds
Other Convenient
Functions
Connecting Other
Equipment
Appendix
MEMO
If a Live Set has been edited, a check mark (red) will appear at
the right of the Live Set name.
Adjusting the Tones
By touching <EDIT> of each layer in the Live Set screen (p. 32),
you can adjust the Tones assigned to each layer (the Live Set
Modify screen will appear).
For details, refer to “Editing the Tones Assigned to a Layer”
(p. 60).
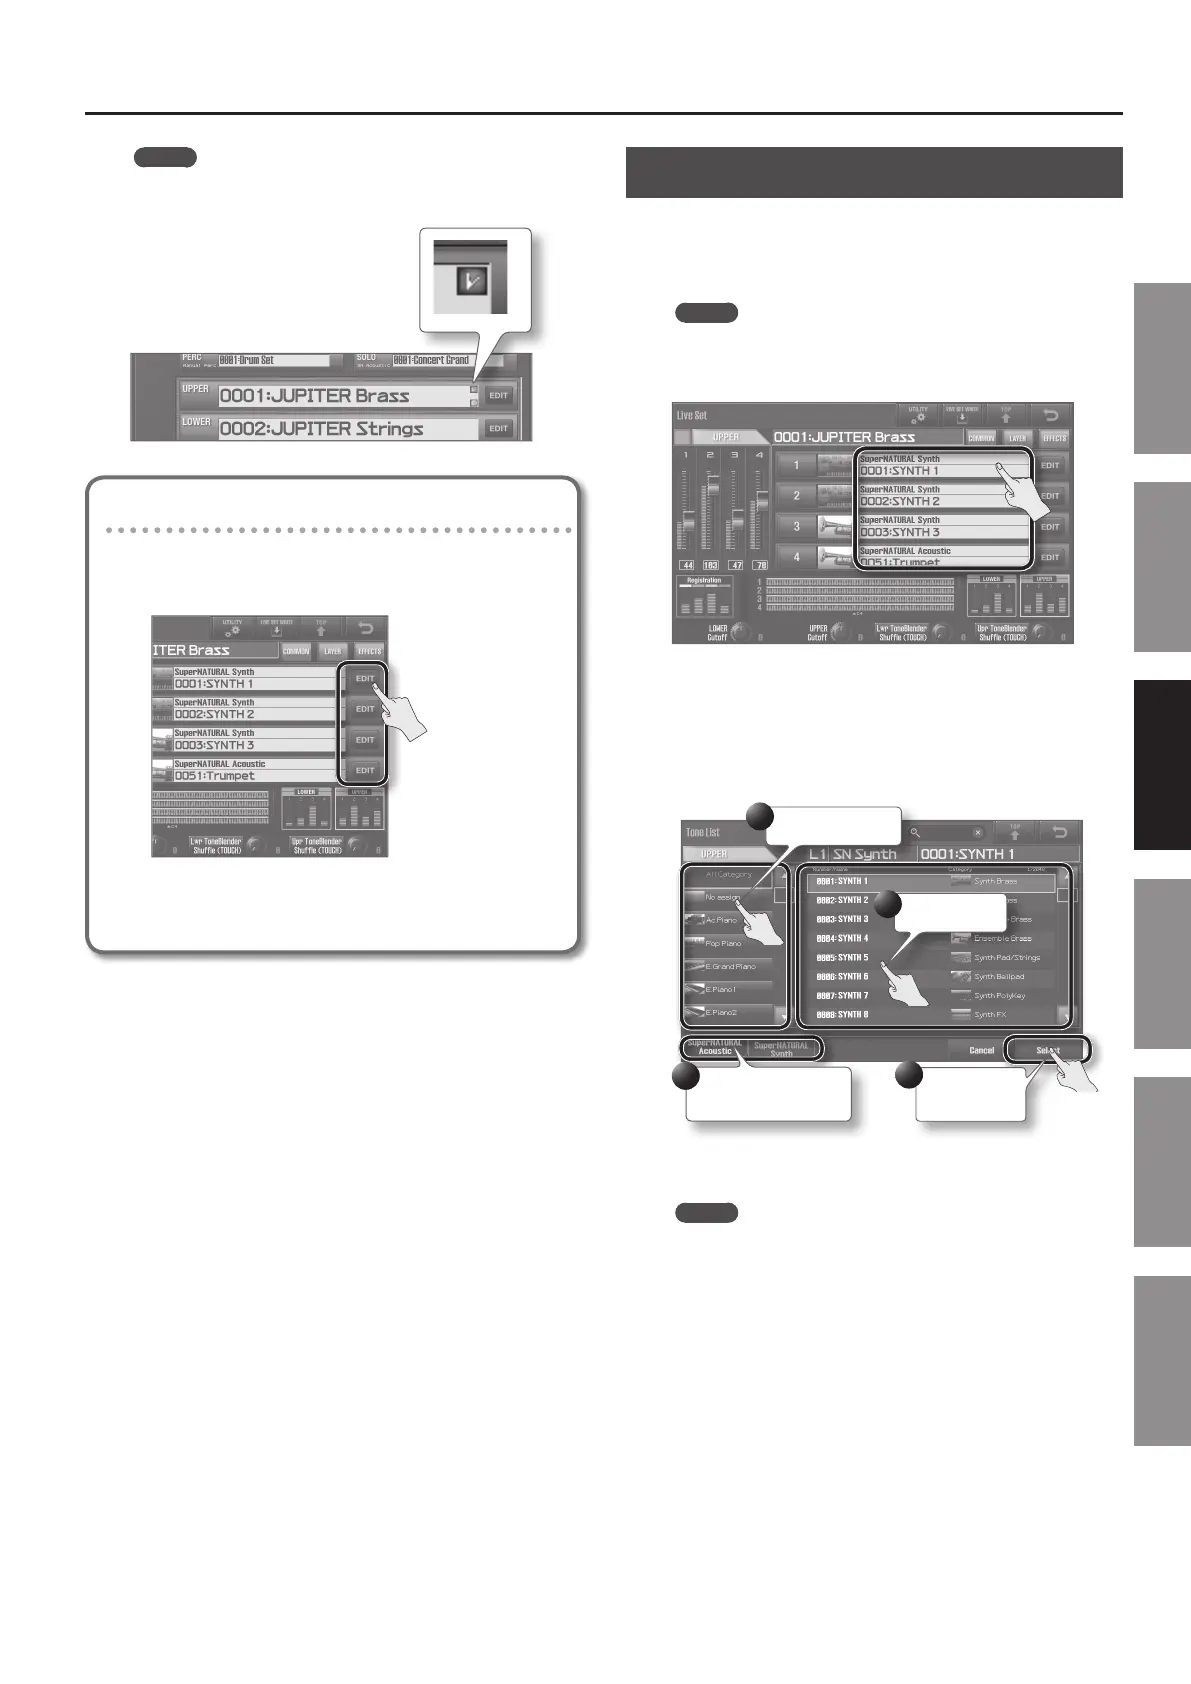
Changing a Live Set’s Tones
Here’s how to change the Tones in a Live Set.
1. In the Live Set screen (p. 32), touch a tone name to view a
list.
MEMO
You can also switch tones by moving the cursor to the tone
name in the Live Set screen, and using the value dial or the
[DEC] [INC] buttons to select a Tone.
The Tone List screen will appear. In this example, the Tone for layer 1
of the Live Sets assigned to the Upper Part is changed.
2. Touch the new tone, and then touch <Select>.
The left column lists the tone categories, and the right column lists
the Tones in the selected category.
Select a category.
Select a Tone.
Conrm your
selection.
2
3
4
Select the type of tone.
1
The Tone will change.
MEMO
The SuperNATURAL Acoustic Tone 0028: TW Organ can be
assigned only to layer 1.

 Loading...


