Using the USB Memory Song Player/Recorder
77
Introduction Playing Sounds Editing Sounds
Other Convenient
Functions
Connecting Other
Equipment
Appendix
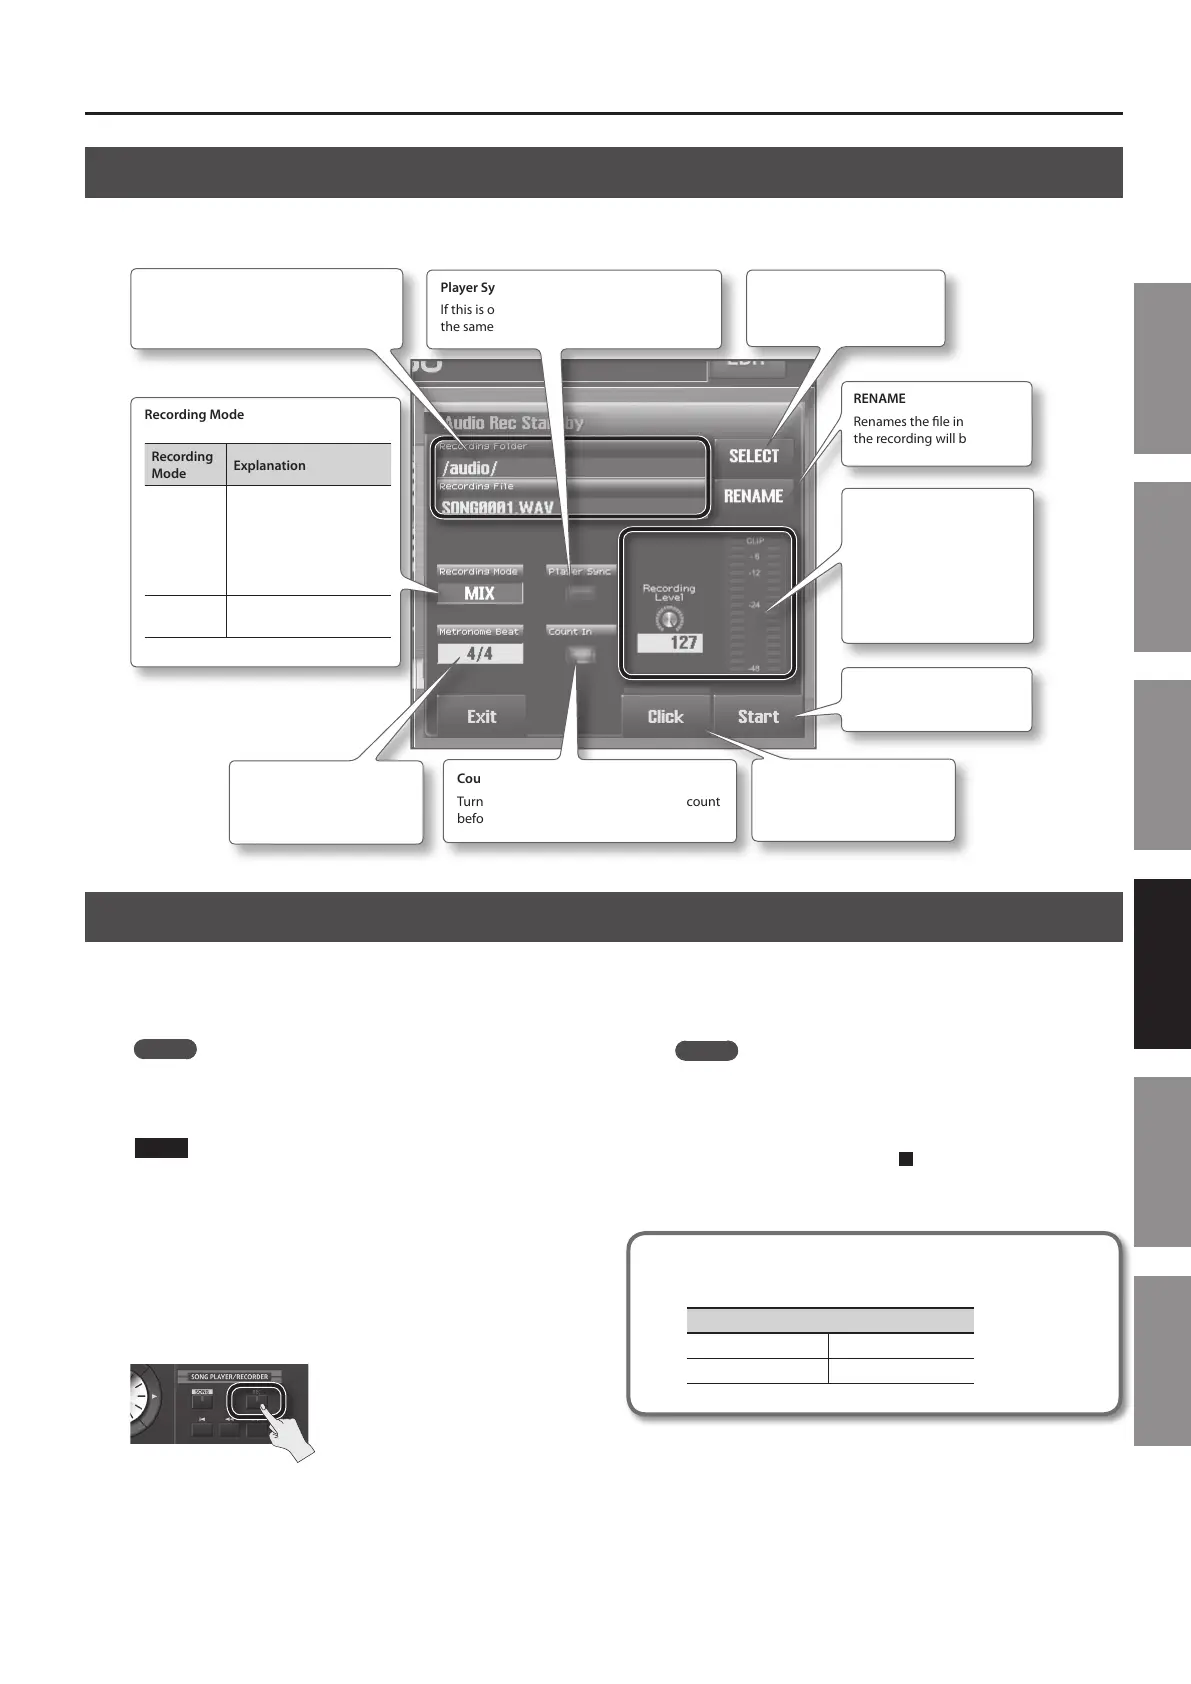
Basic Operations in the Audio Rec Standby Screen
When you press the [REC] button, the Audio Rec Standby screen will appear.
Here you can make settings for recording.
RENAME
Renames the le in which
the recording will be saved.
Start
Recording will begin.
Recording Mode
Recording
Mode
Explanation
MIX
Sound from the keyboard,
the USB COMPUTER port,
the AUDIO IN jack, and
the playback from the USB
memory song player will
be recorded.
KEYBOARD
Sound from the keyboard
will be recorded.
Count In
Turn this on if you want a two-measure count
before recording (the button will light).
Metronome Beat
Species the time signature
of the click sound.
Click
Switches on/o the click
sound during recording.
Player Sync
If this is on, audio le playback will begin at
the same moment that recording begins.
Recording Level Knob/
Level Meter
Use the Recording
Level knob to adjust the
recording level so that the
CLIP indicator of the level
meter does not light.
SELECT
Changes the folder in which
the recording will be saved.
Recording Folder/Recording File
Indicates the name of the folder and le
in which the recorded result will be saved.
Recording
Your keyboard performance can be recorded to a USB ash drive.
The audio being input via the JUPITER-80’s AUDIO IN jack and USB
COMPUTER connector can also be recorded.
MEMO
Sounds for which the Output Assign MAIN OUT check box
is selected (p. 86) will be recorded (except for the metronome
sound).
NOTE
While the Audio Rec Standby screen is displayed, you must not
turn o the JUPITER-80’s power, or disconnect or connect your
USB ash drive.
Also, you must not turn o the JUPITER-80’s power or disconnect
or connect the USB ash drive while recording.
If you do so, the data might not be written correctly, or the
contents of memory might be destroyed.
1. Press the [REC] button.
The Audio Rec Standby screen will appear.
2. Make the recording settings, and then touch <Start>.
The [REC] button and [PLAY] button will light, and recording will
begin.
MEMO
• One minute of recorded data will occupy approximately 10 MB.
• To see how much free space remains on the USB ash drive,
refer to “INFORMATION” (p. 87).
3. To stop recording, press the [
] (STOP) button.
Recording will stop, and the recorded result will be saved on the
USB ash drive.
Audio les that will be saved
WAV
Sampling Frequency 44.1 kHz
Bit Rate 16-bit