15
Getting Ready
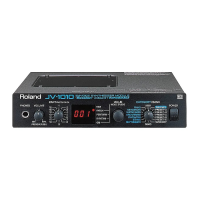
Getting Ready
2
Connect the supplied AC adaptor to the RS-5/9, and then plug
its other end into a power outlet.
3
Connect the RS-5/9 and the external device as shown in the
figure.
Use audio cables to connect audio equipment, such as an amp or speakers.
If you are using headphones, plug them into the PHONES jack. Connect
pedal switches or expression pedals as necessary.
Turning On the Power
1
Before turning on the RS-5/9’s power, make sure that:
• Are all devices connected properly?
• Are the volume controls of the RS-5/9 and the other connected
equipment turned to the minimum position?
• Is the AC adapter correctly connected to the RS-5/9?
2
Press the RS-5/9’s power switch on the rear panel to turn on
the power.
fig.Q-02
3
Turn on the power of the connected audio devices.
• CONTROL PEDAL jack
can also accommodate
pedal switches.
• In order to take full
advantage of the RS-5/9’s
performance, we
recommend using a
stereo amp/speaker
system, If you are using a
mono system, make you
connections to the
OUTPUT jack L (MONO).
When you want to how to make the connections for use with another
external device
•“Playing Sounds from an External MIDI Sound Generator With the RS-5/9” (p. 120)
•“Playing the RS-5/9’s Sound Generator from an External MIDI Device” (p. 122)
• “Recording to an External Sequencer” (p. 124)
• “Enjoying Computer Music” (p. 126)
Once the connections have
een completed (p. 14),
turn on power to your
various devices in the order
specified. By turning on
devices in the wrong order,
you risk causing
malfunction and/or
damage to speakers and
other devices.
This unit is equipped with
a protection circuit. A brief
interval (a few seconds)
after power up is required
efore the unit will operate
normally.
 Loading...