22
Editing a Kit’s Settings (KIT Edit)
Here’s how to edit the settings of the currently selected kit.
* If you want to keep the edited kit settings, you must save the kit
(p. 29).
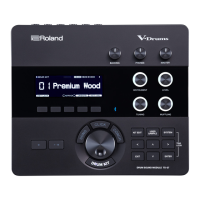
1. Hold down the [SHIFT] button and press the [KIT]
button.
The KIT Edit screen appears.
2. Select a parameter.
2-1. Use the [VALUE] knob to select a parameter.
2-2. Press the [ENTER] button.
Proceed to editing the parameter value (step 3).
3. Modify values.
3-1. Use the [VALUE] knob to edit the parameter value.
3-2. Press the [ENTER] button.
Return to selecting a parameter (step 2).
4. Press the [KIT] button.
Exit the KIT Edit screen.
KIT
Parameter Value Explanation
Level
-INF, -53.0dB–
0.0dB–+10.0dB
Specifies the volume of the kit.
KIT: REVERB
Parameter Value Explanation
Type
AMBI, ROOM,
HALL1, HALL2,
PLATE, MOD
Selects the type of reverb.
Time
[KIT]+ REVERB
[LEVEL]
0–255 Specifies the reverb time.
Level
REVERB [LEVEL]
OFF, 1–255 Specifies the volume of the reverb.
Pre Delay 0ms–100ms
Adjusts the time until the reverb
sound appears.
Selecting kits (KIT)
Here’s how to select kits.
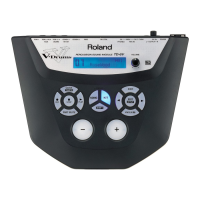
1. Press the [KIT] button to make it light.
The KIT screen appears.
If the kit is being edited, an “*” is shown at the left side of the kit
number.
2. Use the [VALUE] knob to select a kit.
3. Press the [KIT] button once again.
The [KIT] button goes dark, and you exit the KIT screen.
Copying a kit (KIT COPY)
1. Hold down the [COPY] button and press the [KIT]
button.
The KIT COPY screen appears.
2. Use the [VALUE] knob to select the copy-source,
and press the [ENTER] button.
3. Use the [VALUE] knob to select the copy-
destination, and press the [ENTER] button.
A confirmation message appears.
4. To copy, use the [VALUE]knob to select “O K ,” and
press the [ENTER] button.
If you decide to cancel, use the [VALUE] knob to select “Cancel,”
and then press the [ENTER] button.
Grouping instruments
You can create a group of multiple instruments and play their
layered sound with a single note.
You can use grouped master instruments in the following ways. The
slave instrument follows the master instrument.
5 Pattern input in “TR-REC”
5 Pad performance in “INST PLAY”
5 Pad recording in “INST REC”
1. Hold down the [SHIFT] button and press the [KIT]
button.
2. Long-press the [BD]–[RC] button that you want to
specify as the master instrument.
The INST GROUP screen appears.
3. While holding down the button that you pressed
in step 2, press the [BD]–[RC] button that you want
to specify as the slave instrument.
The instruments that you selected as the master instrument and
the slave instrument are grouped.
MEMO
5 During TR-REC, when you press a grouped [BD]–[RC] button,
the [BD]–[RC] button of the master instrument (
) lights
and the [BD]–[RC] button of the slave instrument ( ) blinks.
5 During INST PLAY/INST REC, pressing a pad [1]–[11] of a
grouped slave instrument does not produce sound.
5 If you press the [MUTE] button, the same group’s master
instrument’s [BD]–[RC] button lights and the slave
instrument’s [BD]–[RC] button blinks.
 Loading...