44
Initializing, Backing-Up, Restoring
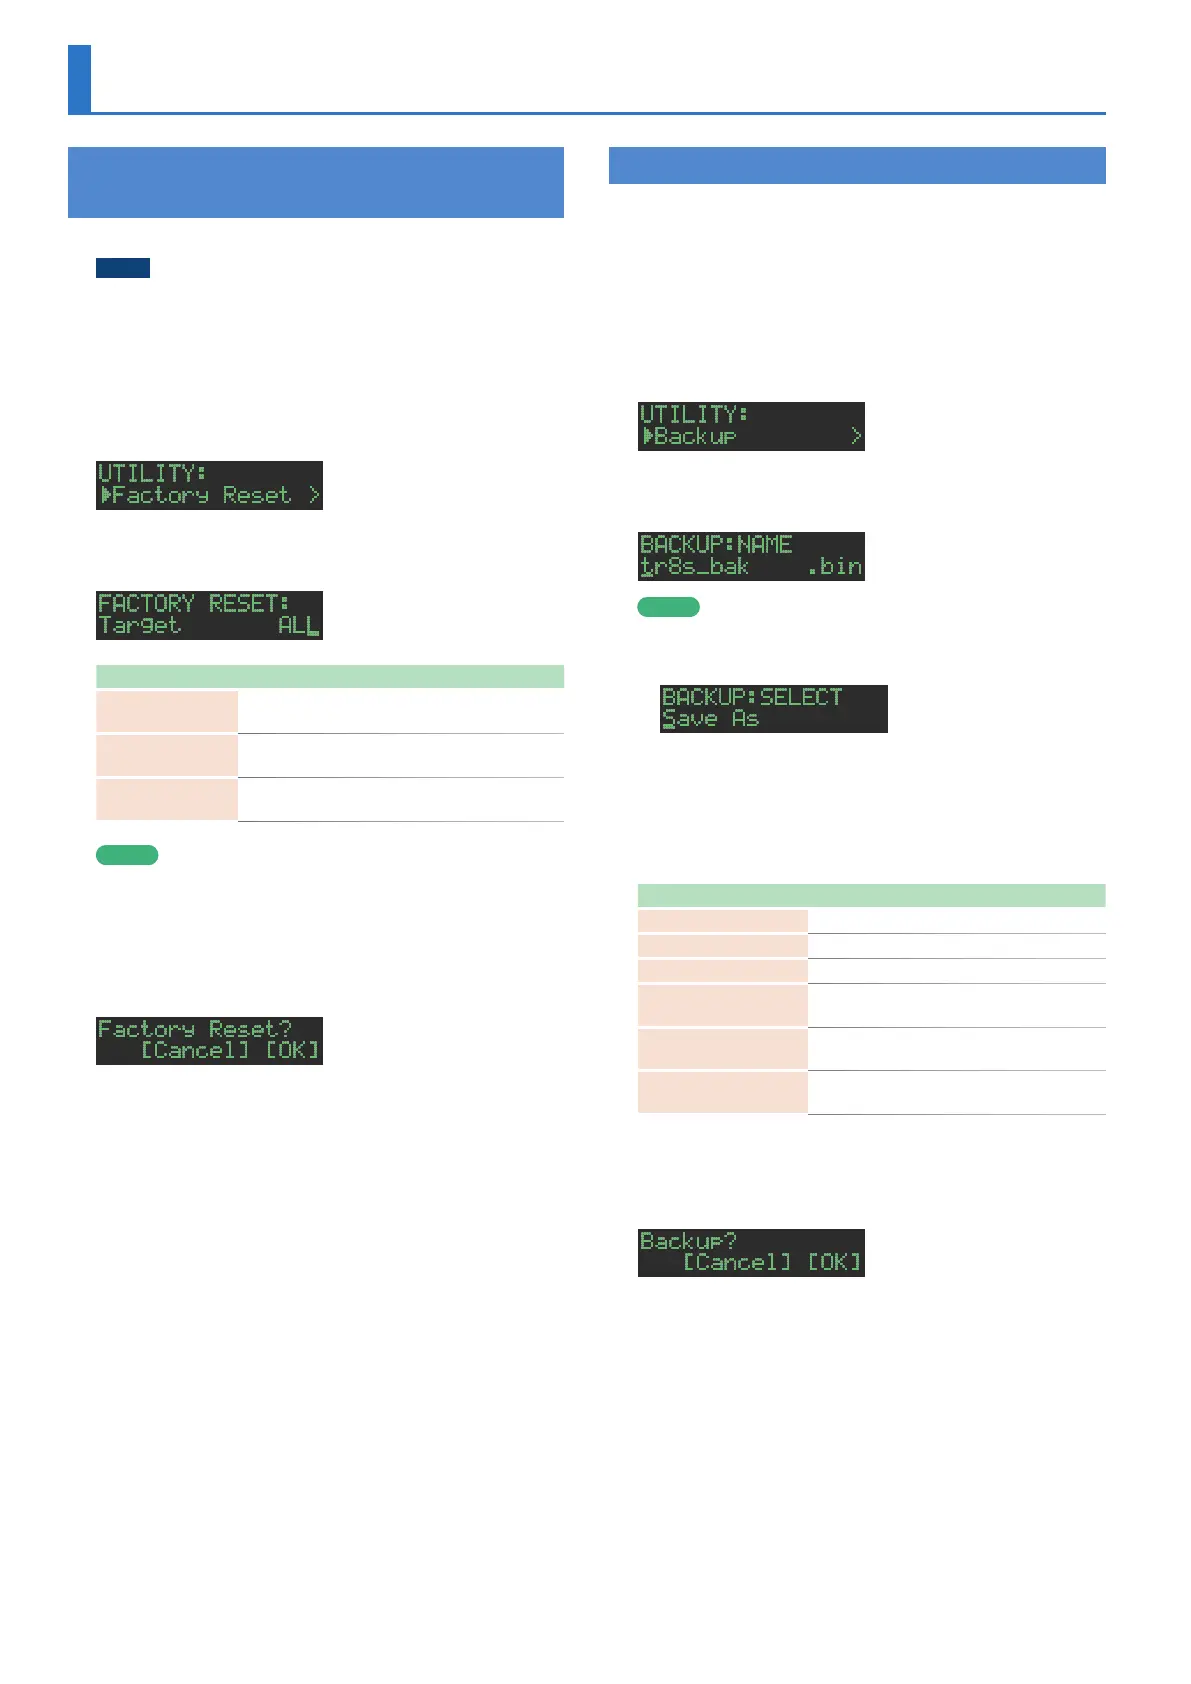
Returning to the Factory Settings
(FACTORY RESET)
Here’s how to return the TR-8S to its factory-set state.
NOTE
Be aware that when you execute FACTORY RESET: ALL, the user
sample tones and user sample data are also erased.
1. Press the [UTILITY] button to make it light.
The UTILITY screen appears.
2. Use the [VALUE] knob to select “UTILITY: Factory
Reset.”
3. Press the [ENTER] button.
The target selection screen appears.
Target Explanation
ALL
Returns all settings including patterns and kits
to their factory-set state.
KIT
Returns only the kit settings to their factory-set
state.
PTN
Returns only the patterns to their factory-set
state.
MEMO
You can also access the target select screen by holding down
the [CLEAR] button while you turn on the power.
4. Use the [VALUE] knob to select the target, and
press the [ENTER] button.
A confirmation message appears.
5. To execute, use the [VALUE] knob to select “O K ,”
and press the [ENTER] button.
If you decide to cancel, use the [VALUE] knob to select “Cancel,”
and then press the [ENTER] button.
6. When the display indicates “Completed. Turn off
p o w e r.” turn the TR-8S’s power off and on again.
Backing Up Data to SD Card (BACKUP)
* If you want to make a backup, save the data (patterns, kits, system
settings) before you proceed. The backup will not include the pattern
or kit that you’re currently editing (shown by an “*” indication) or
system settings that you have not saved.
1. Insert the SD card into the TR-8S.
2. Press the [UTILITY] button to make it light.
The UTILITY screen appears.
3. Use the [VALUE] knob to select “UTILITY: Backup.”
4. Press the [ENTER] button.
The BACKUP:NAME screen appears.
MEMO
If a backup file already exists, the BACKUP:SELECT screen
appears.
To overwrite-save, select the existing backup file and press the
[ENTER] button.
If you select Save As and press the [ENTER] button, the
BACKUP:NAME screen appears.
5. Edit the name if necessary.
Controller Explanation
[VALUE] knob Change the character.
[UTILITY] button Moves to the right.
[COPY] button Moves to the left.
[SHIFT] button
+[COPY] button
Deletes one character (Erase).
[SHIFT] button
+[UTILITY] button
Inserts one character (Insert).
[SHIFT] button
+[VALUE] knob
Switches between uppercase/lowercase/
numerals.
6. When you’ve finished inputting characters, press
the [ENTER] button.
A confirmation message appears.
7. To execute, use the [VALUE] knob to select “O K ,”
and press the [ENTER] button.
If you decide to cancel, use the [VALUE] knob to select “Cancel,”
and then press the [ENTER] button.
 Loading...