Configuration
EVQM-V01-R6 Installation and Operation Manual Quantum Intelligent EV Charging Pedestal
December 2023 Page 42 of 52
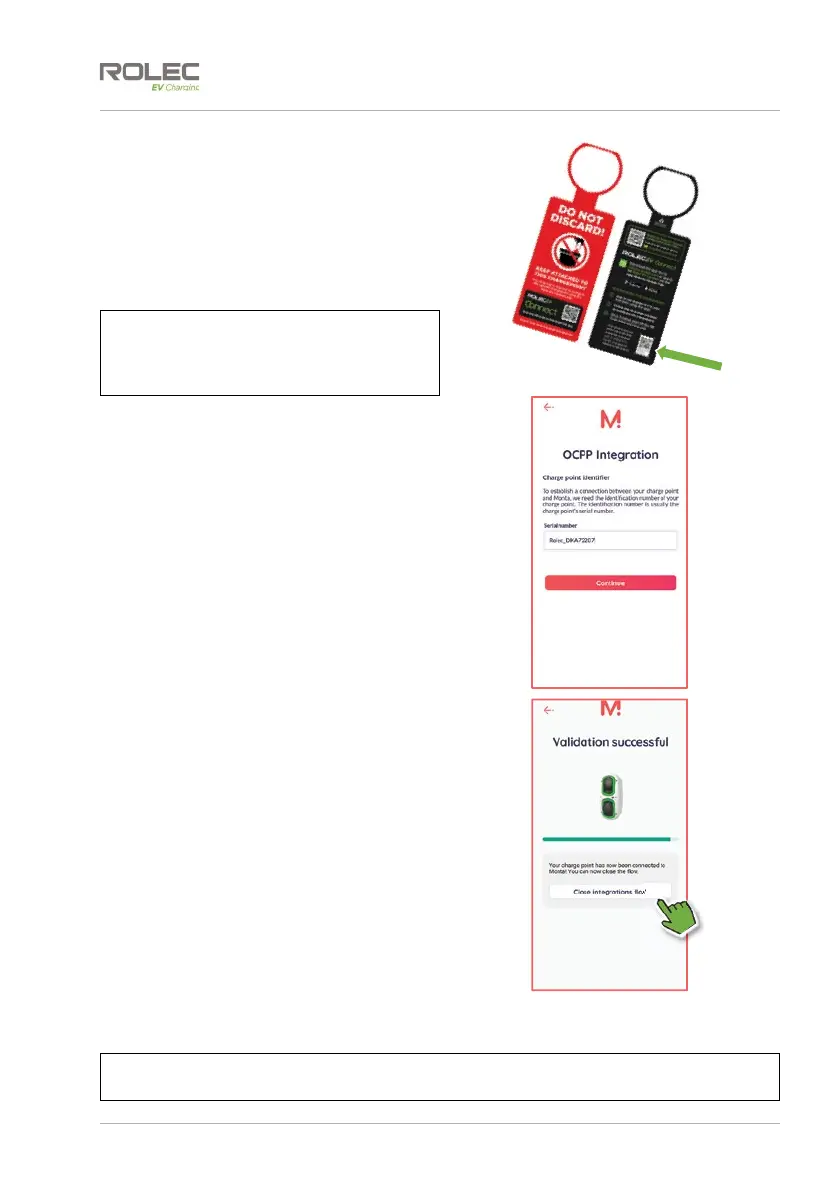
10. Enter the charge point ID/Serial
number.
This number is on a removable label
attached to the red and black
charge point tag or may have been
placed by the installer on the
manual, the property fuse box, or
the installation certificate.
NOTE: The charge point ID/Serial number is
also shown on the product label that is
permanently attached to the charge
point.
11. When the full ID has been entered,
tap Continue.
x A message may be displayed as
a reminder that the charge
point needs to be added to
Monta using a specific web
address. This should have
already been done in the EV
Connect App so the message
can be ignored.
12. If you are happy to proceed, tap
Yes, pair charge point.
The Monta App will use the information
provided in the previous steps and will
attempt to pair the charge point with your
phone application.
In a few seconds the App will report if the
pairing was successful.
13. Tap Close integrations flow.
14. The charge point is now available
for use. From this point you can use
the Monta App to charge a vehicle
or set up schedules for charging.
15. If the charge point has more than
one output (socket or cable) return
to step 2 and repeat the process of
adding the socket or cable to the
Monta App.
NOTE: The red and black configuration tag can now be removed from the charger and
should be saved for future reference.
 Loading...