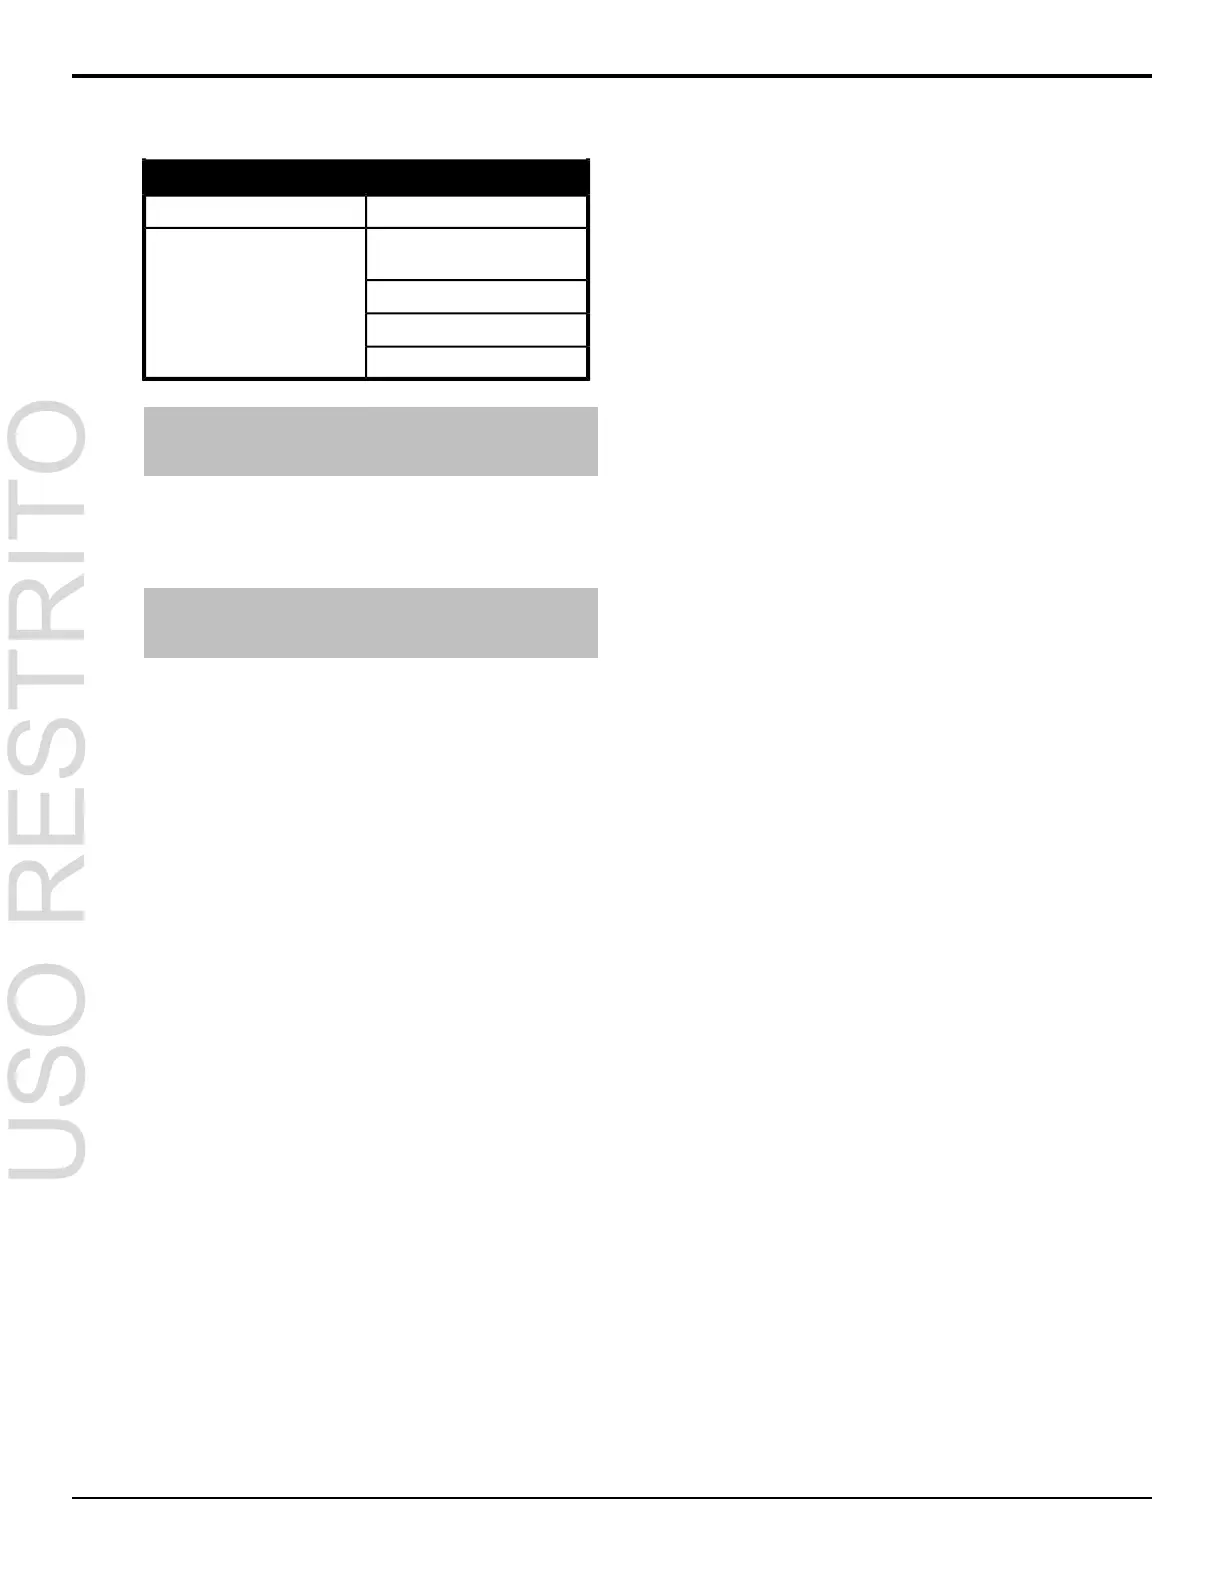
Allowable Input FormatsSwitcher Video Formats
1080p 59.94Hz (HDMI only)
576i 50Hz (aspect ratio
conversion)
576i 50Hz
720p 50Hz
1080i 50Hz
1080p 50Hz (HDMI only)
Note: De-interlacing of video signals marked with an (*) are
only available using the MultiMedia inputs on the Carbonite
MultiMedia.
FSFC For Carbonite Frame
This section provides information for setting up a FSFC
on a Carbonite frame.
Note: The Carbonite frame can be configured to have 6 FSFC
resources, or none. Refer to Switcher Modes on page 39 for
information on resource settings.
To Set Up Input Mode FSFC
Input mode locks a specic FSFC channel to a specic
input. Refer to Supported FSFC Input Mode Video
Formats on page 14 for a list of compatible video format
conversions.
1.
Press MENU > REF > NEXT.
2.
Use the FSFC knob to select the frame
converter/synchronizer channel that you want to
assign to a video input.
3.
Press the FSFC knob.
4.
Use the FSFCx knob to select Input.
5.
Use the Input knob to select the video input you
want to assign the FSFC to.
6.
Use the Frming knob to select aspect ratio
conversion mode you want to use.
The options that are available depend on the
video format that the switcher is converting from
and to.
•
Full — The video signal is scaled
disproportionately to ll the display of the
new aspect ratio. Aspect distortion occurs as
the image is stretched/compressed to t in
the new aspect ratio.
•
Zoom — The central portion of the video
signal is zoomed to ll the display of the new
video format. No aspect distortion is
introduced but the edges of the video signal
may be cropped.
•
LttrBx — Black bars are added to the top
and bottom of a 16:9 image to display
correctly in a 4:3 video format.
•
PllrBx — Black bars are added to the right
and left of a 4:3 image to display correctly
in a 16:9 video format.
7.
Press the Frming knob.
8.
Press the Confrm knob to assign the FSFC
channel.
To Set Up Bus Mode FSFC
Bus mode locks a specied FSFC channel to a specic
bus.
1.
Press MENU > REF > NEXT.
2.
Use the FSFC knob to select the frame
converter/synchronizer channel that you want to
assign to a video input.
3.
Press the FSFC knob.
4.
Use the FSFCx knob to select Bus.
5.
Use the Bus knob to select the bus you want to
assign the FSFC to.
6.
Use the 2ndCh knob to select the second FSFC
channel that you want to pair with the assigned
channel.
In a bus-pair keyer conguration, the rst
channel is used to convert the key video, and the
second channel is used to convert the key alpha.
7.
Press NEXT.
8.
Use the Frming knob to select aspect ratio
conversion mode you want to use.
The options that are available depend on the
video format that the switcher is converting from
and to.
•
Full — The video signal is scaled
disproportionately to ll the display of the
new aspect ratio. Aspect distortion occurs as
the image is stretched/compressed to t in
the new aspect ratio.
•
Zoom — The central portion of the video
signal is zoomed to ll the display of the new
video format. No aspect distortion is
introduced but the edges of the video signal
may be cropped.
•
LttrBx — Black bars are added to the top
and bottom of a 16:9 image to display
correctly in a 4:3 video format.
Carbonite Setup Manual (v10.0) — Video Reference • 15

 Loading...


