EB 8384-2 EN 71
Mounting and start-up
5.9.1 Reversing amplier
(1079-1118 or 1079-
1119)
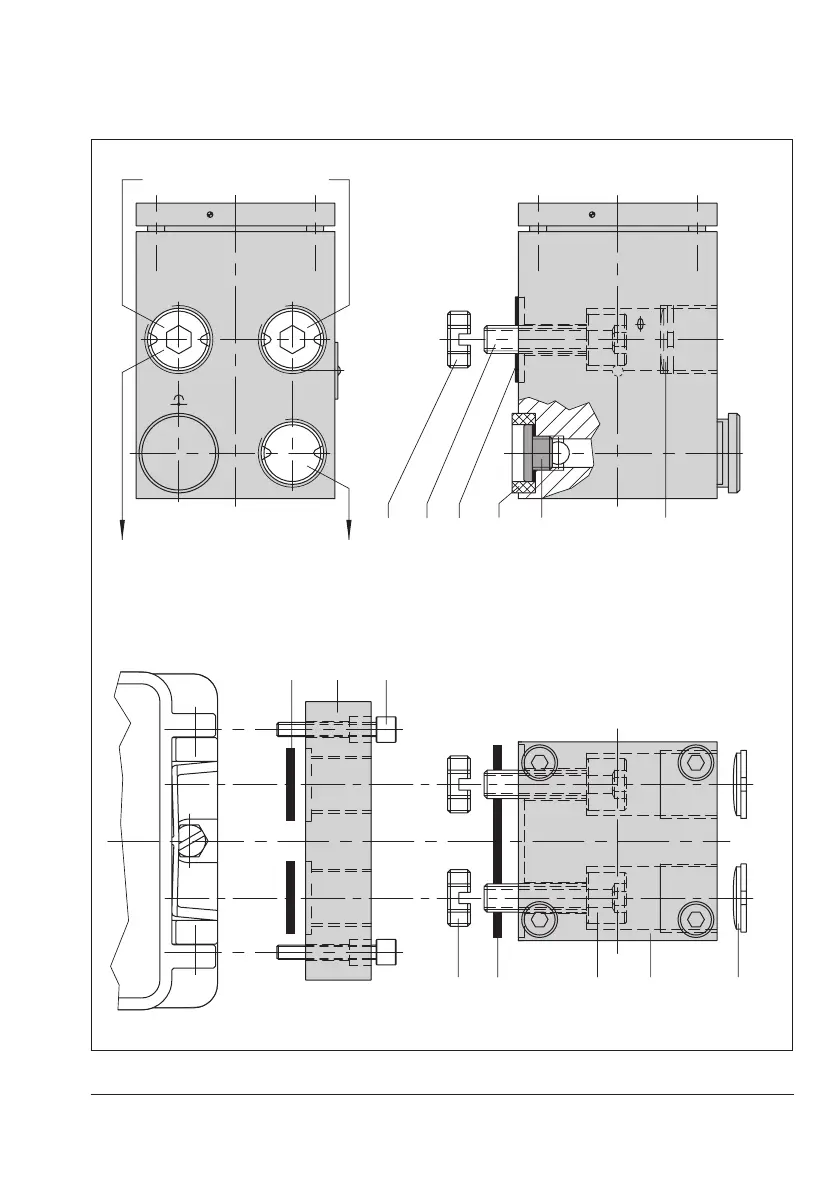
Î RefertoFig.24
1. Mount the connecting plate (6) from the
accessoriesinTable6tothepositioner.
Make sure that both O-rings (6.1) are
seated correctly.
2. Thread the special nuts (1.3) from the ac-
cessoriesofthereversingamplierinto
the boreholes of the connecting plate.
3. Insert the gasket (1.2) into the recess of
thereversingamplierandslideboththe
hollowed special screws (1.1) into the
connecting boreholes A
1
and Z.
4. Placethereversingamplierontothe
connecting plate (6) and screw tight us-
ing both the special screws (1.1).
5. Useascrewdriver(8mmwide)toscrew
theenclosedlters(1.6)intotheconnec-
tion boreholes A
1
and Z.
Air can escape uncontrolled from the signal
pressure connection.
Do not unscrew the sealing plug (1.5) out of
the reversing amplier.
The rubber seal (1.4) is not required and can
be removed when the sealing plug is used.
6. Afterinitialization,setCode16(Pressure
limit) to No.
A
1
1.5 1.6
1.3
6.266.1
1.2 1.1 1 1.6
Z
A
2
1.4
A
1
A
2
Z
A
Output 38 Supply 9
1.3 1.21.1
From the positioner
Control signals to the actuator
1 Reversingamplier
1.1 Special screws
1.2 Gasket
1.3 Special nuts
1.4 Rubberseal
1.5 Stopper
1.6 Filter
6 Connecting plate
6.1 O-rings
6.2 Screws
Fig.24: Mounting a reversing amplier (1079-1118 or 1079-1119)
NOTICE
Note
 Loading...