EB 8384-2 EN 73
Mounting and start-up
− In addition, the instructions in
sections5.15 and 5.16 apply for the
pneumatic and electrical connection.
− Since 2009, the back of the position
sensor (20) is tted with two pins acting as
mechanical stops for the lever (1). If this
position sensor is mounted using old
mounting parts, two corresponding
Ø8mm holes must be drilled into the
mounting plate/bracket (21). A template is
available for this purpose. See Table8.
5.10.1 Mounting the position
sensor with direct at-
tachment
Type3277-5 Actuator with 120cm² (Fig.6)
The signal pressure from the positioner is
routed over the signal pressure connection of
theconnectingplate(9,Fig.27left)tothe
actuator diaphragm chamber. To proceed,
rstscrewtheconnectingplate(9)included
in the accessories onto the actuator yoke.
− Turn the connecting plate (9) so that the
correct symbol for the fail-safe action
"actuator stem extends" or "actuator
stem retracts" is aligned with the marking
(Fig.27,below).
− Make absolutely sure that the gasket for
the connecting plate (9) is correctly in-
serted.
− The connecting plate has threaded holes
with NPT and G threads. Seal the
threaded connection that is not used with
the rubber seal and square plug.
Type 3277 Actuator with 175 to 750 cm²:
The signal pressure is routed to the connec-
tion at the side of the actuator yoke for the
version with fail-safe action "actuator stem
extends". For the fail-safe action "actuator
stem retracts" the connection on the top dia-
phragm case is used. The connection at the
sideoftheyokemustbettedwithaventing
plug (accessories).
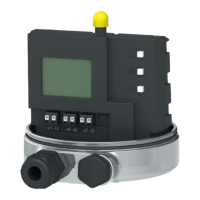
Mounting the position sensor
1. Place the lever (1) on the sensor in
mid-position and hold it in place. Un-
thread the nut (1.1) and remove the lever
together with the disk spring (1.2) from
the sensor shaft.
2. Screw the position sensor (20) onto the
mounting plate (21).
3. Depending on the actuator size and rat-
ed valve travel, determine which lever
and position of the follower pin (2) is to
be used from the travel table on
page28.Thepositionerisdelivered
with the M lever in pin position 35 on the
sensor. If necessary, remove the follower
pin (2) from its pin position and move it
to the hole for the recommended pin po-
sition and screw tight.
4. Place the lever (1) and disk spring (1.2)
on the sensor shaft. Place the lever in
mid-position and hold it in place. Screw
on the nut (1.1).
5. Place follower clamp (3) on the actuator
stem, align it and screw tight so that the
mounting screw is located in the groove
of the actuator stem.
Note
 Loading...