-11-
Maintenance
Lamp Replacement
When the projection lamp of the projector reaches its end of life,
the Lamp replacement icon appears on the screen and LAMP
REPLACE indicator lights. Replace the lamp with a new one
promptly. The timing when the LAMP REPLACE indicator should
light is depending on the lamp mode.
Follow these steps to replace the lamp.
Allow a projector to cool for at least 45 minutes before you open
the Lamp cover. The inside of the projector can become very
hot.
CAUTION
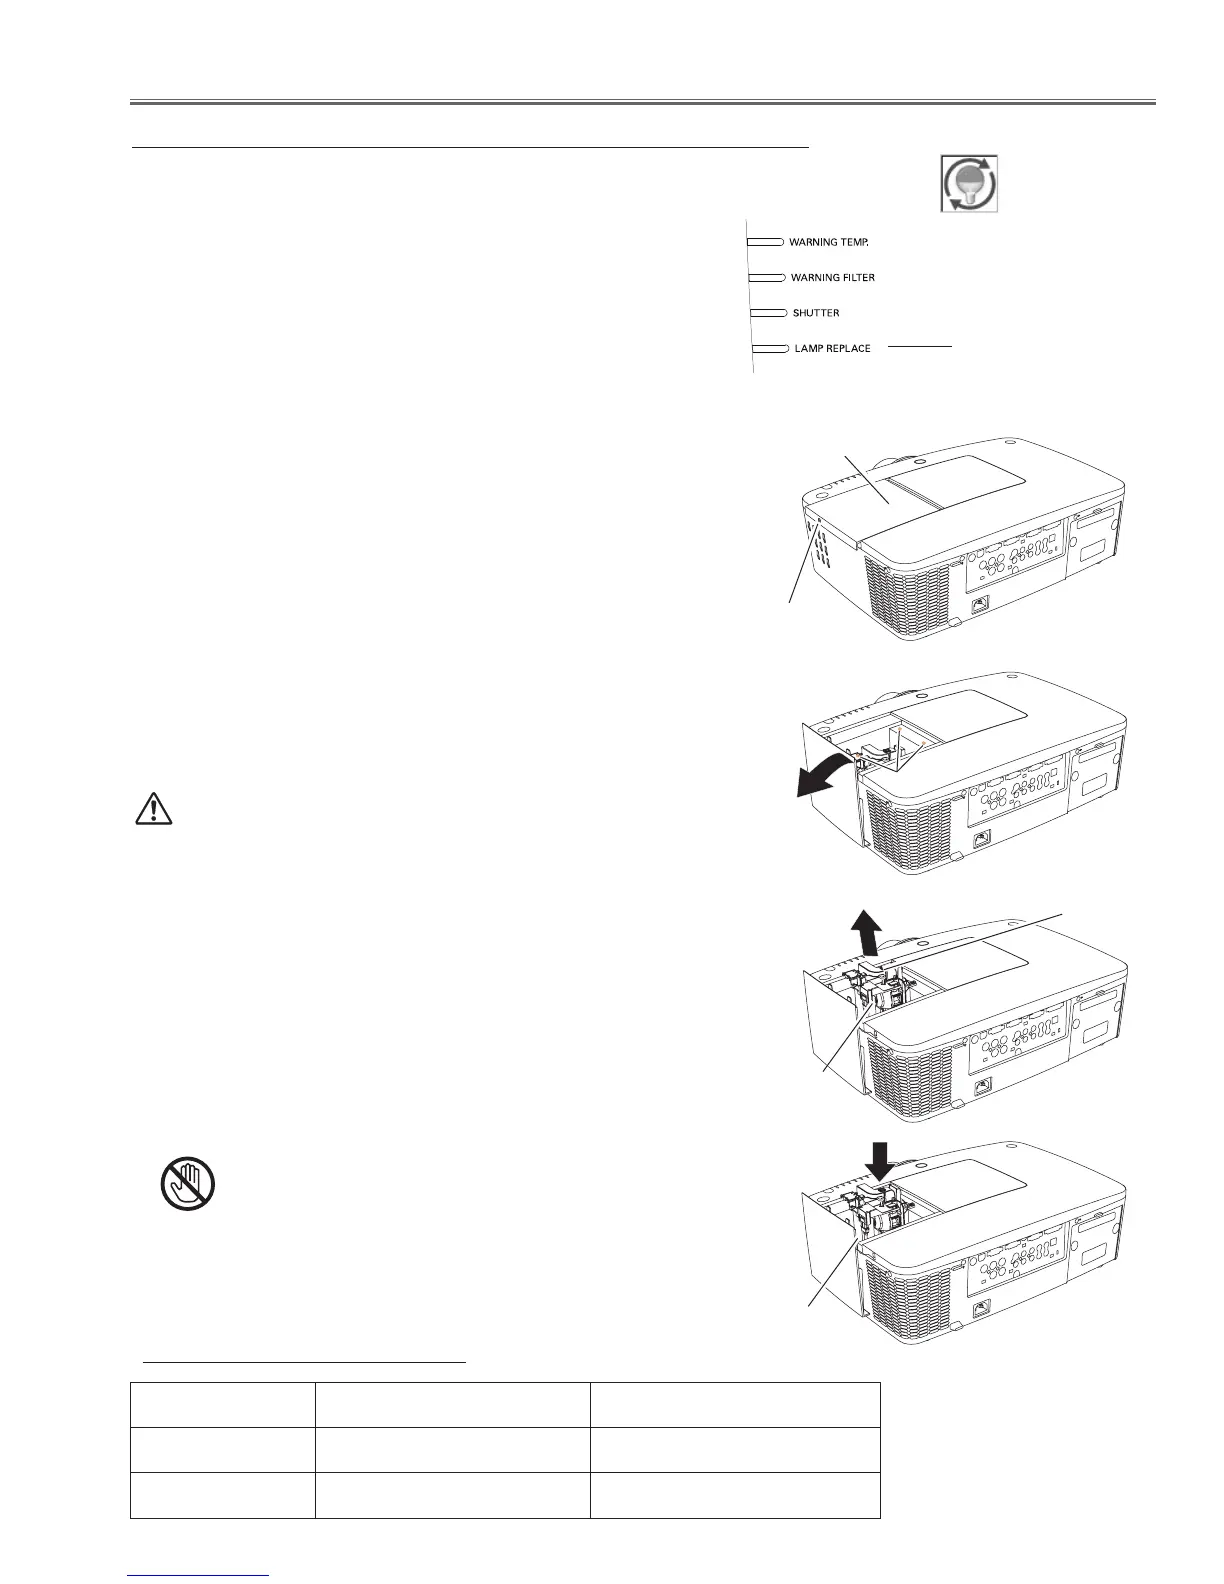
Lamp replacement icon
Top Panel
LAMP REPLACE indi-
cator
Note:
• The Lamp replacement icon will not appear when the Display
function is set to “Off”, or during “Freeze”.
Turn off the projector and unplug the AC power cord. Let
the projector cool for at least 45 minutes.
Loosen the screw and slide the lamp cover to open it.
Loosen 3 screws of the lamp and pull out the lamp by using
the built in handle.
Replace the lamp with a new one. Make sure that the lamp
is properly and fully inserted.
Close the lamp cover and secure the screw.
When replacing the lamp because it has stopped illuminating,
there is a possibility that the lamp maybe broken. If replacing the
lamp of a projector which has been installed on the ceiling, you
should always assume that the lamp is broken, and you should
stand to the side of the lamp cover, not underneath it. Remove
the lamp cover gently. Small pieces of glass may fall out when
the lamp cover is opened. If pieces of glass get into your eyes or
mouth, seek medical advice immediately.
For continued safety, replace with a lamp of the same type lamp.
Do not drop the lamp or touch the glass bulb! The glass can shat-
ter and may cause injury.
CAUTION
1
2
3
4
5
Lamp
Handle
Lamp cover
Screw
New Lamp
Screws
Model PLC-XM150/PLC-XM150L PLC-XM100/PLC-XM100L
Type No. POA-LMP136 POA-LMP137
Service Parts No. 610 346 9607 610 347 5158
ORDER REPLACEMENT LAMP
 Loading...