-33-
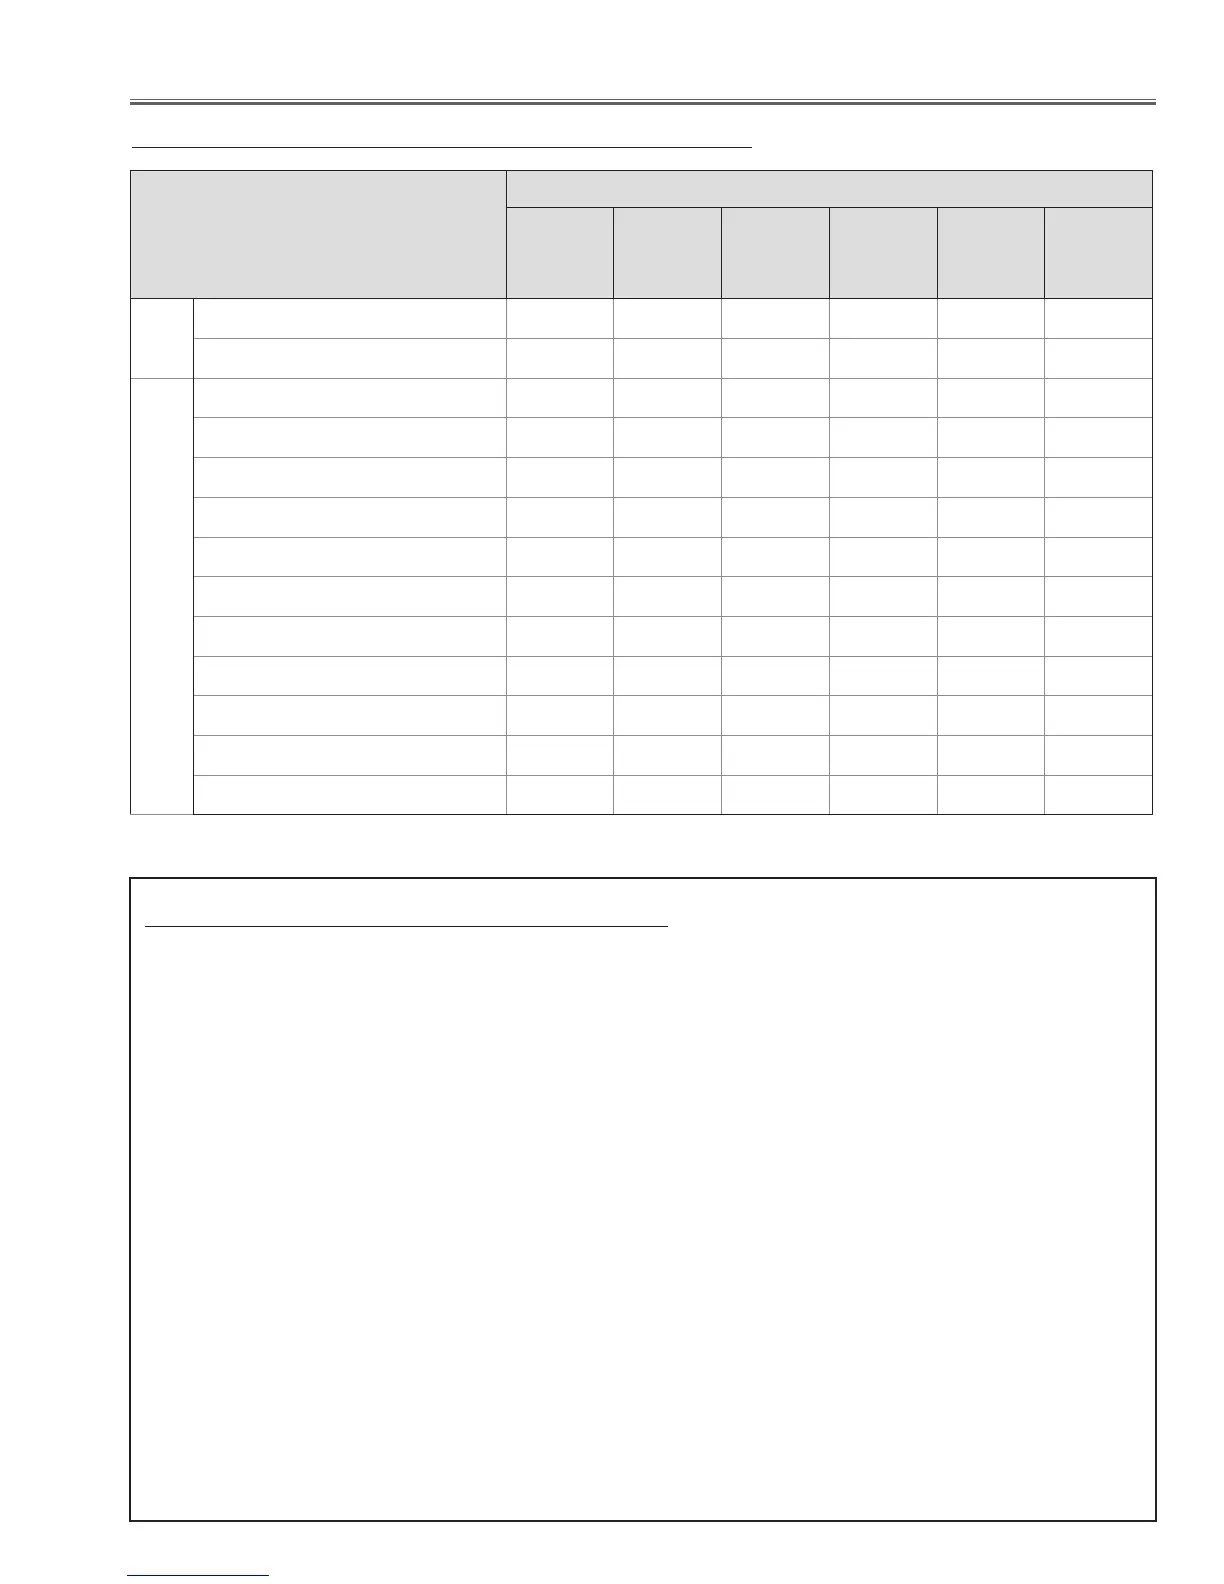
●: Adjustment necessary ❍: Check necessary
Adjustments after Parts Replacement
Adjustments
Disassembly / Replaced Parts
LCD/
Prism Assy
Polarized
Glass
Condesner
lens /
Relay lens
/ Integrator
lens
Power Board Main Board
Fans
Wind Sensor
Optical
Adj.
Optical axis adjustment
●
Contrast adjustment
● ●
Electrical Adjustments
Output voltage adjustment
●
Fan voltage adjustment
● ● ●(Fans)
PC-auto calibration
●
Video-auto calibration
●
Component-auto calibration
●
Common voltage adjustment
● ●
Panel type check and setting
❍ ●
Gamma shipment setting-up *
● ●
White balance adjustment
❍
●
Color shading correction adjustment *
❍ ❍ ❍
Wind sensor calibration
● ● ●(S901)
*
To setup or adjust those items, the Projector Service Tool v. 4.20 software is needed. Refer to the owner's manual for this
software for the further details.
Note on Main Board Replacement
Take the following setting when the main board is replaced.
- Shipment data setting (Color Shading Correction, Gamma Shipment)
- Serial No. Setting
Adjustment Ship Data Setting
This projector stores "Color Shading Correction Data" and "Gamma Data" in the flash memory (IC801) and memory
(IC1387) on the main board. Those shipping data have been setup according to the optical characteristics of the
mounted LCD panels preciously in the factory. When replacing the main board, you need to read out the those setting
data stored in the memory ICs on the previous main board and write down them into the memory ICs on the new main
board. By this way, the projector enables to reproduce the picture which has properly adjusted color shading correc-
tion, gamma correction. For further details, refer to the operation manual of the software [PROJECTOR SERVICE
TOOL v4.20].
Serial No. Setting
Each projector has an unique serial no. controlled in the factory. There are 2 ways to check this serial no. The
one is printed on the rating label on the cabinet, the other one is displayed on the "Information" on the on-screen
menu. The serial no. displayed on the on-screen menu is stored in the memory IC (IC1387) on the main board.
When replacing the main board or memory IC, you need to write the serial no. referring to the serial no. printed
on the rating label with the serial no. setting tool. For further details, refer to the operation manual of the serial no.
setting tool [SST LITE v1.00].
Those software are included in the service CD-ROM listed below;
PROJECTOR SERVICE TOOL CD-ROM v4.20
SERVICE CODE: 610 343 5596
 Loading...