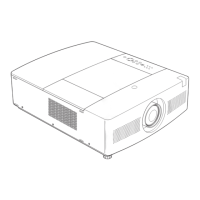
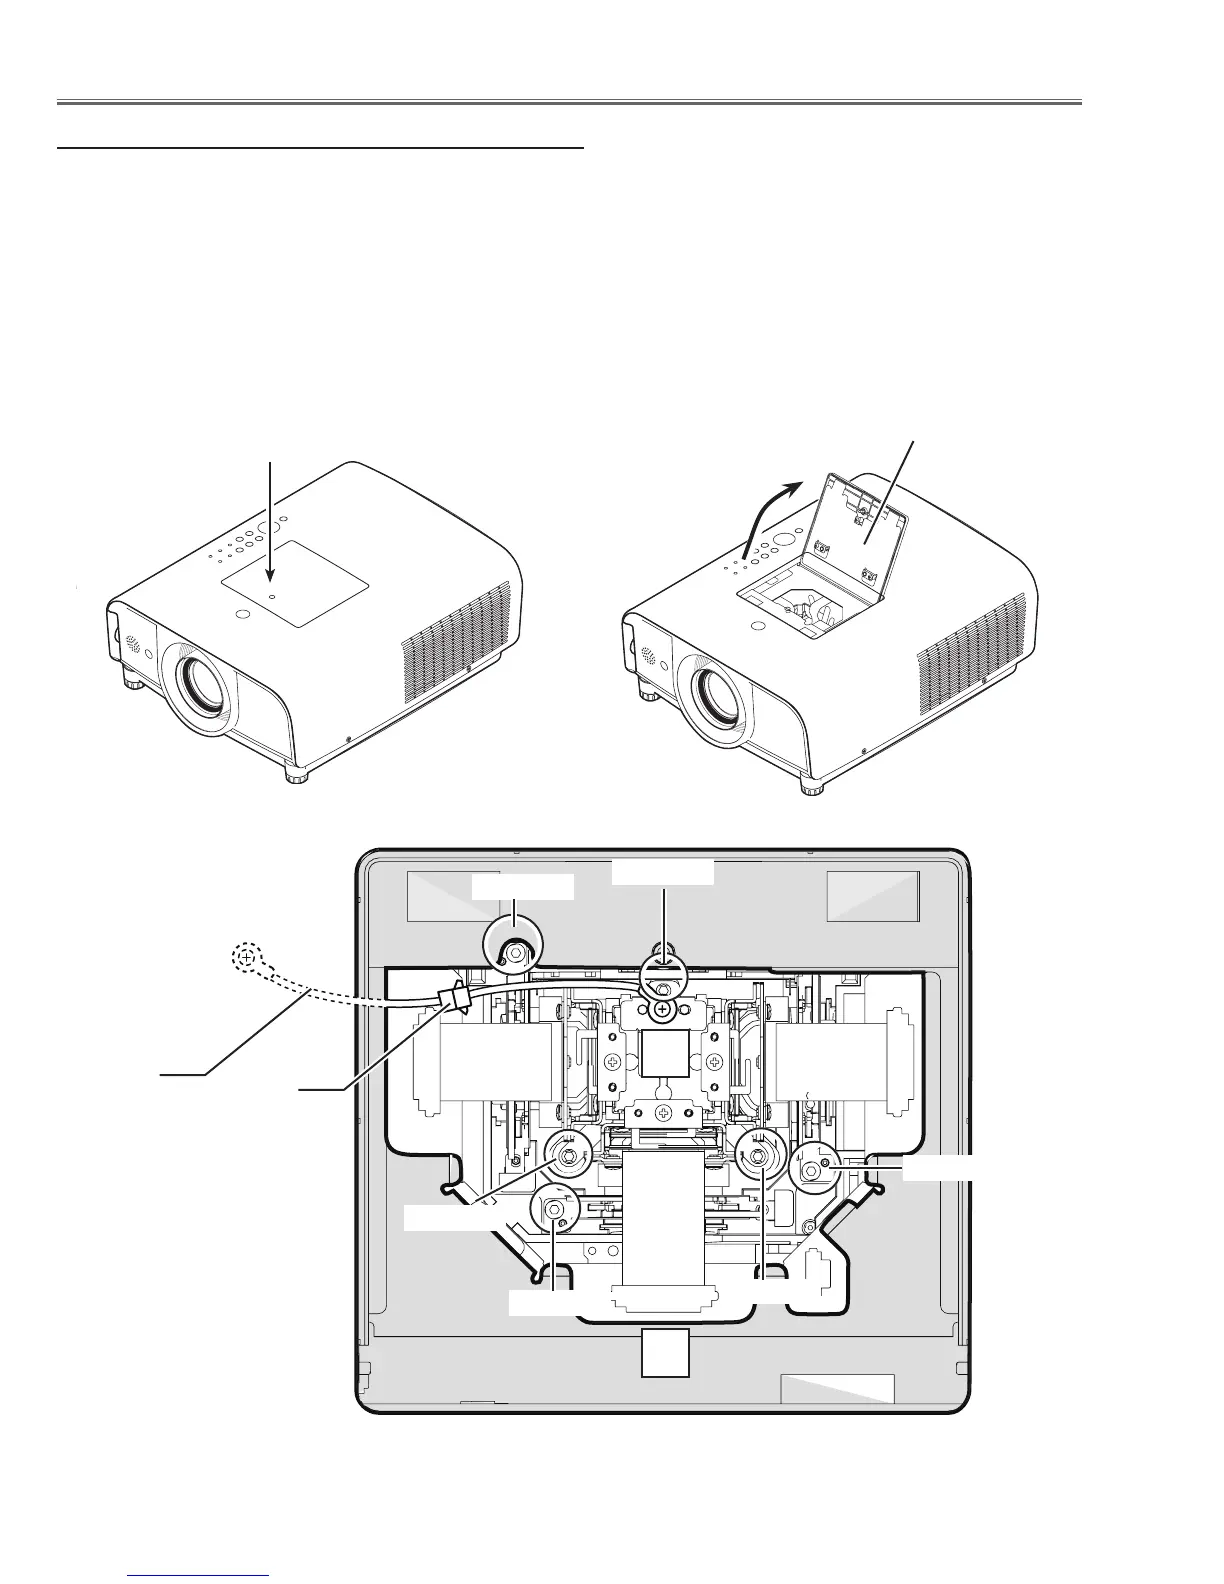
EasyManuals Logo

Sanyo PLC-XT25 User Manual

Sanyo PLC-XT25
152 pages
To Next Page IconTo Next Page
To Previous Page IconTo Previous Page
Page #12 background imageLoading...
Page #12 background image
-12-
Maintenance
Screw-A
Prism cover panel
This projector provides a prism cover on the cabinet top to enhance the service maintenance. This enables service
personel to align the optical adjustment or replace the optical parts without disassembly the cabinet top.
1. Loosen 1 screw-A and open the prism cover panel.
2. To remove the LCD Panel/Prism ass'y, loosen 3 screws-B and disonnect a socket-D, and then pull the LCD Panel/
Prism ass'y up.
3. To remove the Optical filter ass'y, remove a screw-C on each stopper of the Optical filter ass'y and then pull the
Optical filter ass'y up.
Screw-B
Screw-C
Screw-B
Screw-B
Screw-C
Screw-C
L
L
Maintenance
Quick maintenance
Socket-D
Grounding
wire

Table of Contents

Other manuals for Sanyo PLC-XT25

Questions and Answers:

Question and Answer IconNeed help?

Do you have a question about the Sanyo PLC-XT25 and is the answer not in the manual?

Sanyo PLC-XT25 Specifications

General IconGeneral
Projection technologyLCD
Contrast ratio (typical)1000:1
Projector native resolutionXGA (1024x768)
Resolution1024 x 768 pixels
Dimensions (WxDxH)302 x 422 x 162 mm
Display diagonal1 \
Lamp typeUHP
Lamp power300 W
Light source typeLamp
Market positioningPortable
Weight and Dimensions IconWeight and Dimensions
Weight9200 g

Related product manuals