25
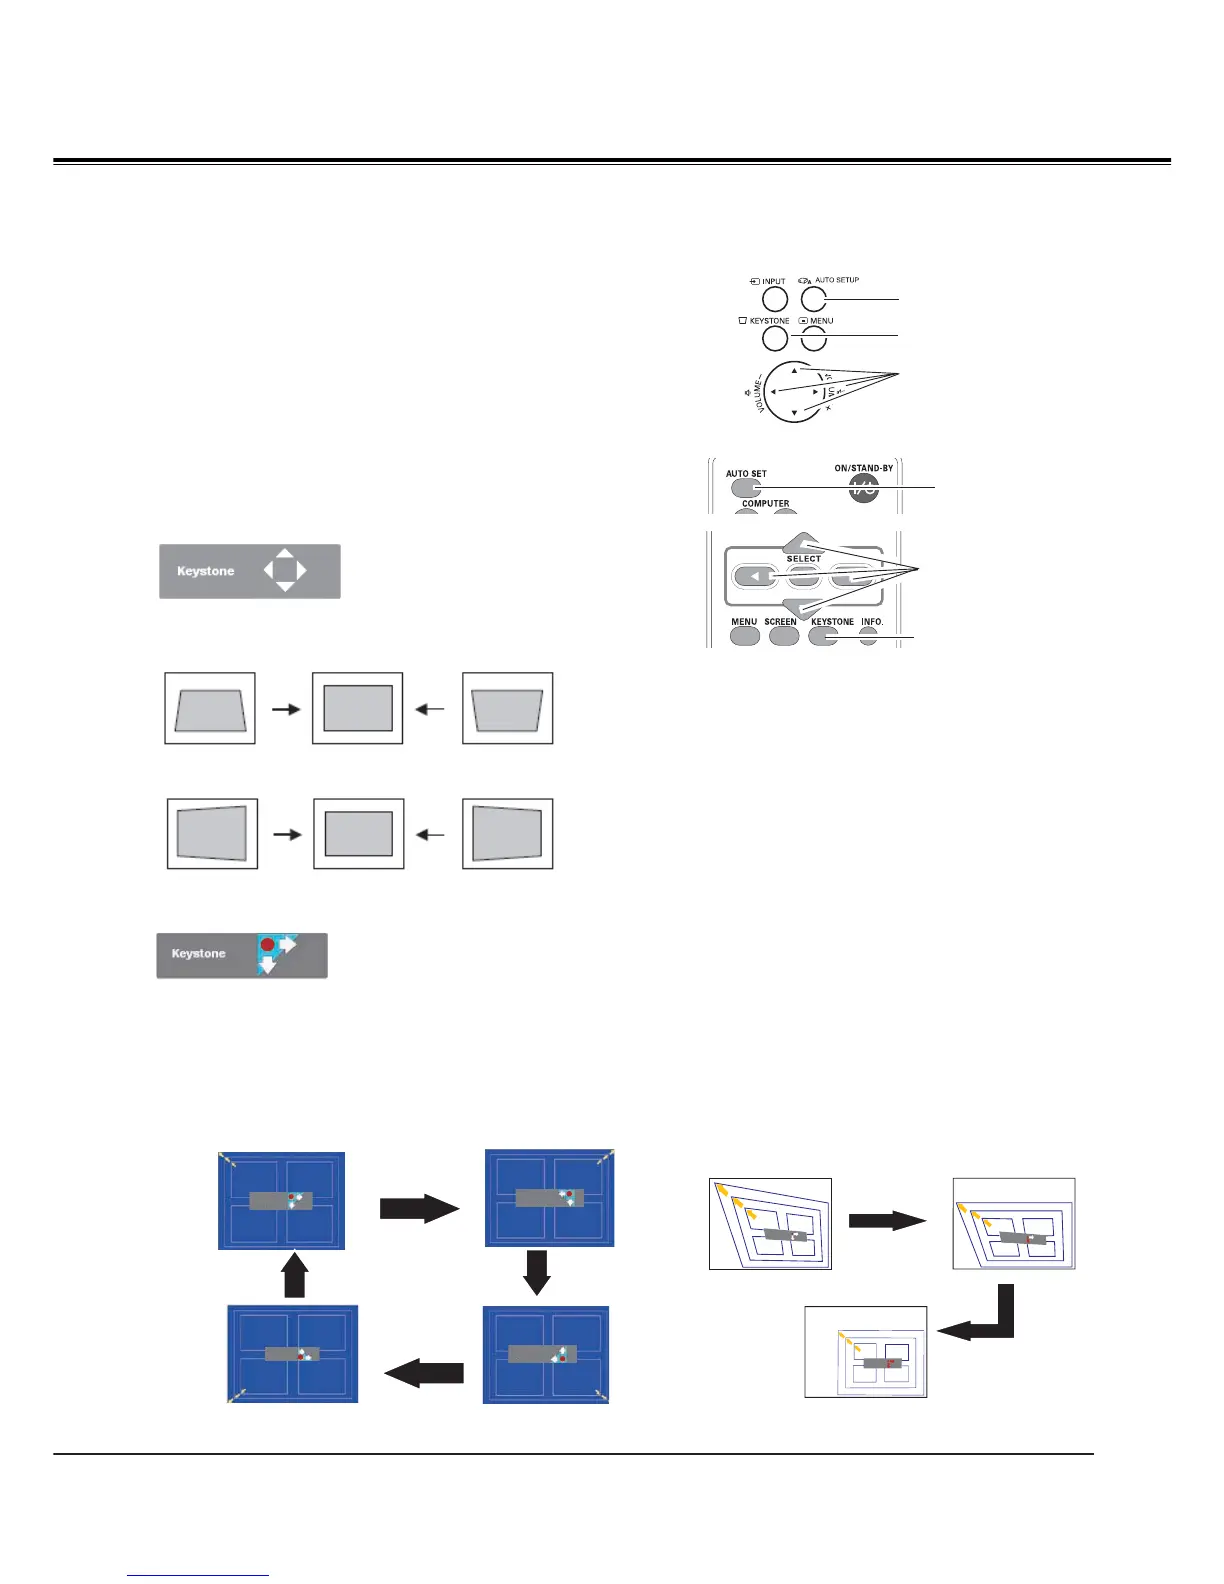
If a projected picture still has keystone distortion after
pressing the AUTO SETUP button on the top control or the
AUTO SET button on the remote control, correct the image
manually as follows:
Press the KEYSTONE button on the top control or on
the remote control to switch the Standard (for Vertical/
Horizontal) /Corner adjustment. The Standard or Corner
adjustment dialog box appears. Use the Point
ŸźŻŹ
buttons to correct the Standard or Corner distortion. The
Standard or Corner adjustment can be stored (see page
48).
Keystone Correction
Standard
3Note:
• The white arrows indicate that there is no correction.
• A red arrow indicates the direction of correction.
• An arrow disappears at the maximum correction.
• If you press and hold the KEYSTONE button for
more than 3 seconds while the Standard or Corner
dialog box is being displayed, the Standard or Corner
correction will be released
.
• The Corner pattern can be set to
Off, Red, White or
Blue in the Corner pattern function. See "Keystone"
on page 48.
• The adjustable range is limited depending on the
input signal.
• Standard and Corner functions cannot be adjusted at
the same time. If one of the fuctions is adjusted, and
then the other one will be reset automatically.
• The corner keystone function may be canceled when
you set the Auto keystone function to Auto or Manual.
To avoid this, it is recommended to set the Auto
keystone function to Off while the corner keystone
function is activated.
Remote Control
AUTO SET button
Top Control
AUTO SETUP button
POINT ŸźŻŹ
buttons
KEYSTONE button
Corner
Reduce the top left corner part
with the Point
Źź buttons.
POINT ŸźŻŹ
buttons
KEYSTONE button
Reduce the top right corner part
with the Point
Żź buttons.
e stone
e stone
e stone
Reduce the bottom left corner
part with the Point
ŹŸ buttons.
Reduce the bottom right corner
part with the Point ŻŸ buttons.
Press the KEYSTONE button on the top control or on the
remote control to switch Corner adjustment, press the
SELECT button on the remote control to select the corner
you want to adjust.
Basic Operation
Reduce the right part
with Point
Ź button.
Reduce the upper width
with the Point
Ÿ button.
Reduce the left part with
Point
Ż button.
Reduce the lower width
with the Point
ź button.
Press the SELECT
button
Press the SELECT
button
Press the SELECT
button
Press the SELECT
button
Keystone
 Loading...