SARTORIUS Master
pro
23
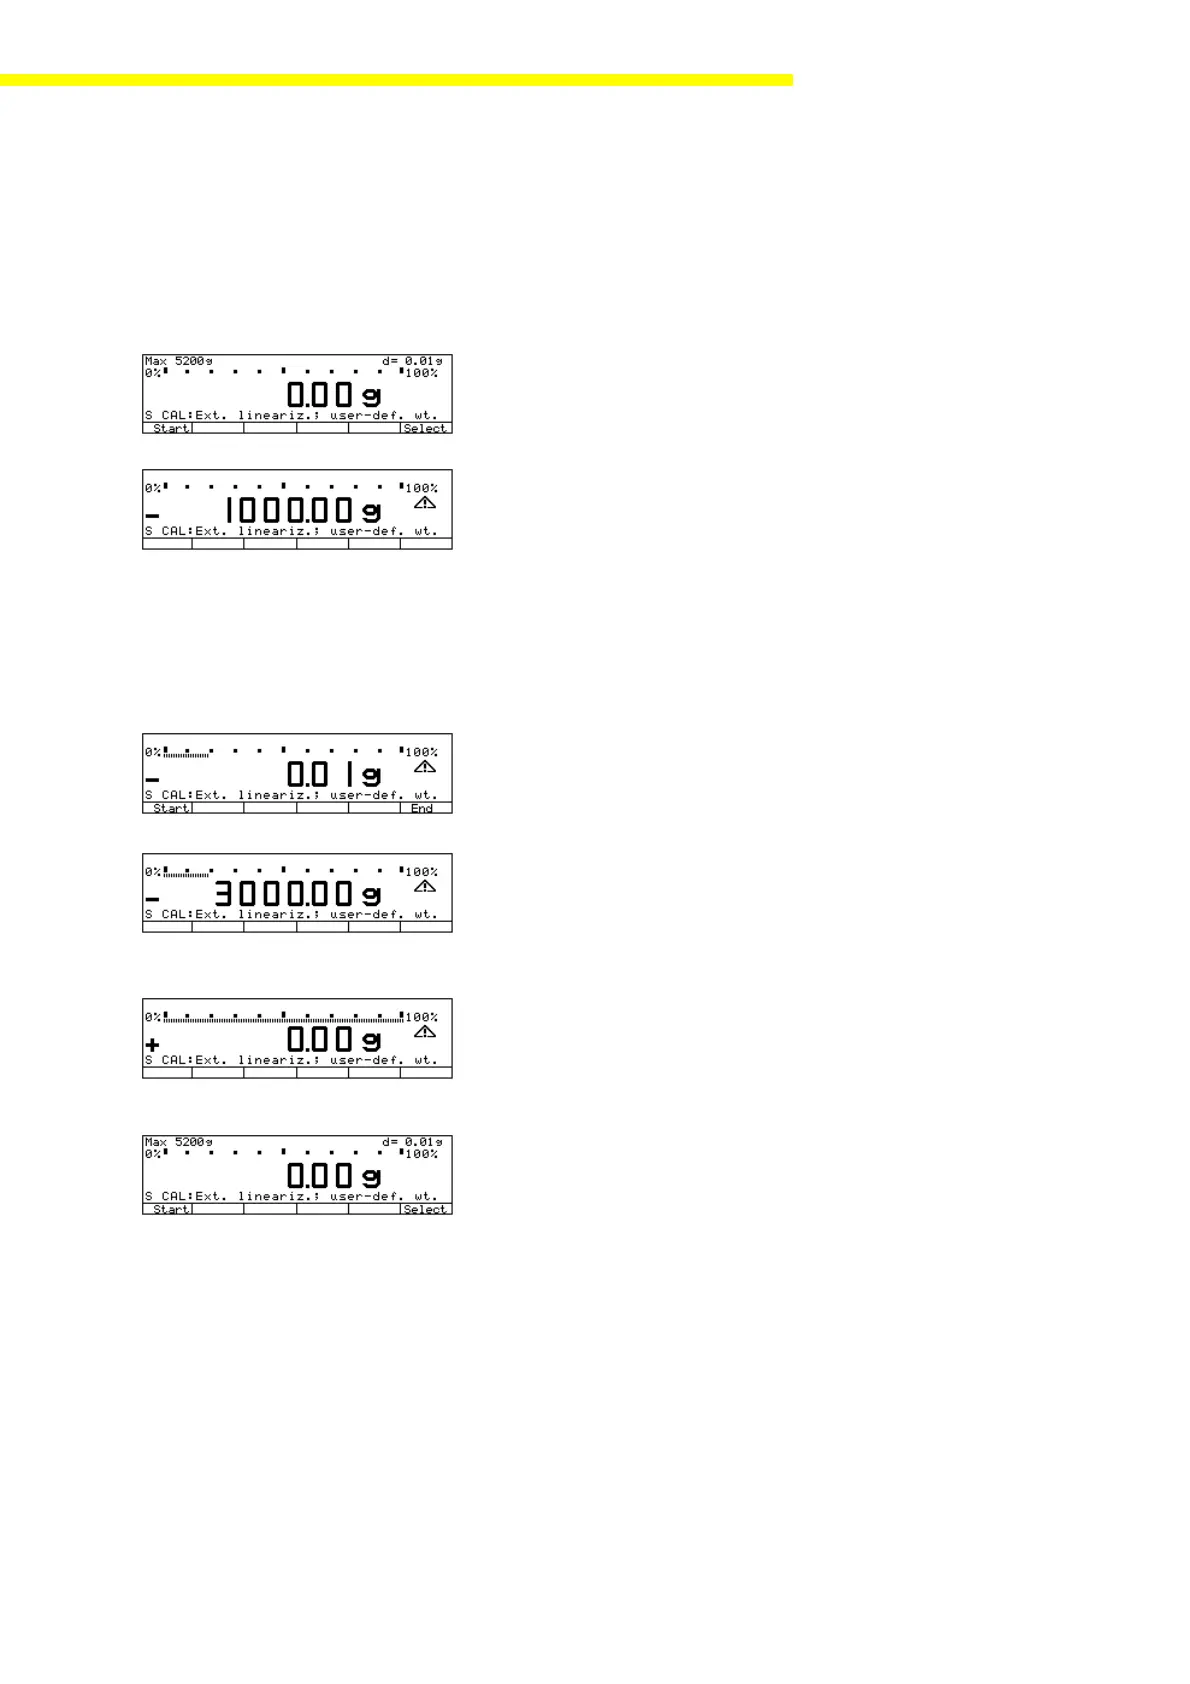
Performing External Linearization
After defining the linearization weights, the linearization procedure can be
started.
– Activate the service mode again (see page 11).
– Press
F6F6
F6F6
F6 to activate the adjustment menu.
– Press
F1F1
F1F1
F1 to activate the “ext. linear user wt.” menu item, or tare the
balance and press
F6F6
F6F6
F6 to start the linearization routine.
– The first linearity weight is displayed.
Center the corresponding weight on the weighing pan.
Note: Depending on the menu code setting (under 1 10 X), either calibration/
adjustment is performed automatically (code 1 10 1: calibrate, then auto-
adjust), or the deviation from the last linearization is displayed, but no
adjustment is made until you press a key (code 1 10 2: calibrate, then
manual adjust).
– The deviation from the last adjustment is displayed.
– If the error exceeds the tolerance limits, either press
F6F6
F6F6
F6 to make the corre-
sponding adjustment, or press
F1F1
F1F1
F1 to cancel the adjustment procedure.
– The second linearity weight is displayed.
– Center the corresponding weight on the weighing pan and press
F6F6
F6F6
F6 to
confirm.
– Repeat this procedure until all linearity weights have been adjusted.
– After defining the last linearization weight, all adjustment weights must be
removed from the weighing pan and the balance zeroed again.
– After concluding the linearization routine, the service mode remains active
until you press c.
If linearization weights of sufficient accuracy are available (at least one digit
greater than the display accuracy) it is not necessary to defined the lineariza-
tion weights before performing the adjustment routine (in INPUT mode).
In this case, linearization can be started immediately by selecting the menu
item “Lin. extern std. wt.”.
Perform the routine in accordance with the routine described above.
La-024e.BMP
La-025e.BMP
La-026e.BMP
La-027e.BMP
La-029e.BMP
La-028e.BMP