SARTORIUS Master
pro
25
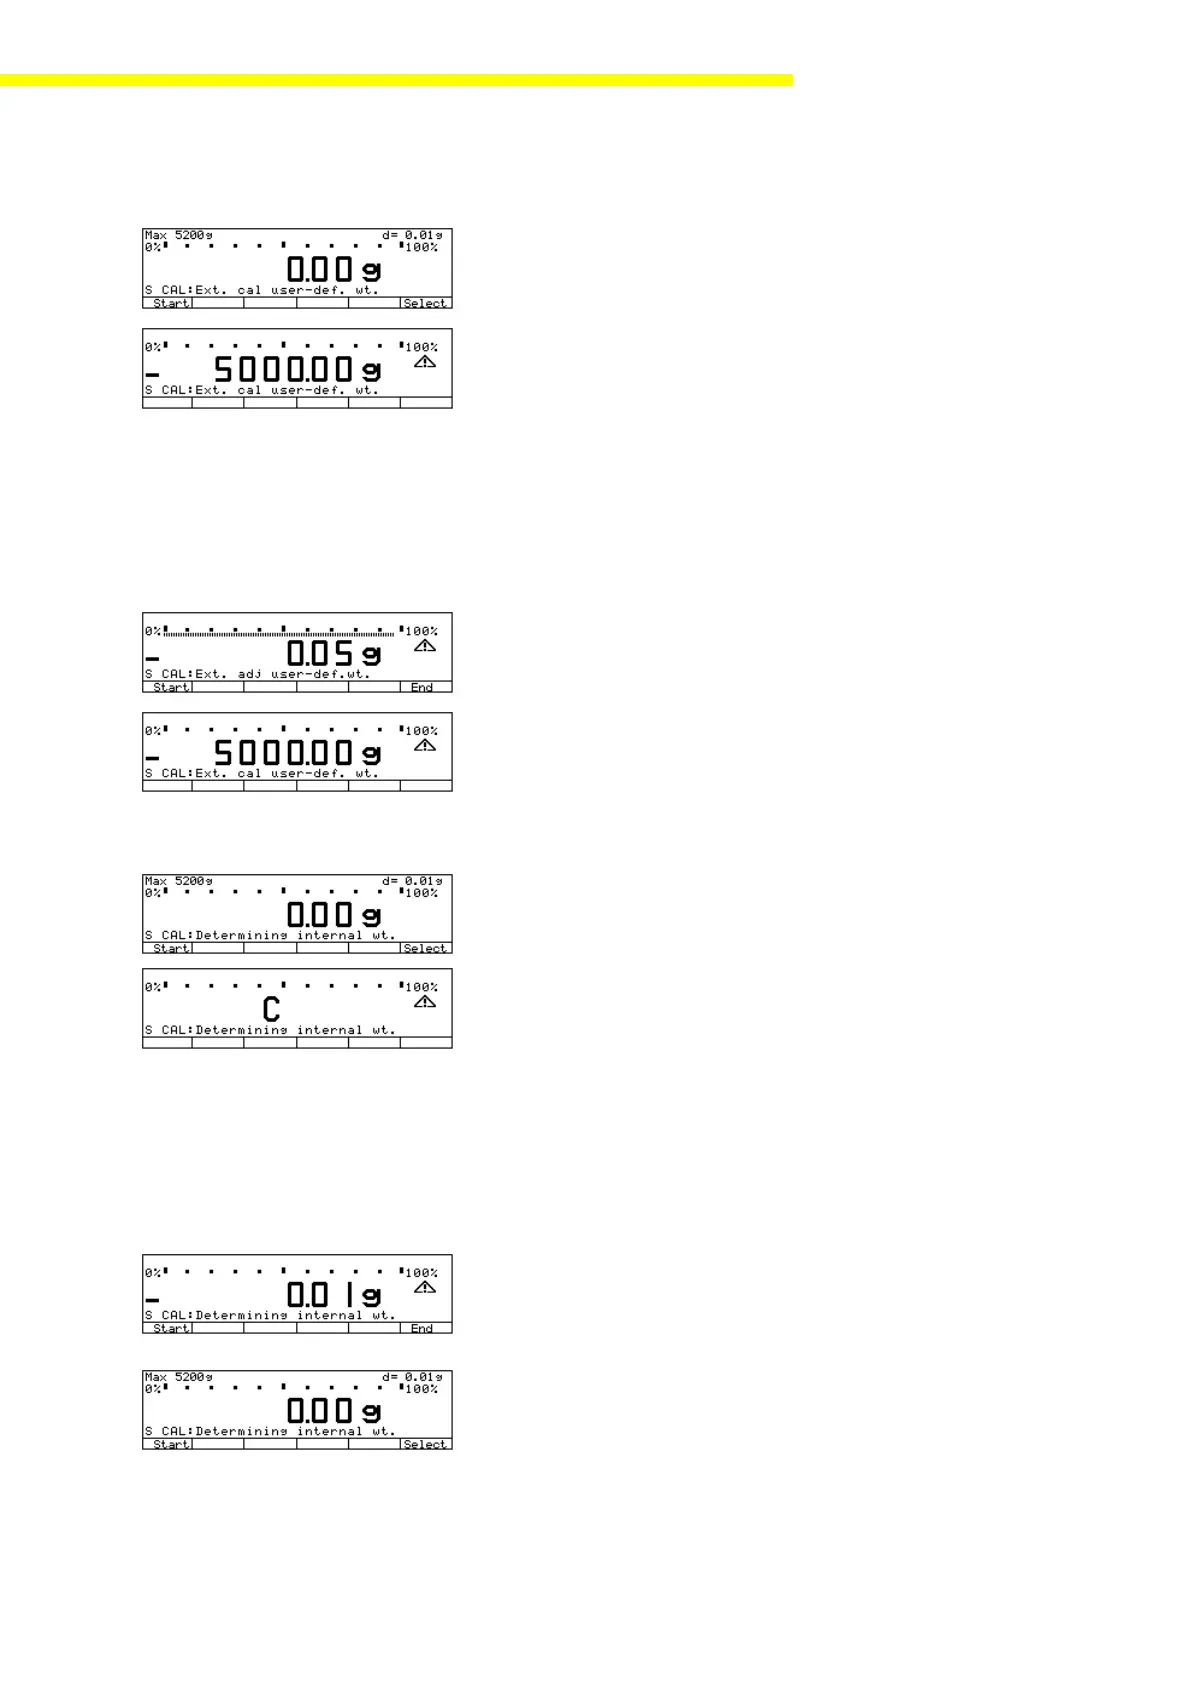
External Span Adjustment with Stored Weight
– Activate the service mode (see page 11).
– Press
F6 F6
F6 F6
F6 and then press
F1 F1
F1 F1
F1 to select the “cal. ext. adjust. wt.” menu
item.
– Tare the balance, if necessary, and then press
F6F6
F6F6
F6 to start external span
adjustment.
– Center the prompted calibration weight on the weighing pan.
Note: Depending on the menu code setting (under 1 10 X), either calibration/
adjustment is made automatically (code 1 10 1: calibrate, then auto-adjust),
or the deviation from the last linearization is displayed, but no adjustment is
made until you press a key (code 1 10 2: calibrate, then manual adjust).
– If the error exceeds the tolerance limits, press
F6F6
F6F6
F6 to make the correspond-
ing adjustment, or press
F1F1
F1F1
F1 to cancel the adjustment procedure.
– The balance then returns to the SELECT mode.
Overwriting the Internal Calibration Weight
– Activate the Service mode (see page 11).
– Perform external span adjustment.
– Press
F1F1
F1F1
F1 to select the “det. int. wt.” menu item.
– Tare the balance, if necessary, and press
F6F6
F6F6
F6 to overwrite the calibration
weight.
– The built-in calibration weight is applied automatically and measured.
Note:Note:
Note:Note:
Note:
Depending on the menu code setting (under 1 10 X), either calibration/Depending on the menu code setting (under 1 10 X), either calibration/
Depending on the menu code setting (under 1 10 X), either calibration/Depending on the menu code setting (under 1 10 X), either calibration/
Depending on the menu code setting (under 1 10 X), either calibration/
adjustment is made automatically (code 1 10 1: calibrate, then auto-adjustment is made automatically (code 1 10 1: calibrate, then auto-
adjustment is made automatically (code 1 10 1: calibrate, then auto-adjustment is made automatically (code 1 10 1: calibrate, then auto-
adjustment is made automatically (code 1 10 1: calibrate, then auto-
adjust), or the deviation from the last linearization is displayed, but noadjust), or the deviation from the last linearization is displayed, but no
adjust), or the deviation from the last linearization is displayed, but noadjust), or the deviation from the last linearization is displayed, but no
adjust), or the deviation from the last linearization is displayed, but no
adjustment is made until you press a key (code 1 10 2: calibrate, thenadjustment is made until you press a key (code 1 10 2: calibrate, then
adjustment is made until you press a key (code 1 10 2: calibrate, thenadjustment is made until you press a key (code 1 10 2: calibrate, then
adjustment is made until you press a key (code 1 10 2: calibrate, then
manual adjust).manual adjust).
manual adjust).manual adjust).
manual adjust).
– If the error exceeds the tolerance limits, press
F6F6
F6F6
F6 to make the correspond-
ing adjustment, or press
F1F1
F1F1
F1 to cancel the adjustment procedure.
– Press c if you need to cancel this routine.
– The balance then returns to the SELECT mode.
La-035e.BMP
La-036e.BMP
La-037e.BMP
La-036e.BMP
La-039e.BMP
La-040e.BMP
La-041e.BMP
La-039e.BMP