SARTORIUS Master
pro
27
Unt-0002.EPS
A
B
Unt-0001.EPS
C
Grblo001.EPS
D
E
Servicing the Weighing Cell
Note: Always disconnect the balance from AC power and then disconnect all cables
from the balance before beginning service work!
LP balances are equipped with either a small single-casting block system, a
brass system or a large single-casting block system.
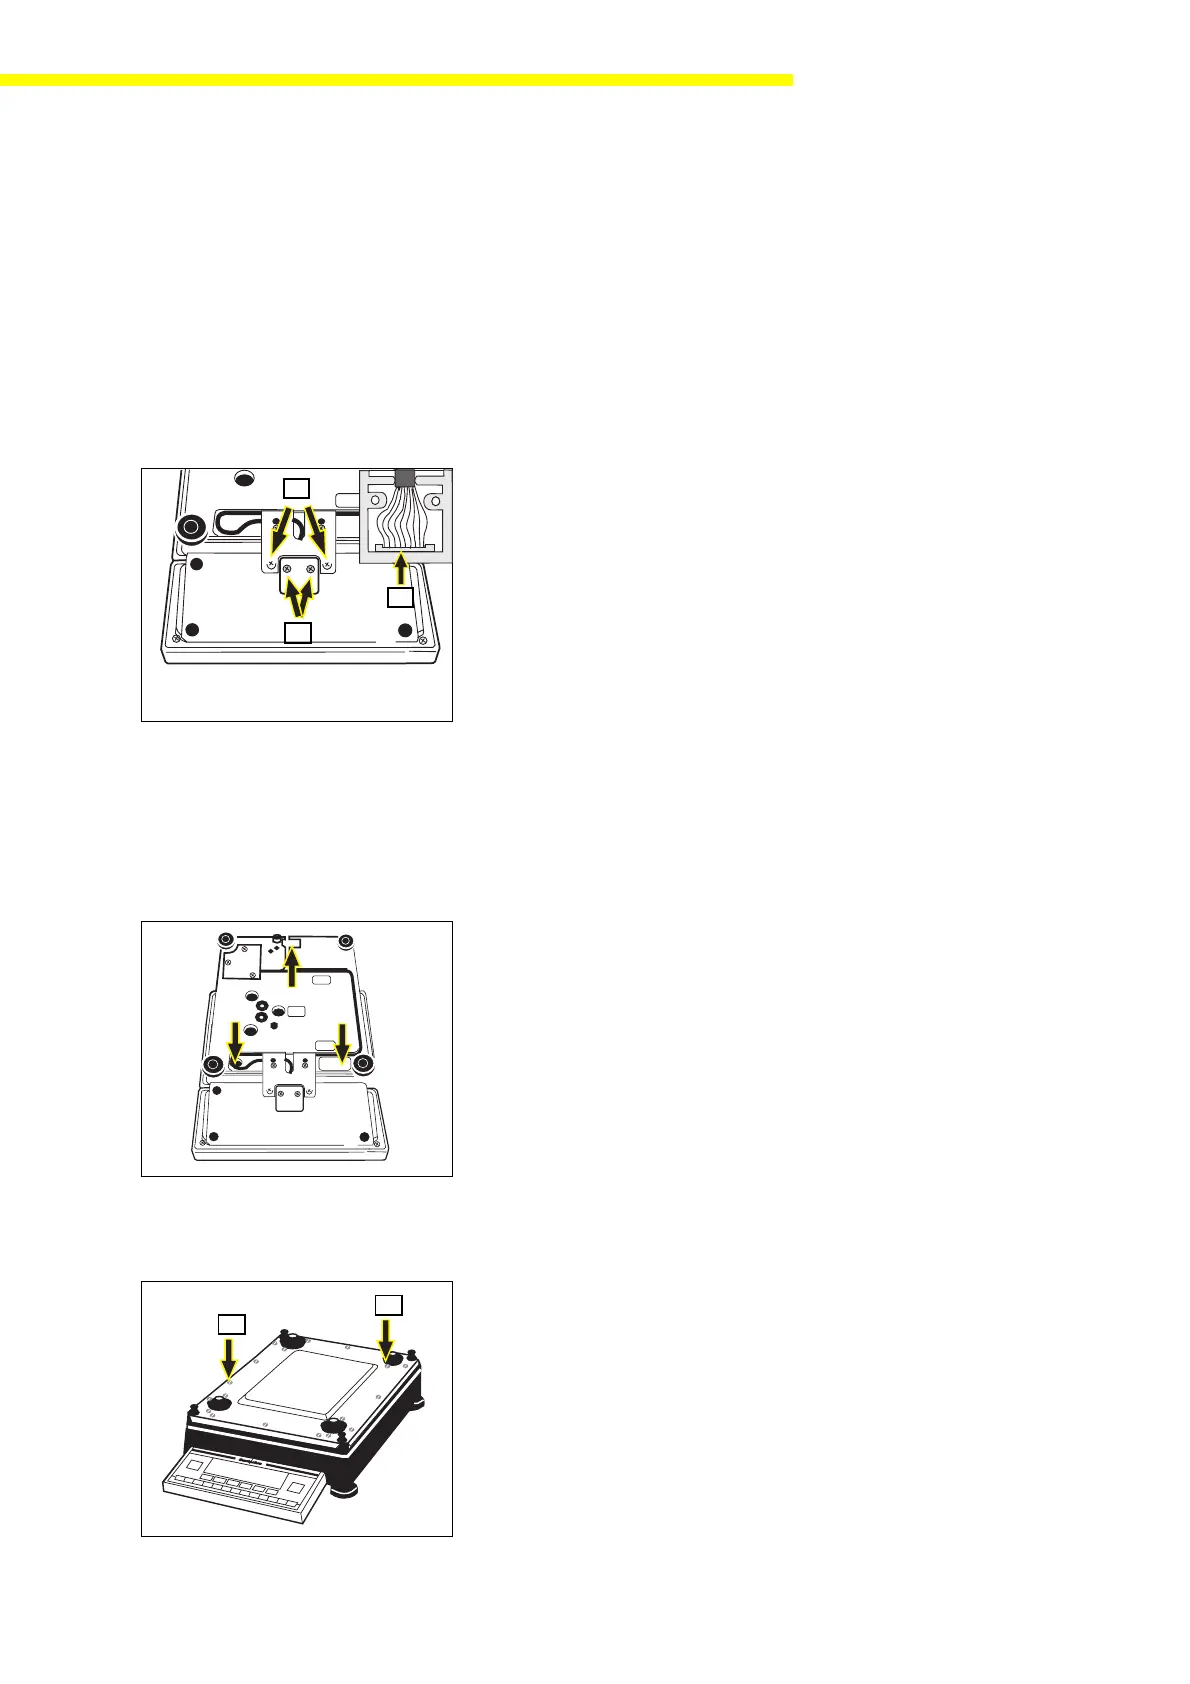
Removing the Display and Control Unit from the Weighing Cell
– Disconnect the balance from AC power.
– Remove all movable parts from the balance; e.g., weighing pan, pan flex-
ures, draft shield, etc.
– Turn the balance over; place it on a soft surface to avoid damaging the
weighing system.
– Remove the 2 screws (A) from the base pan.
– Disconnect the plug indicated on the left (B).
– Remove the fastening screws (C) from the display and control unit retainer
and take the cable out of the strain relief clamp.
– Return the balance to the upright position and remove the dustcover, plac-
ing it to one side.
Opening the Weighing Cell (Small Single-Casting Block System, Brass Sys-
tem)
Note: If you remove the seal (warranty sticker), the balance is no longer covered
under the warranty.
– Disconnect the balance from AC power.
– Remove all movable parts from the balance; e.g., weighing pan, pan flex-
ures, draft shield, etc.
– Carefully place the balance on its side and remove the 3 screws from the
base pan.
– Return the balance to the upright position and remove the dustcover, plac-
ing it to one side.
– You can now access the weighing system and the balance PCB.
– Follow the above steps in reverse order when closing the balance.
Opening the Weighing Cell (Large Single-Casting Block System)
– Disconnect the balance from AC power.
– Remove the weighing pan.
– Remove the screws (E) that fasten the seals (103) and remove the 4 seals.
– Remove the 13 fastening screws (D) from the cover plate (104), remove
the cover plate and place it to one side.