Section 5: Cleaning and Maintenance
Page 5-4 CG4 Series Operator Manual
5.4 EASY REPLACEMENT OF PARTS
It is easy to replace the print head and platen roller of the CG4 Series printer.
The one-touch, tool-less print head release mechanism enables the print head to be quickly and easily
replaced. The platen roller can be replaced without the need to use any tools.
5.4.1 Releasing/ Replacing the Print Head
The print head on the printer is a user-replaceable item. If it becomes damaged for any reason, it can be
easily removed and replaced. Contact your local SATO representative for information on obtaining a new print
head.
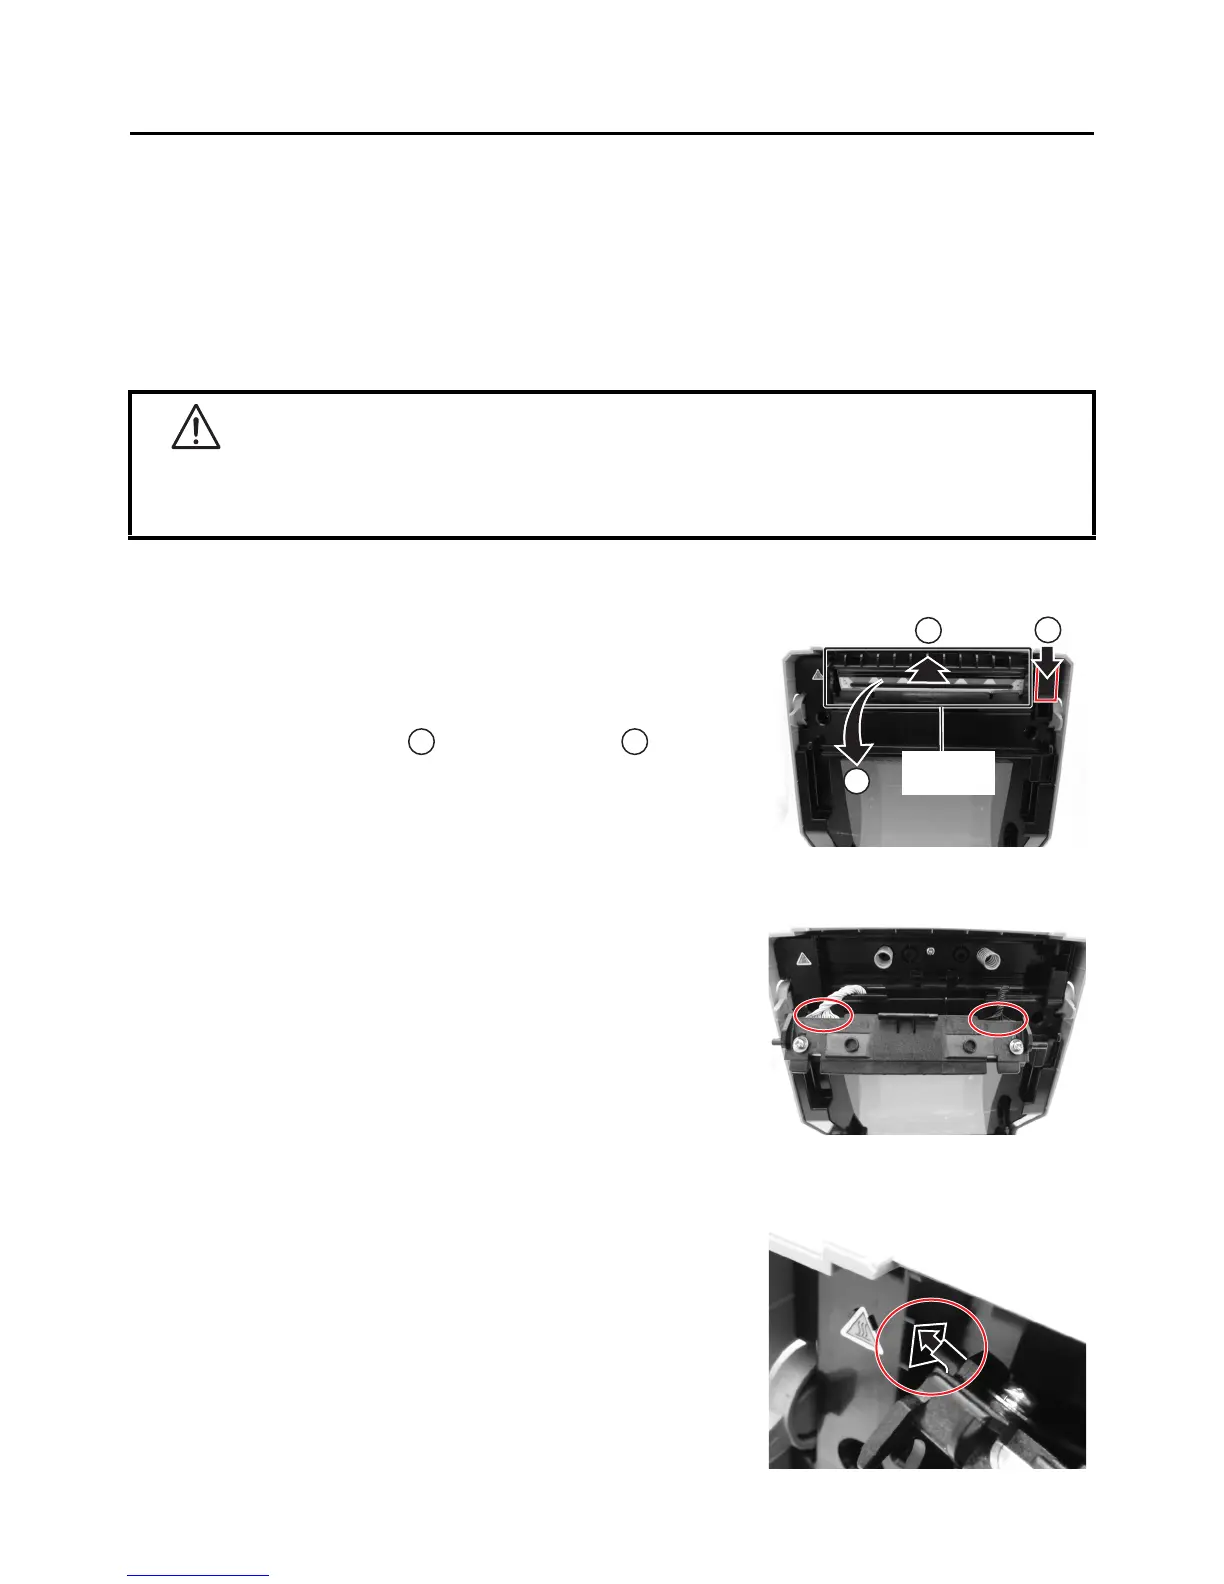
For CG412 DT and CG418 DT Direct Thermal printer
1. Make sure the printer is turned off, and remove the power
cable.
2. Lift the Top Cover.
3. While pressing and hold down the top portion of the print
head assembly (see arrow ), slide the side tab ()
downward to unlock the print head assembly. Shift the print
head assembly to the right and pull the whole print head
assembly downward.
4. The cable connectors (circled) at the rear of the print
head is now exposed. Pull the print head downward, then
gently disconnect the defective print head from the cable
connectors.
5. Carefully connect the cable connectors to a replacement
print head. The white cable should be connected to the
left connector while black cable should be connected to
the right connector. The connectors are keyed so that they
can only be inserted in the correct orientation.
Caution:
While handling the print head, be careful not to scratch the
printing surface of the print head. Scratching the surface
will cause permanent and irreparable damage that is not
covered by the warranty!
6. Insert the left shaft of the new print head assembly into
the hole beside the triangular symbol on the left side of
printer. (see circled area).
Caution
• Static electricity can result in component damage. Observe appropriate grouping procedures
when replacing any components.
• Wear protective gloves to avoid contaminating the sensitive print head surface.
1