Section 5: Cleaning and Maintenance
CG4 Series Operator Manual Page 5-5
5.4 EASY REPLACEMENT OF PARTS (cont’d)
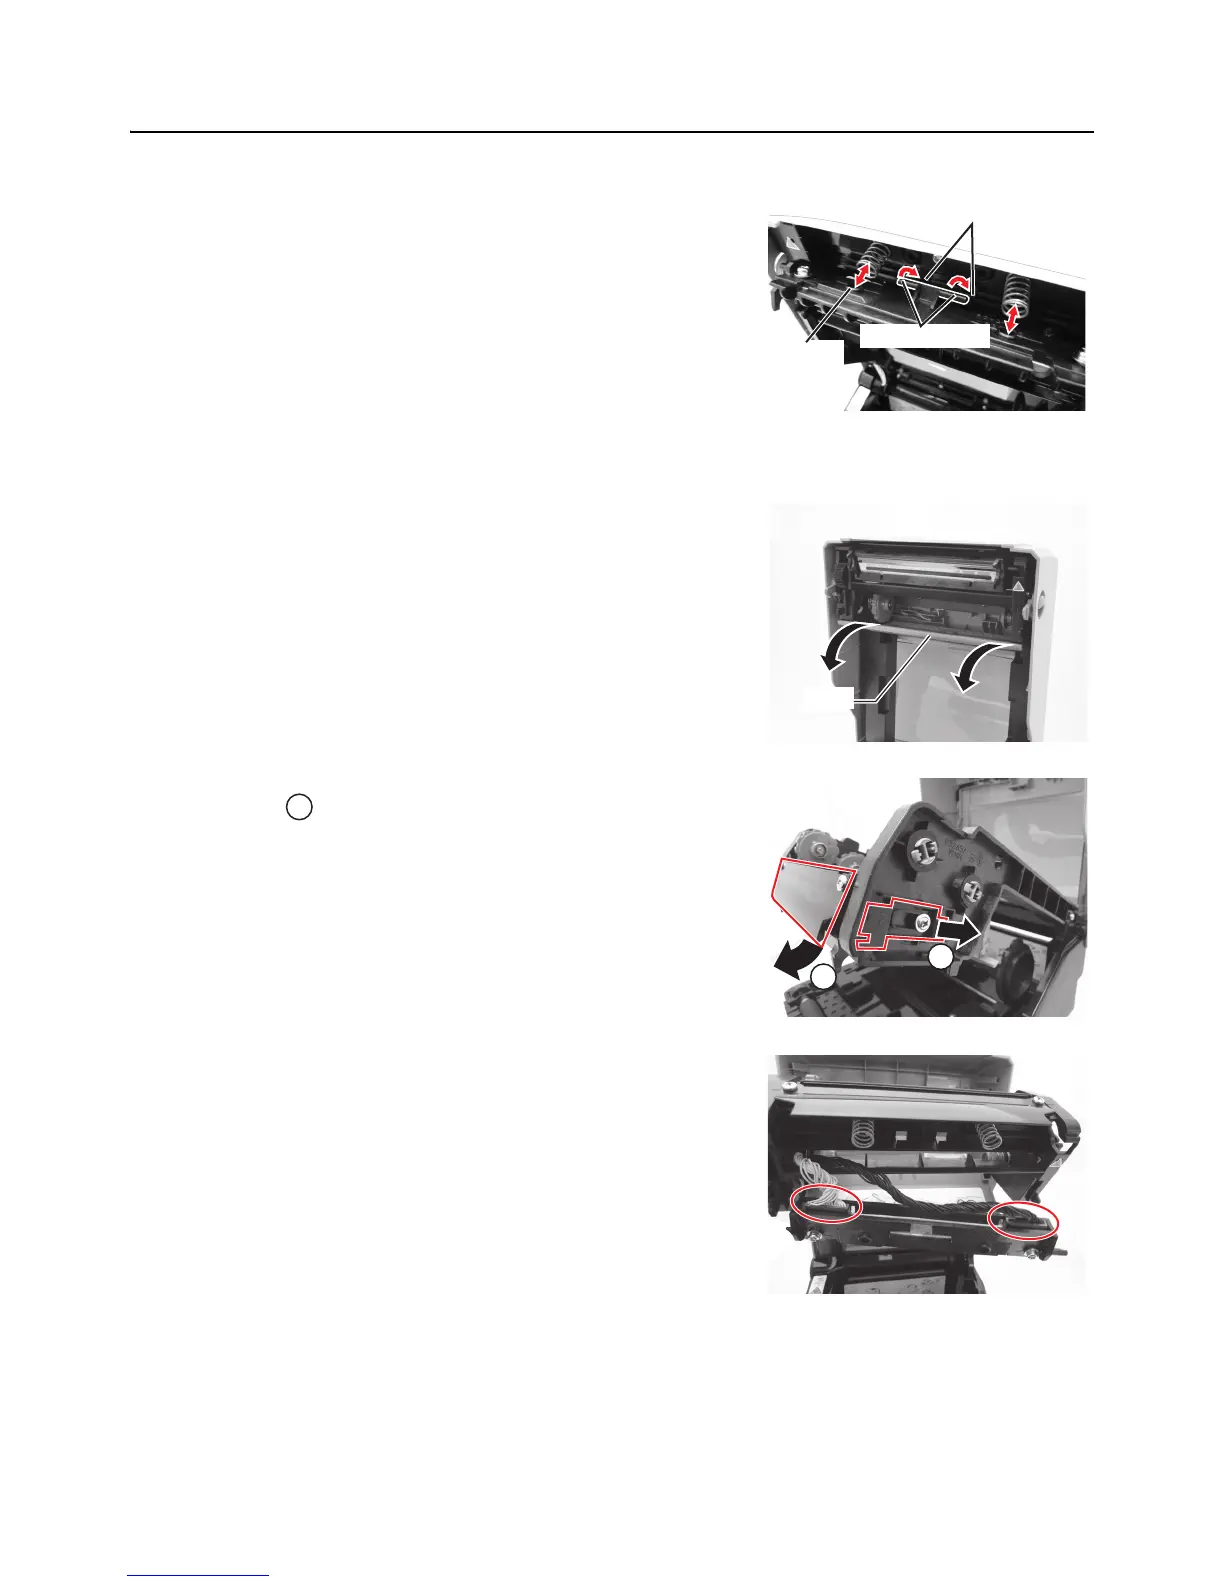
7.
Align the two circular recess of the print head bracket to
the two springs attached to the top cover frame. At the
same time, fix the fulcrum shaft of the print head bracket
to the hooks. While pressing the print head, slide the side
tab upwards to lock the print head assembly in place.
8. Close the Top Cover.
9. Restore power, reload media, reset the head counter and
perform a test print to ensure that the print head is
connected properly.
For CG212 TT and CG218 TT Thermal transfer printer
1. Make sure the printer is turned off, and remove the power
cable.
2. Lift the Top Cover.
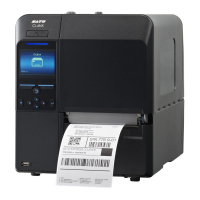
3. Pull the lever on the middle of the ribbon unit downward to
pull out the ribbon unit. Then, simply let down the ribbon
unit. There is a stopper midway through its movement
range that will prevent the ribbon unit from snapping down.
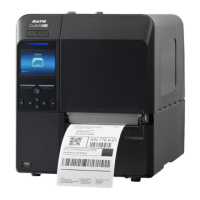
4. On the right side of the ribbon unit, slide the print head
release lever to unlock the print head assembly. Move
the whole print head assembly downward.
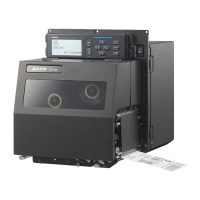
5. The cable connectors (circled) at the rear of the print head
is now exposed. Pull the print head downward, then gently
disconnect the defective print head from the cable connec-
tors.
6. Carefully connect the cable connectors to a replacement
print head. The white cable should be connected to the left
connector while black cable should be connected to the
right connector. The connectors are keyed so that they can
only be inserted in the correct orientation.
Caution:
While handling the print head, be careful not to scratch the
printing surface of the print head. Scratching the surface will
cause permanent and irreparable damage that is not covered
by the warranty!
Fulcrum shaft
Circular
recess
Hooks
1