39
2021-04-12 / V1.1
Contactors CP Series – Installation and Maintenance Instructions
Maintenance
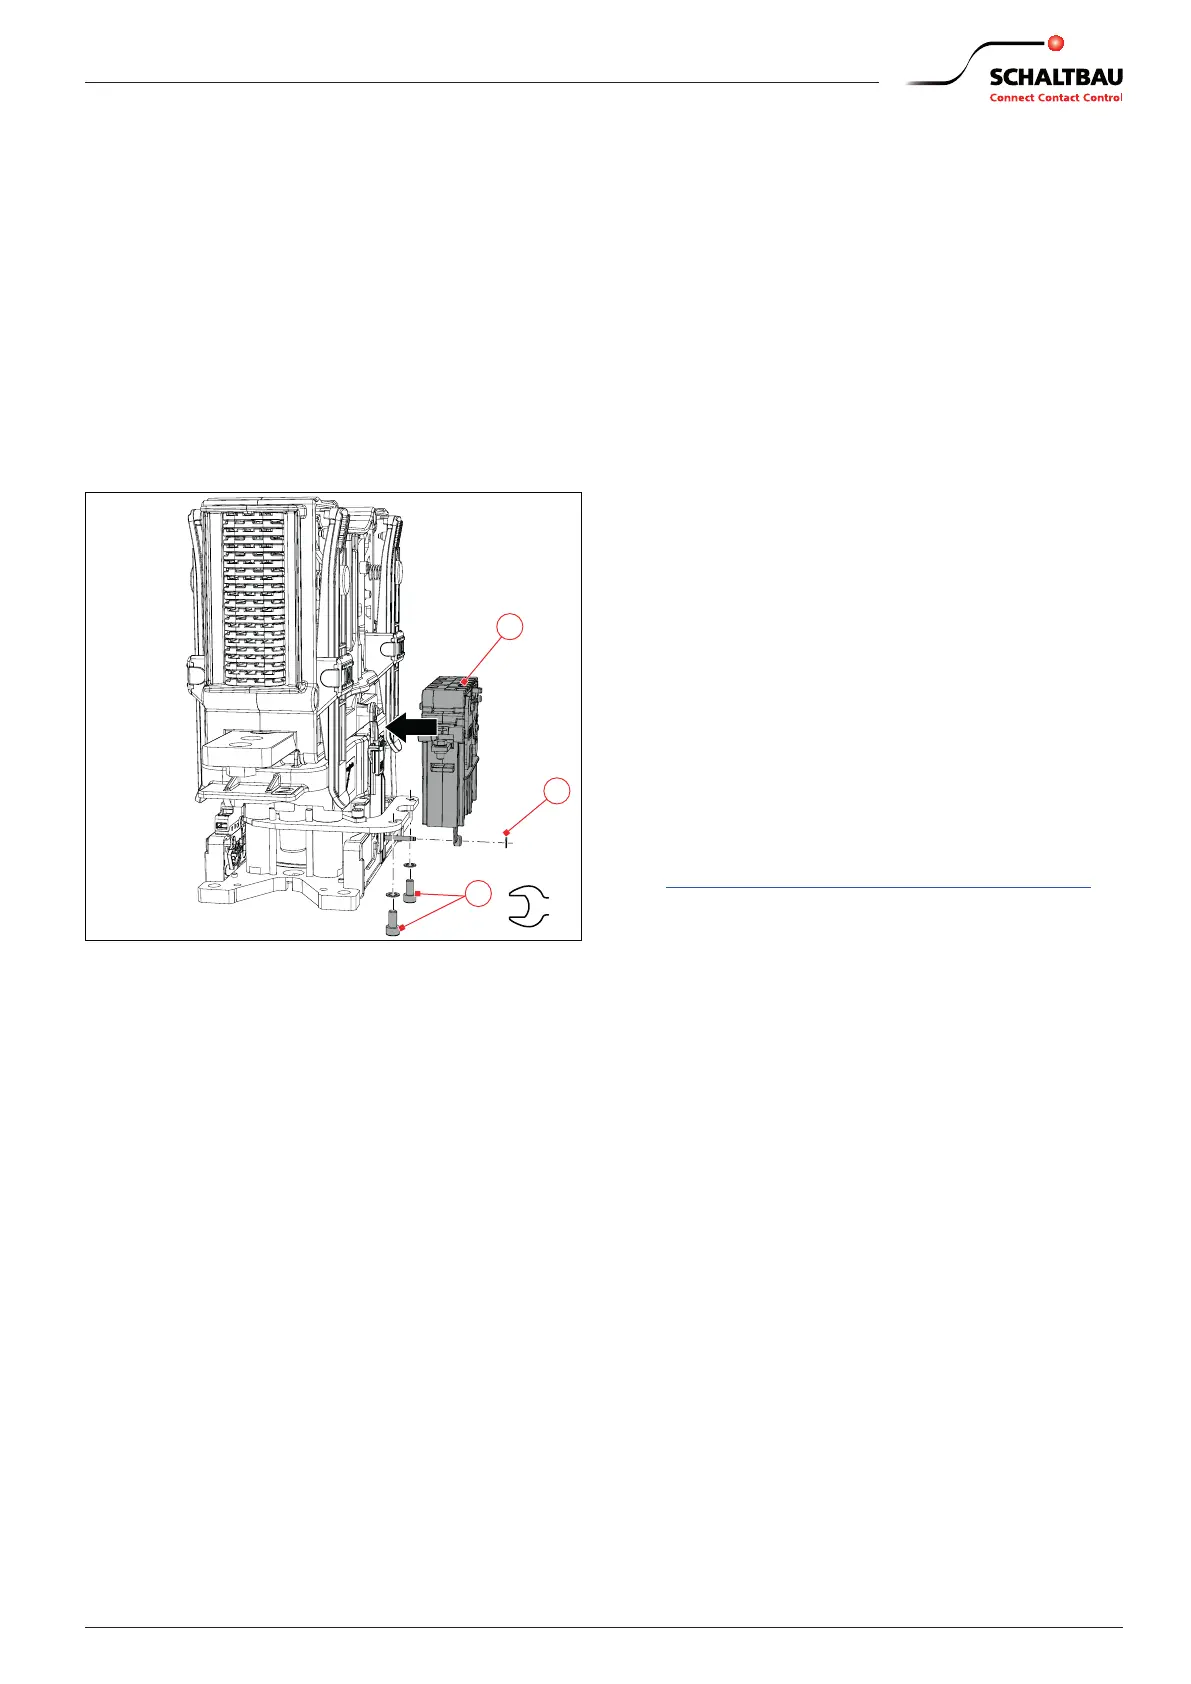
Installing the high-voltage discharging
contact (CPD)
X
Position the new CPD (3).
X
Connect the actuating arm to the shaft.
X
Screw in the two screws (2) including washers and
tighten them to a torque of 3Nm.
X
Install the shaft circlip (1) in the groove on the
shaft.
X
Reconnect the cables to the CPD (3), see “8.4.9
Connecting the optional high-voltage discharging
contact (CPD)”.
2
1
3
3
Nm
Fig. 44: NO/NC contactors – install the high-voltage
discharging contact (CPD)
9.4 Checks
After the maintenance work, perform the following
checks:
X
Check that the contactors are correctly installed
on the mounting plate or mounting frame and
tightly screwed in place.
X
Check that the connecting cables or busbars are
correctly installed and t tightly at the main con-
tacts.
X
Check that the control wires of the coil terminals
are correctly installed and have the correct polar-
ity.
X
Check that the control wires are correctly connect-
ed to the auxiliary switches.
X
Check the correct assignment and function of the
auxiliary switches using a continuity tester.
X
Check that the earthing cable is correctly installed
and ts tightly at the earthing terminal.
X
Ensure that the arc chambers are latched securely
(only for devices with arc chambers).
X
Switch the contactor several times without electric
load in the main circuit.
X
Check the pull-in and drop-o voltage based on
the Schaltbau specications. See catalogue C40.
The catalogue is available under:
https://www.schaltbau.com/en/media-library/
X
Check the routing of the wiring.
- Wires must not be squeezed or bent.
- If applicable bundle and secure wires using ca-
ble ties.
X
After every installation or after maintenance, check
the contactor for correct operation in accordance
with the following standards:
- EN/IEC 60077-2
- EN/IEC 60947-4-1
 Loading...