Schindler 3100/3300/6300 J 43402603 / 01 97/269
Copyright © 2017 INVENTIO AG
4.9.4.2 FI GS100 LOP Configuration
CO BIC7 uses FI GS fixtures LOP/LIN and LCUs for Biobus extension.
It is mandatory to configure LOP/LIP/LCUs via COP, in order each has a unique
address.
The LOP configuration consists of two steps, and before entering configuration, the COP
button need to be teach with CF15.
– Step 1: LOP addressing
– Step 2: LOP counting
Step 1: LOP addressing [LE - -]
[24867; 18.12.2007]
[16452; 31.01.2007]
No Step
1
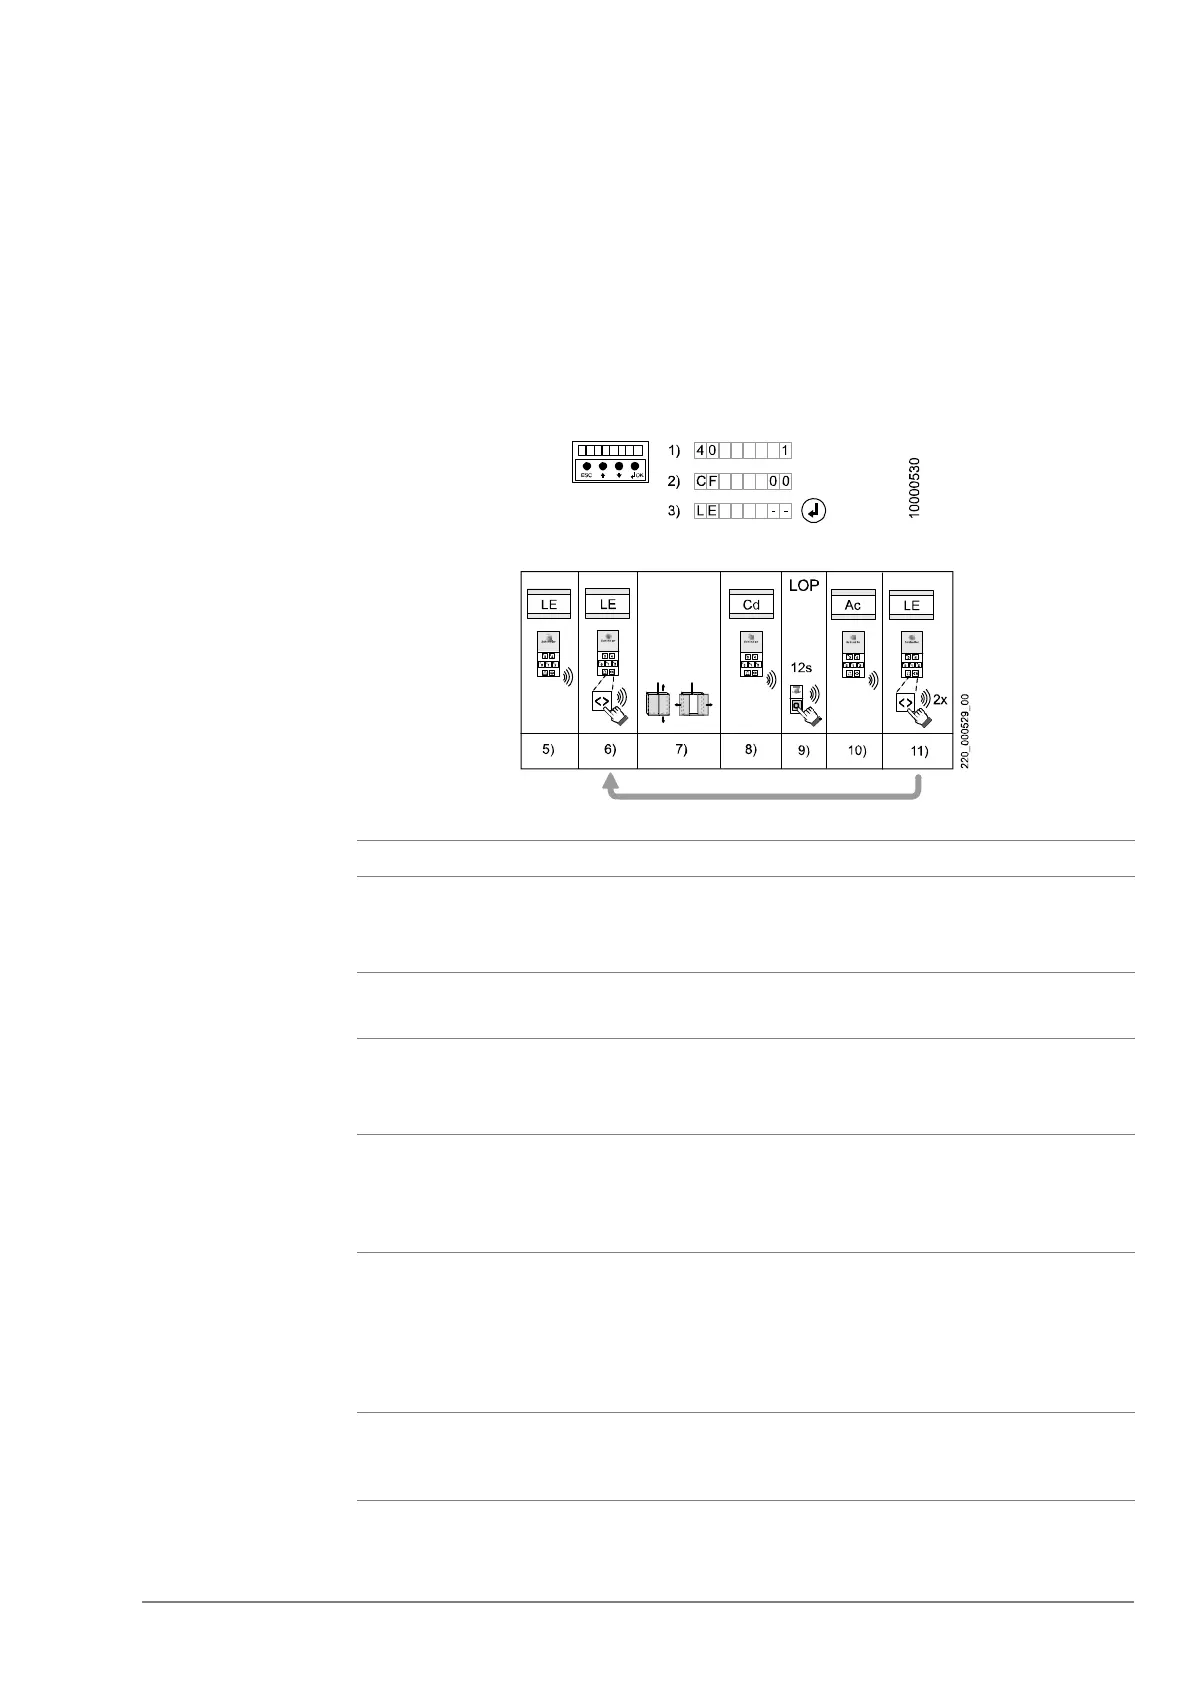
Activate the configuration mode menu 40 on HMI.
The system starts the addressing of the LOP on the highest floor level.
→ If the car is not on the top floor, the car will move to the top floor.
2 Choose CF00 and press "OK".
→ HMI shows [LE - -]
3 Press "OK" to enter LOP configuration.
→ The HMI shows [CF00 _ _ _ ]
→ CPID on COP shows “LE”, and ACID shows the highest floor.
4 Press “DT-O” on the COP. This confirms the start of LOP to configure.
Wait until the door has opened completely. The COP beeps once. This
indicates that the 12 second countdown has started.
→ The CPID on COP shows “Cd”.
5 During this 12 second countdown, press the button on the LOP until you hear a
short beep from the COP and release the button on LOP.
– If the configuration was successful, continue with the next step.
– A double beep from the COP indicates a configuration failure. The CPID on
COP shows “Er”. Press the DT-O twice to confirm the error and to start the
countdown again.
6 Wait until you hear another short beep. This indicates that the countdown has
ended.
→ The CPID on COP shows “Ac” (or “Br” if a JBF has been detected).