36 CHAPTER 5: MAINTENANCE
087-0065 REV B SCOTT SAFETY
Maintenance This section covers maintenance requirements.
Replacing Sensors This section describes replacing the sensors.
Warning: Do not replace sensors while in a hazardous location. Failure to follow this
warning could lead to serious injury or death.
1 Set or verify the device is turned off.
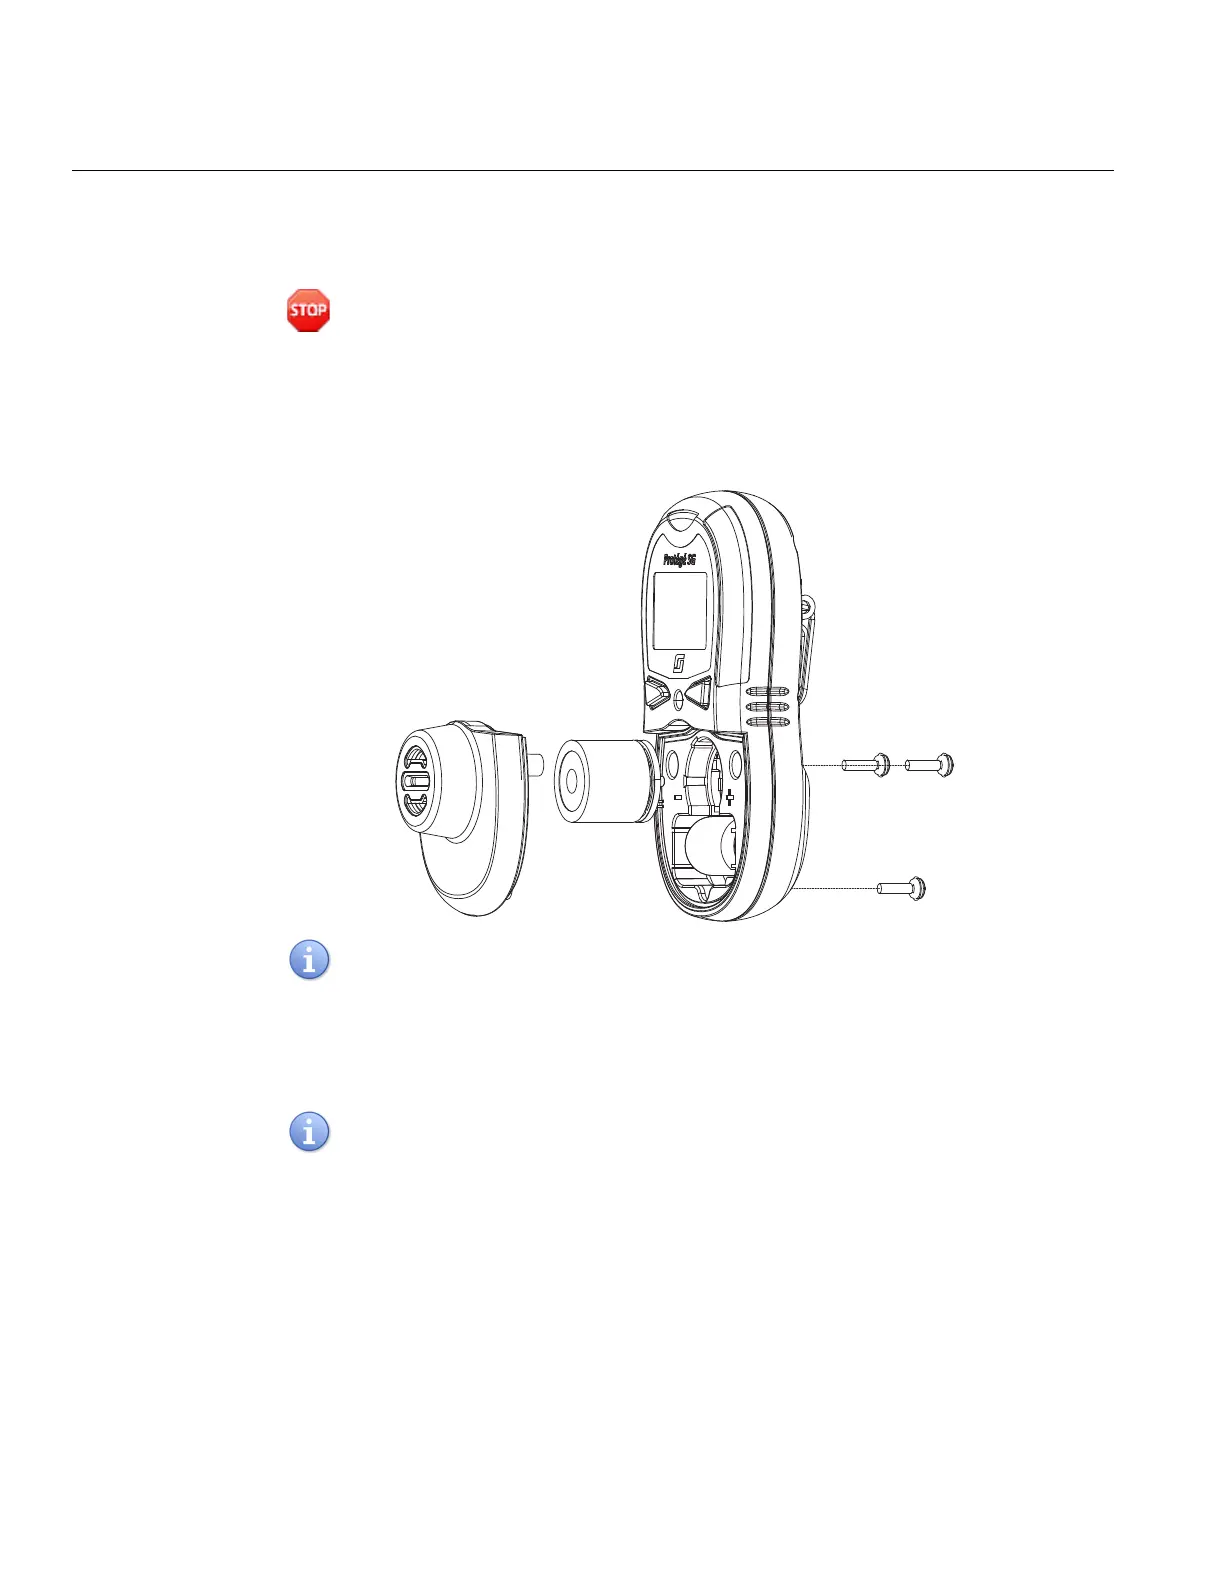
2 Unscrew and remove the three (3) M2.5 × 12 screws from the back of the device
using a Philips screw driver (Figure 16).
Figure 16 Sensor Access
The torque of the screwdriver should be 3 to 4 inch-pounds to loosen or tighten the
screws.
3 Lift and firmly pull the sensor cover apart. Do not pull apart at an angle or by
twisting.
4 Pull the sensor straight out and replace with new sensor (Figure 17).
Each sensor has a small PCB tab that extends beyond its diameter. Ensure the tabs
align with the small slots of sensor cavities.