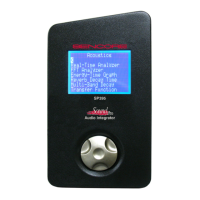
SP395 SoundPro Audio Integrator Form7492 Operation Manual
41
4. Units/Time. Select the desired units (time, in milliseconds, or equivalent distance, in feet or
meters) and duration of the graph window.
5. Select the Horizontal Axis Measurement. Use a distance display (ft, m) for locating
reflections and the mS time display for ITDG and direct sound arrival time measurements.
6. Select the Horizontal Axis Range. To locate reflections, select a distance that is just longer
than the total distance from the speaker, to the rear wall, to the microphone location. Use 60
mS for measuring ITDG in a typical size home theater room, and use longer times for large
rooms.
7. Weighting. Select one of the 38 available filters, including A or C weighting, ANSI octave
band filters, or ANSI 1/3 octave band filters. In most cases, A-weighting, which rolls off
most of the low frequencies, will give you more reliable results.
8. Select the desired weighting. A-weighting often provides sharper timing peaks because it
rolls off most of the low frequency background noise and reflections.
9. Run/Pause. Turn the function “on” by turning on the generator and carefully turn up the
power amplifier (if you are using Internal trigger mode) to obtain the highest possible signal
reading without overloading the SP395 or creating excessive distortion in the speaker.
10. Turn on the test. Be sure the amplifier volume is set to minimum before turning on the
ETG test.
11. Adjust the amplifier volume for a good display. Increase the amplifier volume to obtain a
high signal reading on the ETG graph without signal clipping or speaker distortion. If the
signal level picked up by the microphone is too loud, the display will indicate "Overload".
12. RT Cursor/Offset. While the ETG is running, if you with to offset the starting time of the
display to a time greater than 0 mS, change the Offset field, just below the left graph axis.
This would allow you to see the details of a reflection that is beyond the window time width,
for example, without increasing the graph time and decreasing the graph resolution.
Identifying Loudspeaker Reflections:
1. Follow these steps to obtain an Energy-Time graph. Enable only one loudspeaker at a time to
display early reflections from that loudspeaker to the listening position.
2. Set the Horizontal measurement to either feet or distance.
3. When you have a representative graph, turn off the generator to freeze the graph.
4. Analyze the data from the graph:
•
Direct sound -The first peak is the direct sound and is the distance (or time) that the
sound traveled in a straight line from the speaker to the microphone.
• Reflections -The next peak(s) are reflections. Each peak is the distance that a reflection
traveled from the speaker to the microphone. The peaks that occur within 10 milliseconds
after the direct sound (a reflection path 10 feet longer than the direct sound path) are
called early reflections. In a home theater, the early reflections coming from the side
walls should be at least 10 dB lower than the direct sound level to prevent stereo imaging
degradation.