SP395 SoundPro Audio Integrator Form7492 Operation Manual
69
Audio Stethoscope
The Audio Stethoscope combines the microphone input and sensitive audio preamplifier with the
audio monitoring headphones to form an audio stethoscope. Weighted filters and octave or 1/3
octave band filters may be selected and headphones used to listen to the filtered signal
The Audio Stethoscope is a tool that can be used to aid critical listening so that you can find
problems with noise isolation, or to listen to some sounds while filtering out others. You can use
the Audio Stethoscope to listen to the sound leaking around doors or other partitions at specific
frequencies, to find areas that need better isolation. Also, you can listen to the noise in a space by
frequencies, to listen for problems with HVAC systems or other noise sources.
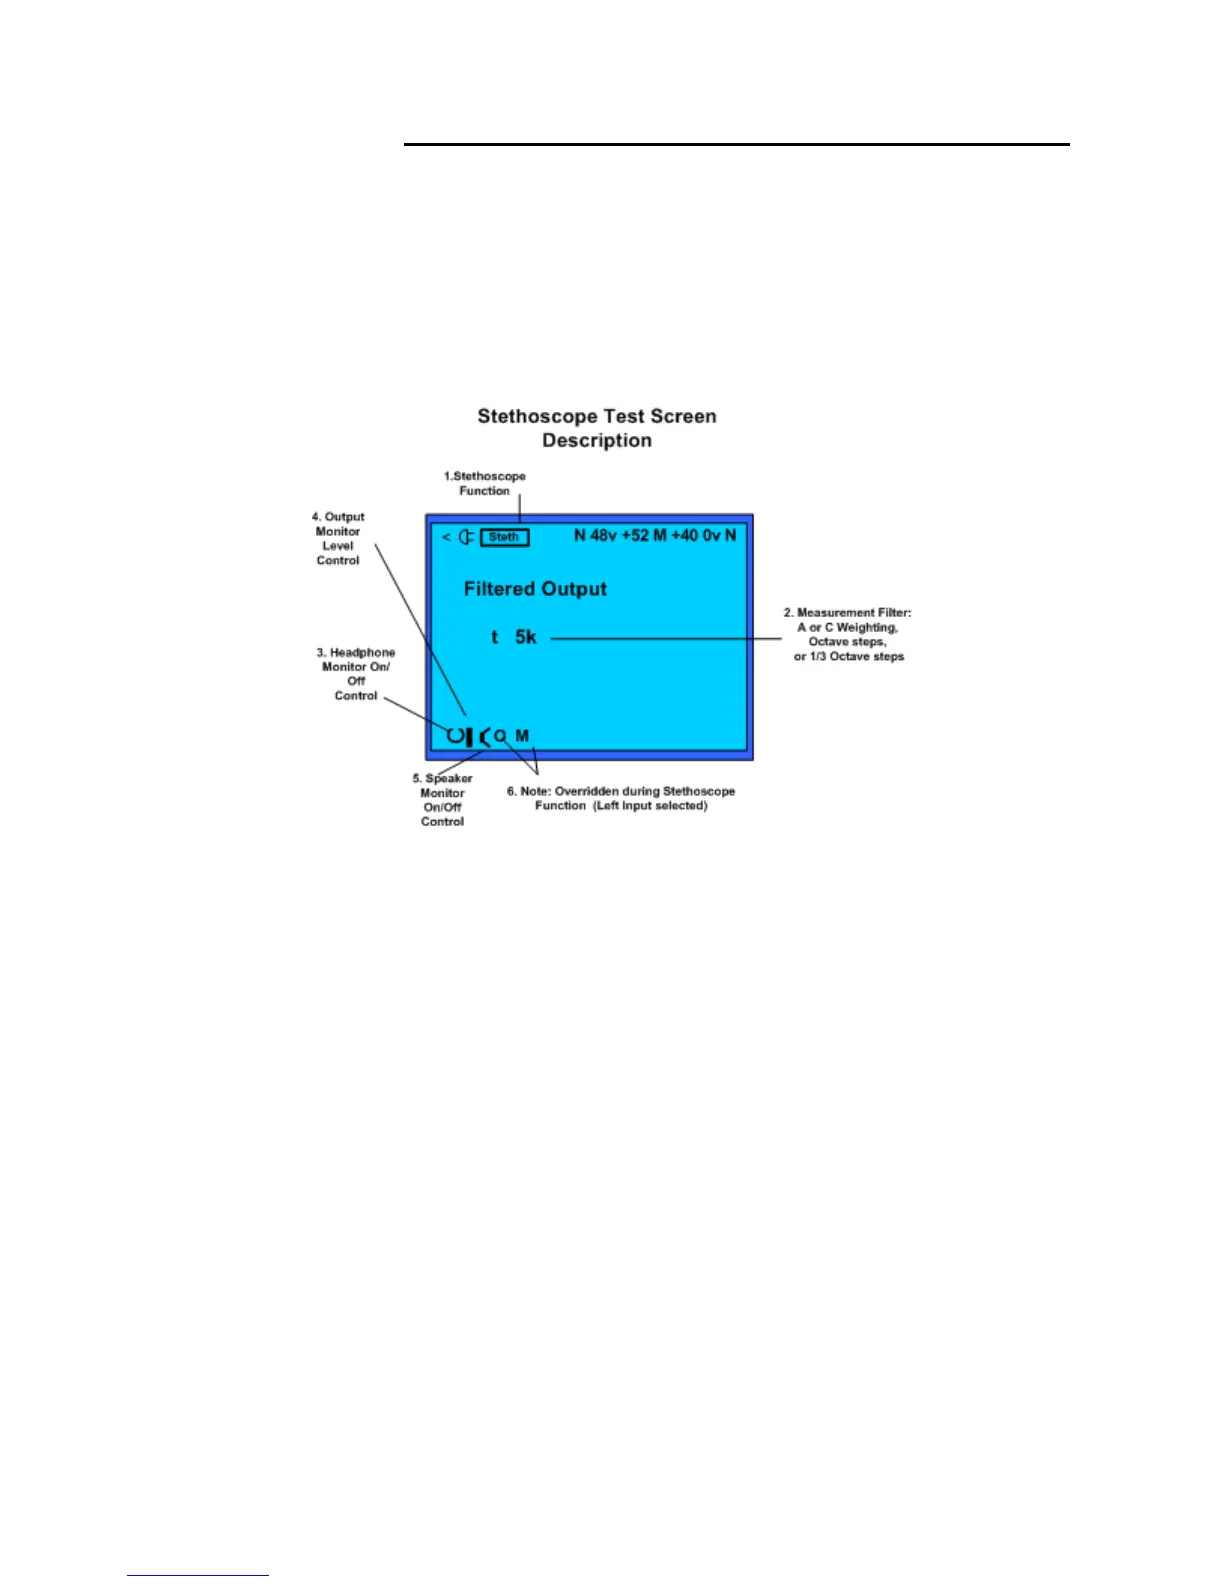
Stethoscope test screen and description of control fields.
Stethoscope test screen and control fields:
1. Test Function – Identifies Stethoscope (Steth) as the selected function and measurement
screen.
2. Measurement Filter – Selects measurement filter applied to input from left channel.
Includes selection of A weighted, C weighted, octave or sub-octave filters.
3. Headphone On/Off – Turns on or off audio from the left input to the headphone jack.
4. Headphone/Speaker Monitor Level – Increases or decreases volume out of the speaker
or headphone.
5. Speaker Monitor On/Off – Turns on or off audio pickup from the left input to the
internal speaker of the SP395.
6. Audio Monitor Source/Mode – Overridden during Stethoscope function. Left input
selected.
Stethoscope Operation
1. Set up the microphone. Connect the microphone to the left input. Turn on phantom power (if
needed) and adjust the input gain as needed. Typically for full gain (+58) for most sensitivity.
2. Plug in headphones. Plug in any good-quality headphones into the 1/4” headphone jack. We
recommend that you use closed-ear models to avoid feedback and to get the maximum isolation.
3. Turn on the monitor output. Using the bottom toolbar, turn on the monitor and adjust the
volume as required.
4. Select the filter. Select the filter field to listen to the frequency ranges that you want to listen to.
Note that whenever you change filters, the output is momentarily muted.