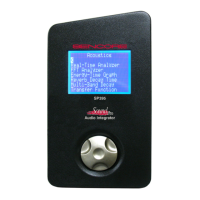
SP395 SoundPro Audio Integrator Form7492 Operation Manual
48
• Max: Sets maximum room sound level using pink noise - This is the maximum sound
energy in the room with the pink noise test signal applied. Adjust the amplifier's
volume and/or SP395 generator output to increase the sound level to 80 – 90 dB. It is
desirable to get at least 26 dB higher than the Min room level for best test results. This
can be challenging as low frequency room noise tends to limit the decay range in the
lower bands. To store the Max Noise level, set the Test Control field to "Max" and
click the Test Control field to “Run”
• Run: Click the Test Control field to display "Run". The pink noise generator will
cycle on and off as readings are taken. The “Decay Time” field displays the actual
time in milliseconds for the sound field to decay by the Decay range amount. The
RT60 time field shows the extrapolated time for the sound to decay in the room, if a
full 60dB decay range were available.
7. Octave Bands – lists the octave bands that are being measured by the SP395 as part of the
multi-band RT60 analysis.
8. Decay Range – This column of values shows the dB difference between the Max Noise
and Min Room levels for each of the octave bands listed minus 6 dB to allow for 6 dB test
headroom. The multi-band reverb decay test measures the time taken for the sound energy
to decrease by this amount in each band.
9. Decay Time – This column of values shows the time it takes for the sound to decay
through the decay range for each of the octave bands listed.
10. RT60 Measurement per. Octave – This column of values shows the extrapolated time
for the sound to decay 60 dB (RT60) for each of the octave bands.
11. Generator On/Off – This indicates whether the Generator is on or off. The Generator is
defeated during the test.
Multi-Band Decay RT60 Operation:
1. Select the SP395 Multi-Band Decay function and position the microphone in the
center of the listening area.
2. Connect any SP395 line output into an amplifier and speaker. Turn the level down at the
amplifier! Apply phantom power to the microphone and select the proper gain range on
the SP395.
3. Set the Test Interval. Use short test times for small rooms, and longer test times for
larger rooms and rooms with minimal sound absorption. Choose a test interval long
enough to include the expected room reverberation time.
4. Speaker Distance. Set the “Speaker” field to the approximate distance from the speaker
to the microphone.
5. Set Minimum Room Noise. Highlight the Test Control field and select "Min." Allow
the SP395 to read the background noise level in the room for each of the octave bands. If
this level is greater than 50 dB in any band, you should attempt to decrease the ambient
noise for best test results and better room acoustics. Click on “Min” to capture these
minimum room levels.
6. Set Maximum Test Level. Adjust the amplifier's volume and/or the SP395 output level
for a Max noise level of approximately 85 dB or higher. You want the sound as loud as
possible, without damaging your system or overloading the SP395. With the Test Control
field highlighted showing “MAX”, click the field to capture the maximum pink noise
levels. The field increments to “RUN” and begins to cycle through the test.
Note: You may want to use earplugs so you can increase the volume to higher levels
enabling a greater decay range.