5.3 Replacement, Silicon Foot
1. Follow the procedure described in
section 5.1 "Prior to Repair"
.
2. Clean the groove for the silicon foot with a cotton swap soaked with 70%
isopropanol.
3. Put one drop of silicon glue (see
section 8.2 “Testing Accessories and Spare
Parts”
) in the groove.
4. Insert the new silicon foot into the groove by pressing firmly.
5. Allow the glue to dry.
Figure 13 Replacement, Silicon Foot
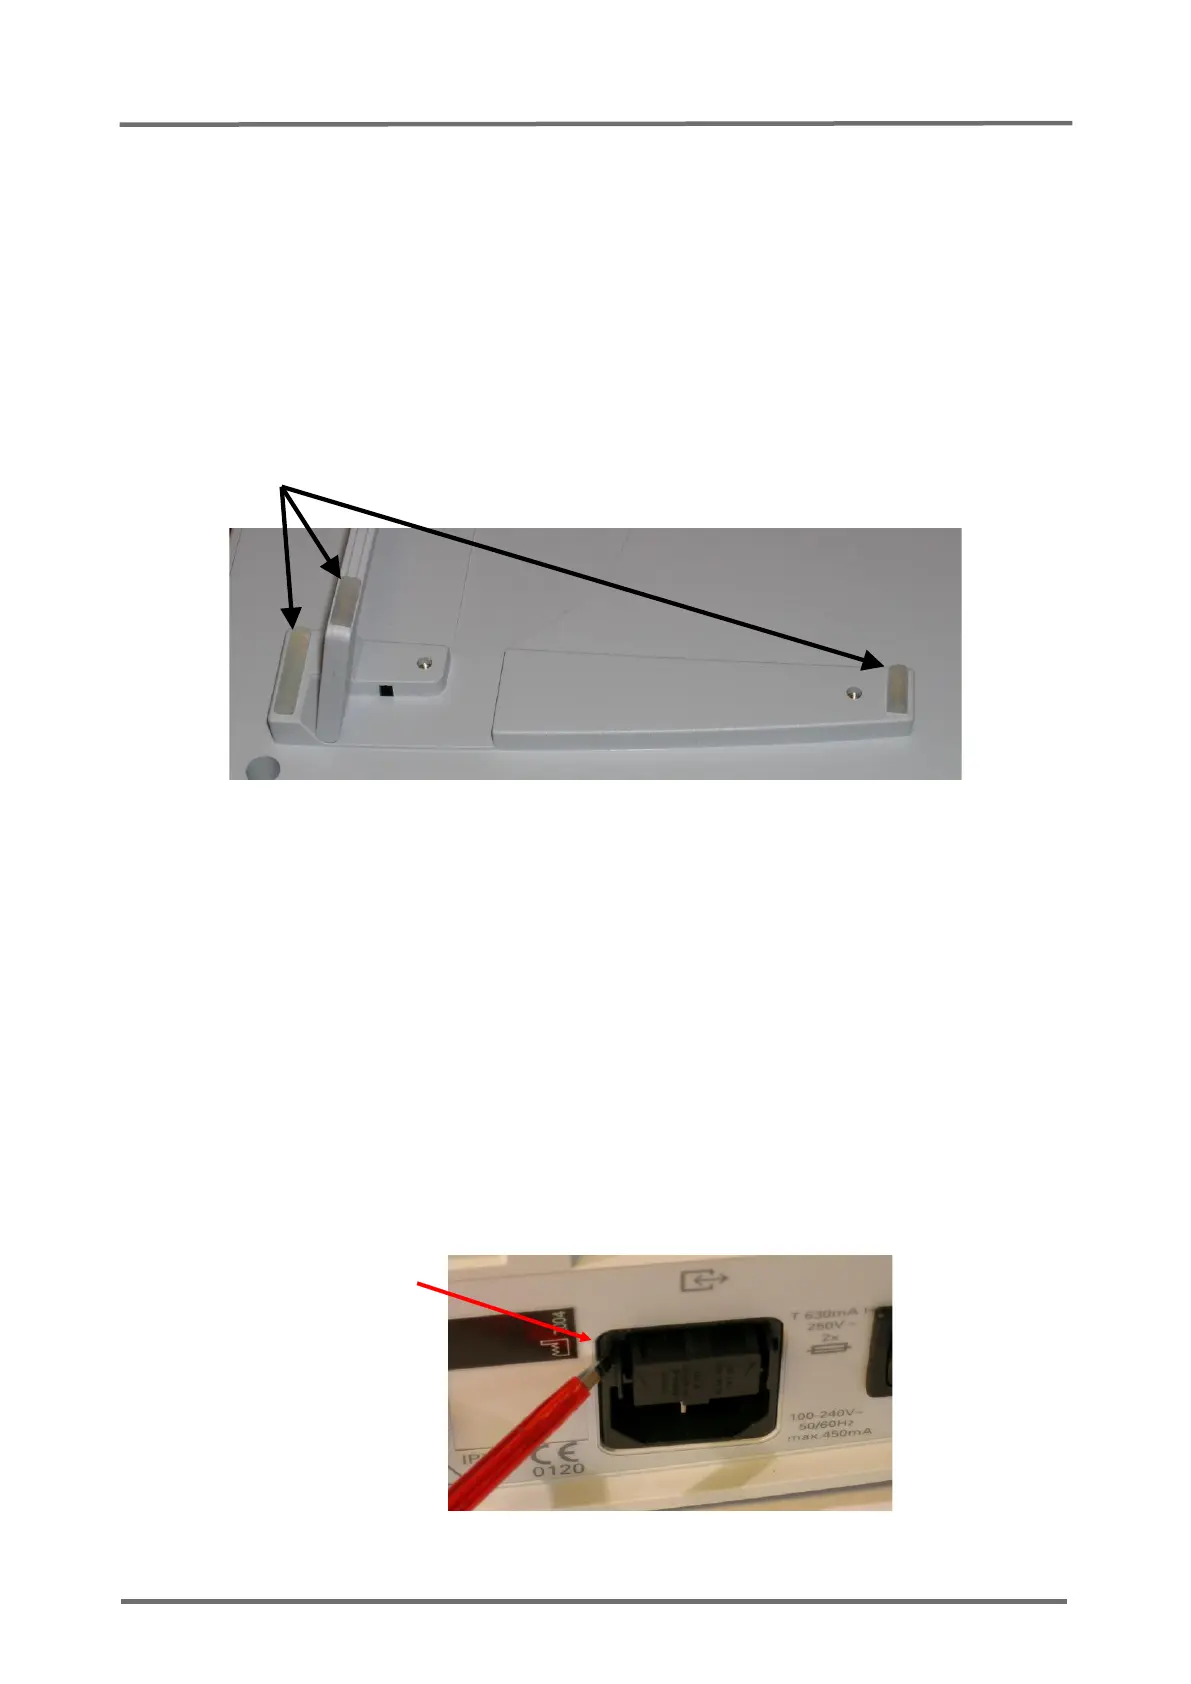
5.4 Replacement, main fuses
1. Follow the procedure described in
section 5.1 "Prior to Repair"
.
2. Remove the fuse holder from the AC Power Connector by compressing the two tabs
on both sides of the lid and pulling out the fuse holder according to
Figure 14
Replacement, Main Fuses
.
3. Replace the defective fuses with time delay, high breaking capacity fuses, by fuses
with rated current as specified on the SDM rear panel (see section 8.2 “Testing
Accessories and Spare Parts”)
4. Reinsert the holder into the AC Power Connector.