SECTION
4
MECHANICAL
\I
4-0
INTRODUCTION
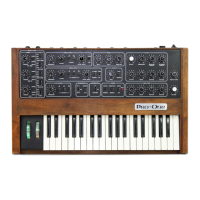
The
Pro-One
has
been produced in two basic
versions,
Revisions
1.0
(prototype)
and
1.1
(production) include the entire
power
supply
on
the
PCB.
Besides
the
increased
shock
hazard,
shipping realities
revealed
two
weaknesses
in
this
design.
Held
by
only
its
terminals,
the transformer
(SCE
#/E-011)
tended
to
break
off.
Also, the power
switch
(RS-048)
was often being
damaged.
Therefore
in
revision 1.2,
the
power supply primary
circuitry
was
mowed to the
back
panel.
There
have
been no problems with the new
design.
It
is
easy
to
distinguish between
the
two
versions.
Revision
1.2,
requiring no
modifications,
can
be
identified
by
the presence
of
the
fuseholder
on the
back
panel.
Depending
on
whether
or
not
it
has
been previously serviced,
a
revision
1.0./1.1
unit
may
or
may
not need further
modification.
SCI
Authorized
Service
Centers have
been
instructed to bolt
the
transformer
to
the
PCB
with
4-40
metal hardware
(you
may
find
nylon
hardware
on
some
units). The metal screw
head
and nut
must
be
insulated from
the
transformer
and
PCB
with fiber washers.
Also,
to
reduce the possibility of switch
breakage,
we
have
recommended enlarging
the hole
for
the power switch,
and
glueing
the
top
of
the
switch,
While these
modifications
have
provided adequate
protection
for
most
units,
a
more
secure
mounting
for
revision
1.0/1.1
PCBs
is
described
in
para.
4-2.
Inspection
and
modification
of the primary power connector system
is
also
covered.
4-1
OPENING
CASE
AND
REMOVING
PCB
1.
Switch
power
off.
s
2.
Unplug
power
cord
and
disconnect
all
cables to the back panel.
3.
Remove
wooden
side
panels
(2
screws
each
side).
4.
Remove
three
screws
along
front
edge.
(If
the
unit
has
been
modified
as
described
in
para.
4-2,
then
also
remove
8-32
screw
near power
switch.)
5.
Carefully
slide
top
panel
assembly
forward.
When
front edge
is
clear
of
keys,
lift
it
up
just
enough
to allow
clearance
for
your
hand.
6.
Reach
in
and disconnect
AC
power connector
running
from
back
panel
to
underside
of
printed circuit
board
(PCB),
at
right. (When reconnecting, orient connector
so
the
side
through
which
you
can
see
the metal contacts
is
visibie.)
7.
Also disconnect keyboard
cable
from
PCB.
(When
reconnecting, the keyboard cable
should
be
twisted
so
that
the
ribbon crosses over the
board.
If
correct,
the numbers
9-
16
stamped
on the connector will
run
along
the
PCB
edge.)
The
top
panel
assembly
will
now
lift
away.